Have you ever gone on a run or walk but didn’t want to carry your phone with you? But you have to bring it with you, cause you want to listen to music during your workout. If you’re anything like me, this happens constantly.
But thankfully, with Apple Watch, this can be a reality!
Today, we’re going to learn how to listen to music offline on your Apple Watch without needing your iPhone nearby.
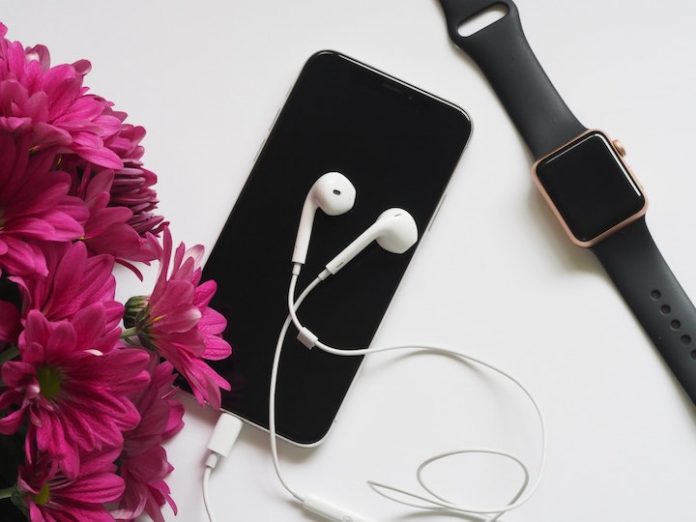
So grab your iPhone, Apple Watch, and your favorite Bluetooth headphones, and let’s get started!
Contents
Suggested Reading:
- Check downloaded music and AudioBooks on your Apple Watch with these easy steps
- 5 best smartwatches with onboard music storage
Most Apple Watches cannot stream music without their paired iPhone
Unfortunately, Apple Watch can not stream music by itself unless you have an LTE model that supports cellular service, and you also purchase a cellular plan for your watch.
To check if your Appel Watch supports LTE, swipe up your watch’s control center from the bottom and look for a button that looks like a radio tower. If you see it, your watch supports LTE. If not, it doesn’t, and you have a WiFi-only model.
Another quick way to check is to look at your watch’s Digital Crown. If it’s red or shows an outline of red, it supports LTE.
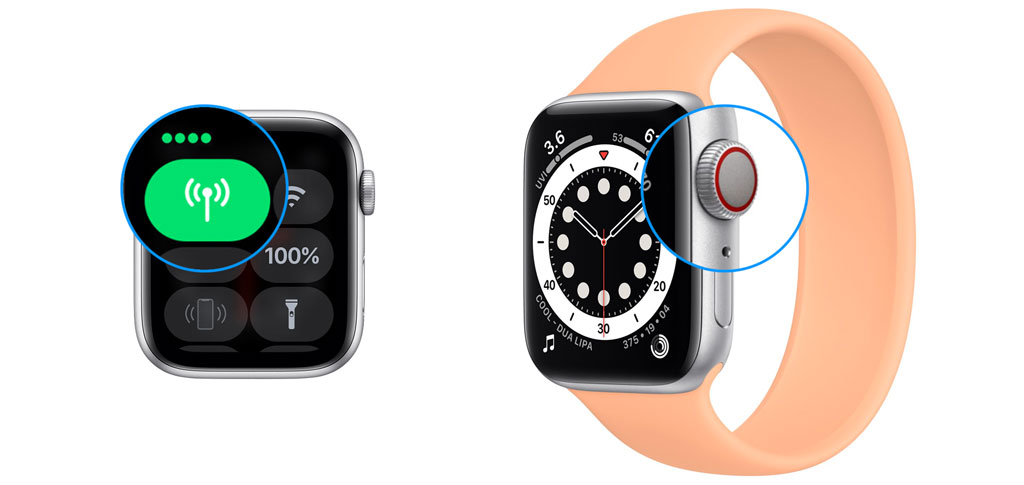
For those with a WiFi-only Apple Watch, you need to either have your paired iPhone with you to listen to streaming music OR download and sync your favorite albums and playlists to your Apple Watch.
So let’s learn how to download music to an Apple Watch so we can listen to our favorite tunes even when our iPhone isn’t around.
Step 1: Add a playlist or album
The only way to add songs from Apple Music to your Apple Watch is to add them by their album or on a playlist.
If you don’t have a playlist already made in Apple Music and want to listen to various artists and songs, go ahead and do that now in the Music app on your iPhone.
Once your playlist is ready, or you know what album you want, go to the Apple Watch app on your iPhone. Scroll down to the Music tab and tap Add Music.
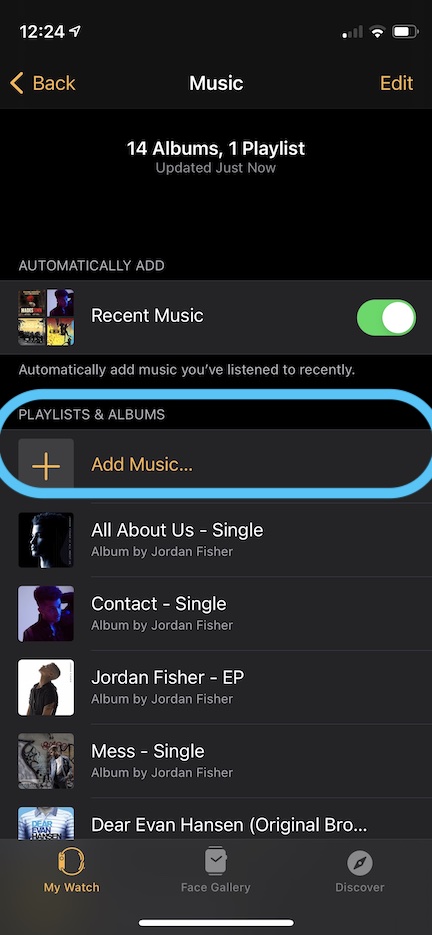
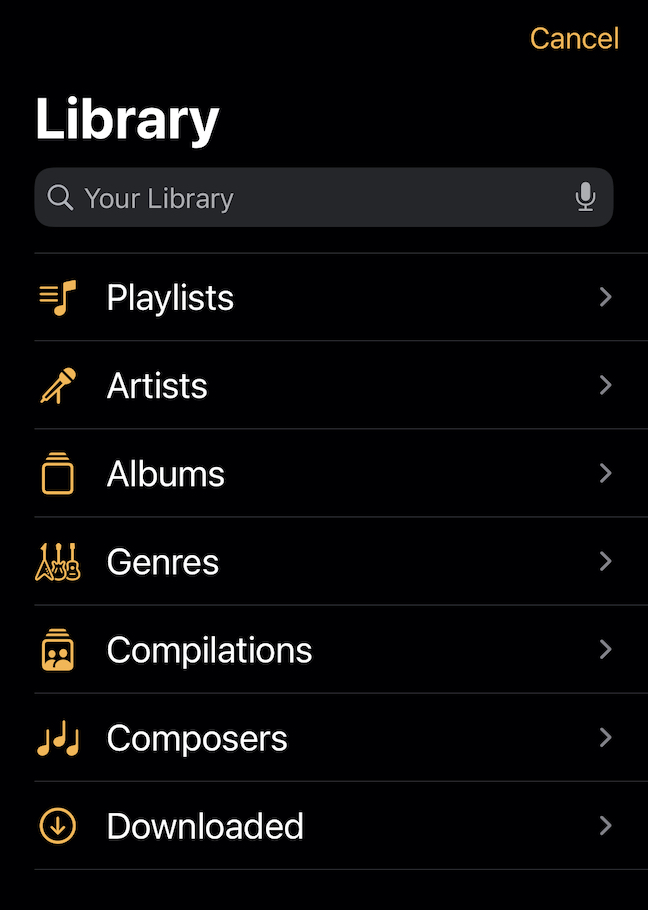
After you tap Add Music, your Music Library pops up. You can go straight to your playlists or albums. Or, you can type what you want and search your library.
When you find your desired playlist or albums, click on the Add Button, aka plus sign, in the upper right-hand corner of your screen. Once you click add, it pops up under the Playlists & Albums tab.
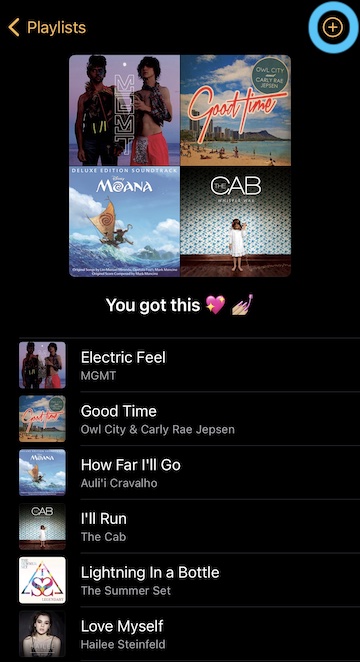
You may notice a Cloud icon next to the playlist. If you see this that means, your music did not sync to your Apple Watch.
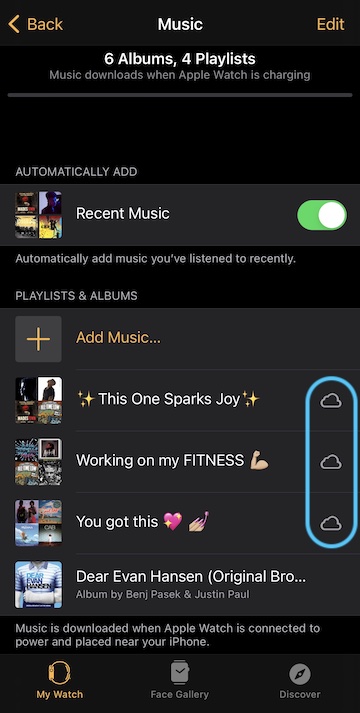
Apple Watch only syncs music when connected to its charger. Once you put your Apple Watch on its charger and have your iPhone nearby, your music automatically downloads.
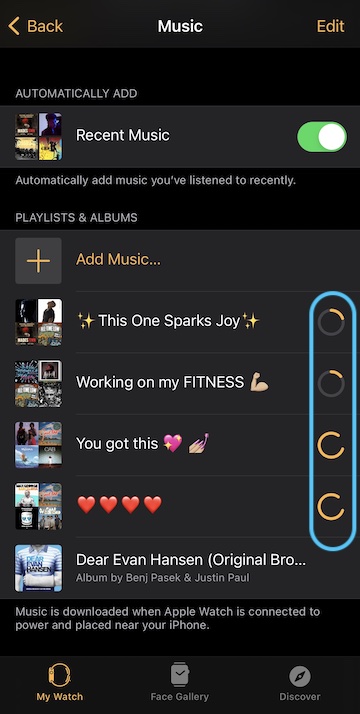
Be patient. It may take some time to sync. Especially if you have a long playlist or you are downloading multiple playlists at a time.
Step 2: Pair your Bluetooth headphones
Next, you need to pair your Bluetooth headphones to your Apple Watch. To do this, go to the Settings app on your Apple Watch. Make sure your headphones are in Discovery Mode.
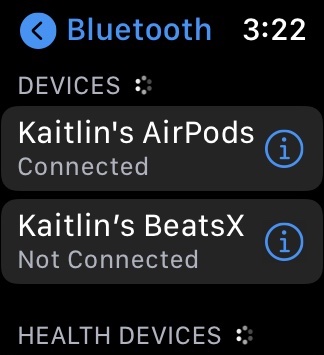
If you have connected your headphones to iPhone or Apple Watch before, they should pop up automatically under the Devices tab.
Tap the device you want to pair. And voila, it should connect!
If you are connecting headphones with Apple’s W1 chip, like AirPods or BeatsX, these devices should automatically pair with your Apple Watch.
Step 3: Play your music
Once you sync your playlists or albums and connect your headphones, it is time to play your music!
Open the Music app on your Apple Watch, and your music should appear.
To scroll through your music, you can either swipe up or down. Or you can twist the Digital Crown to browse through your music.
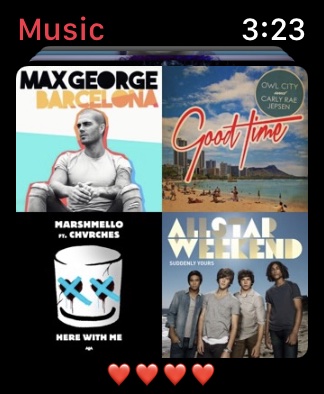
When you find the playlist or album you want to listen to, tap it to select it. After you do that, a pop-up appears. It asks you where you want to play your music. Select the headphones you want to use.
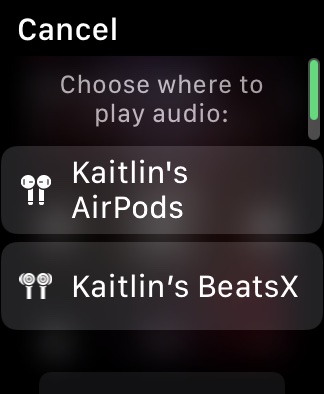
If you want to change or adjust the volume, use the digital crown to edit that.
Then just let your music play! Enjoy!



This worked PERFECTLY!! Thanks for taking the time to write this article.