If you’re anything like me, you use the same iPhone (or iPad) for work and personal life. It’s a lot simpler to carry around one phone than two.
Unfortunately, one of the disadvantages of using the same device for work and pleasure is that when you use Safari to browse the internet, it combines all your settings, website data, bookmarks, history, etc., together.
While other browsers, such as Edge, Firefox, or Chrome, have offered separate user profiles for a while, with iOS 17+ and iPadOS 17+, it’s finally Safari’s time! With profiles, you can save different bookmarks, favorites, etc., depending on the profile you select.
Using multiple profiles in Safari also helps keep you organized by activity (work, school, personal, etc.) or user (child, Grandma, spouse) by keeping each profile’s browsing activity independent.
And Safari takes it a step further by allowing multiple profiles, including a default personal profile (vs. Chrome which currently allows only one named profile on iPhones and iPads.)
Let’s learn how to set up and use profiles on your iPhone and iPad!
Contents
In a hurry? 
If time is short and you don’t need step-by-step instructions, follow these directions to create and use profiles in Safari.
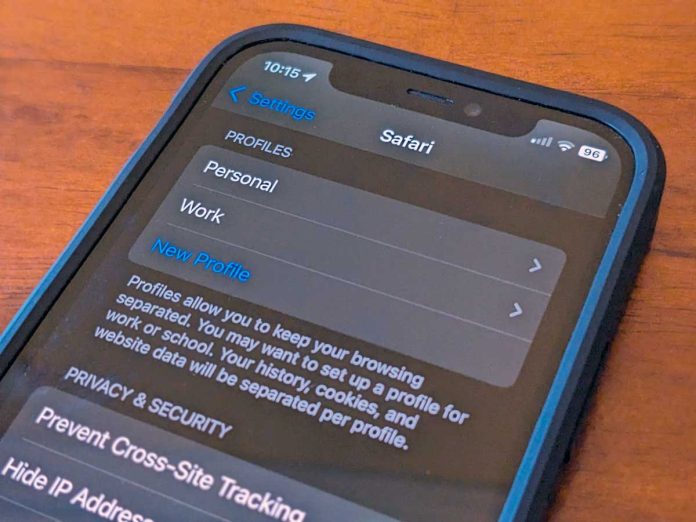
- Create new Safari Profiles via Settings > Safari > New Profile.
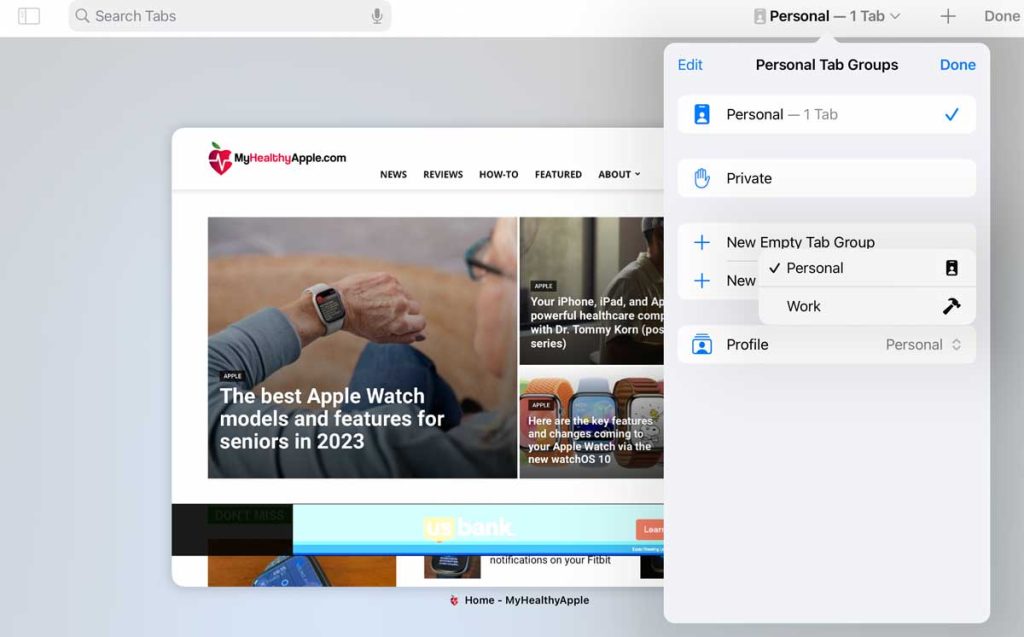
- Use Safari Profiles by opening Safari > Tabs icon > Menu icon > Profile and choosing the profile you want to use.
Related reading
- How to share your location or request someone’s location in the Messages app on Apple Watch, iPhone, and iPad
- How to turn the Screen Distance feature on or off on iPhone and iPad
- Getting a new iPhone or iPad? Use Apple’s Prepare for New iPhone feature
- How to turn Lockdown mode on and off for your Apple Watch, iPhone, and iPad
About using a profile in Safari
With these changes in Safari, once you set up your work and personal profiles, you can easily switch between them and store Safari data, including history, extensions, cookies, tab groups, and favorites, separately! This prevents your work browsing from affecting your personal browsing and vice versa.
It’s a huge advantage when using the same iPhone or iPad for multiple things or if you share an iPhone/iPad with others in your family, so you keep each separate inside a Safari Profile, and Apple does not share data between them.
You can even set a specific profile for Safari when you use a Focus!
And with iCloud, Apple shares any profiles you create under your Apple ID with your other Apple devices, including iPads, iPhones, and even Macs.
Profiles are great when you share your Apple devices with multiple people or want to separate how you use Safari for work and personal.
Separate but not private!
One thing to note is that while Safari does not share information between profiles, someone who uses your iPhone or iPad can switch to any other Safari profile on it and see your profile’s info, including what websites you visited.
Additionally, while you can delete most profiles, Safari includes a default Personal profile that you cannot delete.
How to use profiles in Safari on your iPhone or iPad 
First off, this profile feature is available in Safari on iPhones and iPads that run iOS/iPadOS 17 and above (and Macs that run macOS Sonoma and above.)
When you create a new profile, Safari keeps your browsing information separate from other profiles and maintains a wall between profiles so information is not passed back and forth.
When you create a profile on your iPhone or iPad, it syncs to other devices, including your other iPhones, iPads, and Macs running macOS Sonoma+ that use that same Apple ID.
And when you create a profile in Safari on Mac (with macOS Sonoma+), you find your Mac profiles there when you open Safari on your iPhone or iPad.
How to create and set up a new profile in Safari
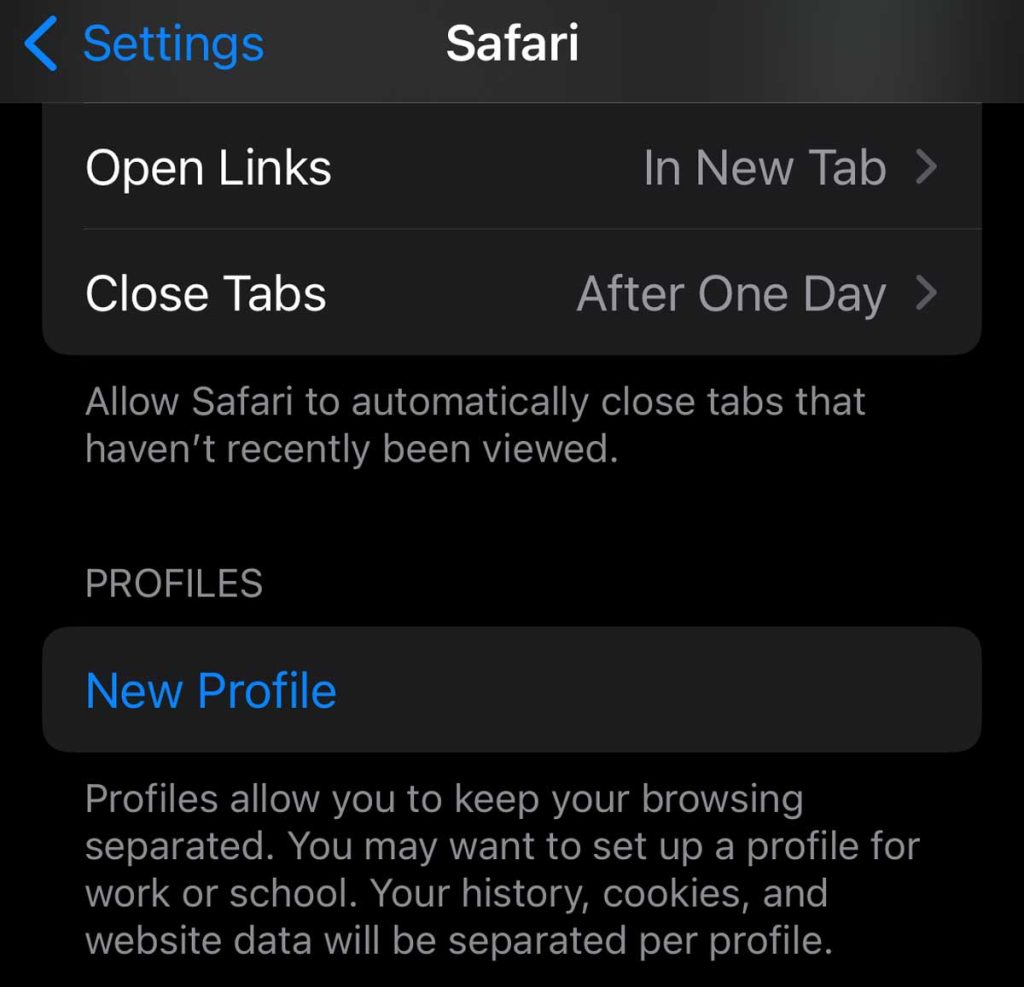
- On your iPhone or iPad, open the Settings app and choose Safari.
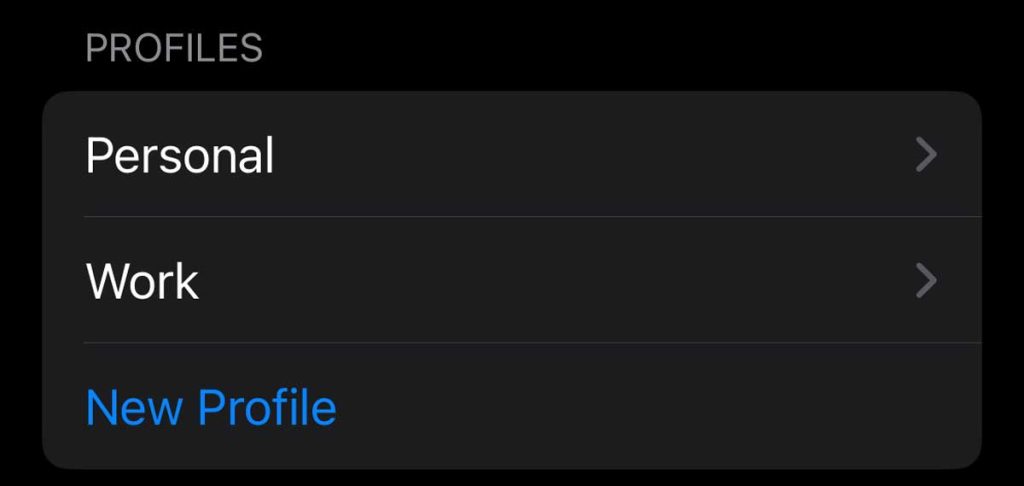
- Scroll down to the Profiles section and tap New Profile.

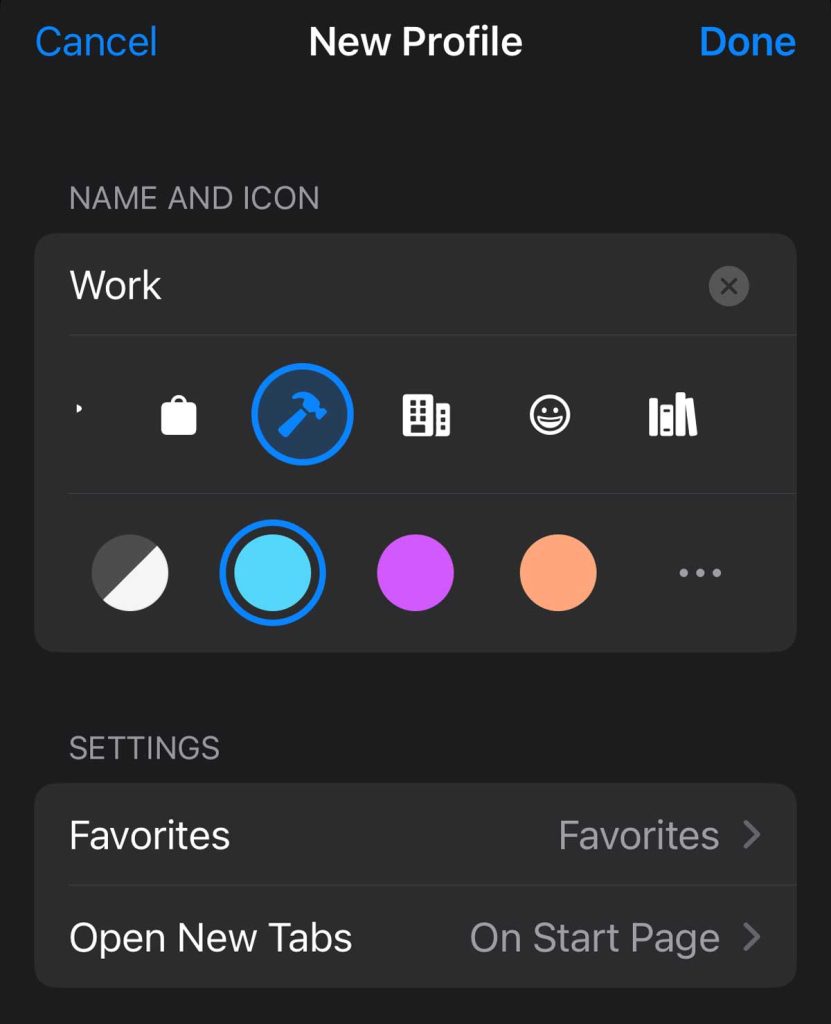
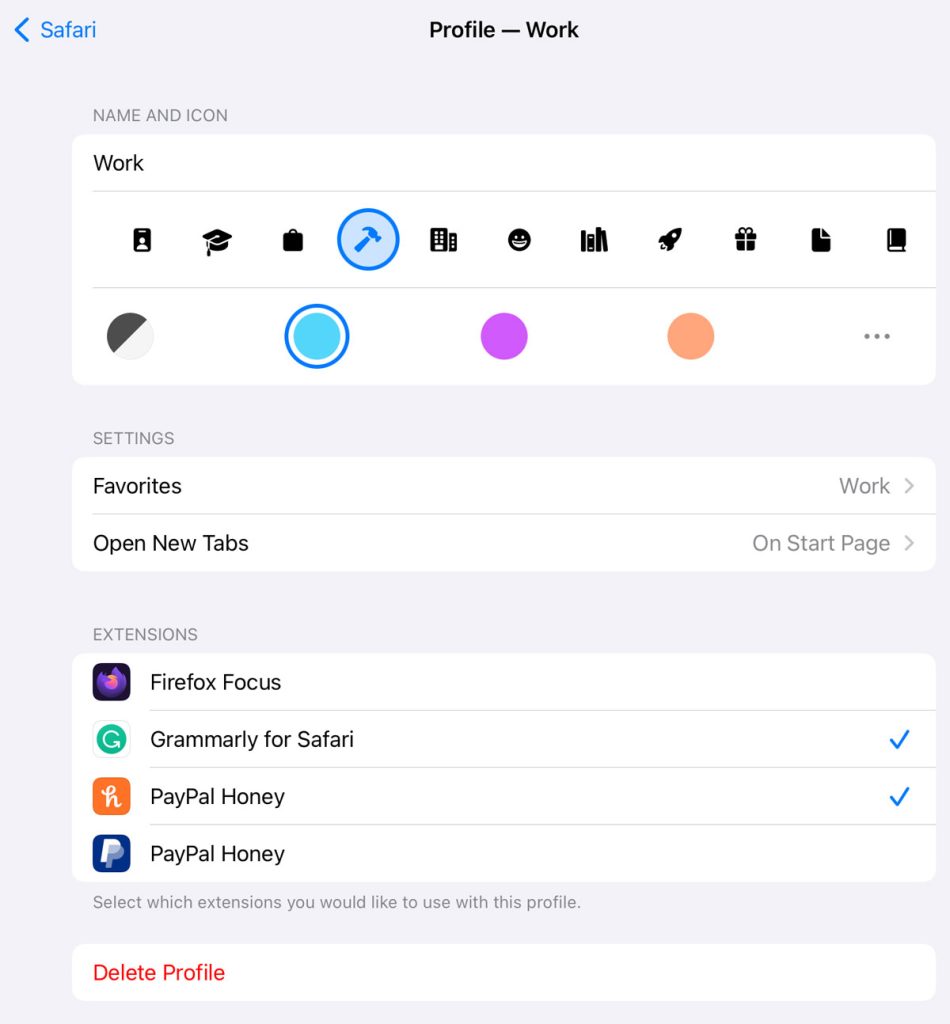
- Choose a Name and icon for your profile. You can also pick a color from the options shown or tap the there dot More button (…) to see additional color options.

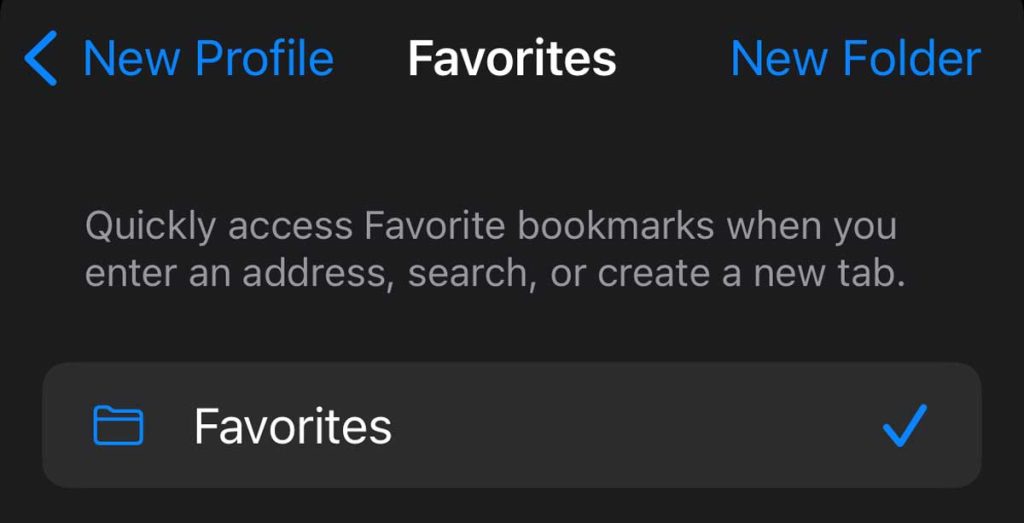
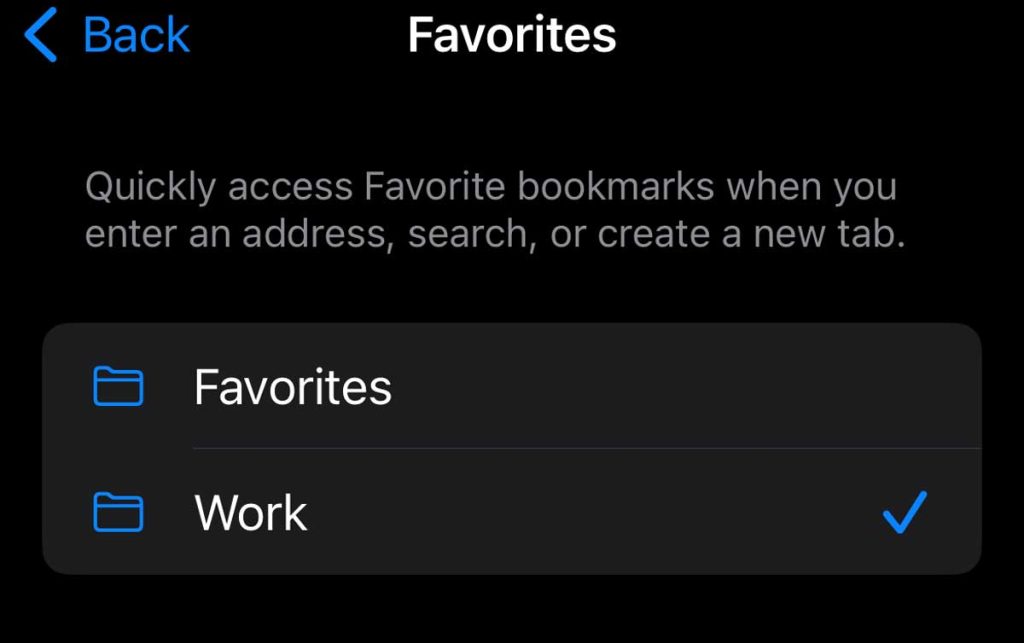
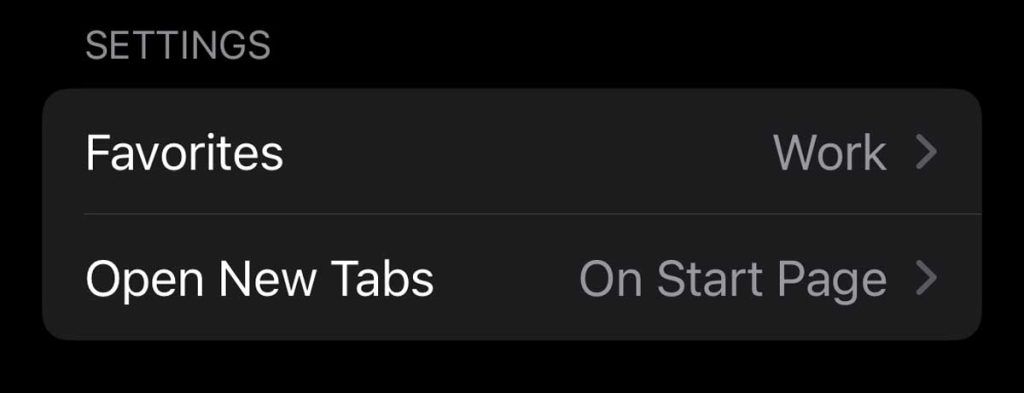
- Under Settings, tap Favorites to change the folder where you want to store those profile favorites.

- When you tap New Folder in the top corner, Apple creates a favorites folder with the same name as your Safari Profile.

- When you tap New Folder in the top corner, Apple creates a favorites folder with the same name as your Safari Profile.
- Tap Open New Tabs and choose how you want new tabs to open using this Safari Profile. The default is On Start Page.

- Once you decide on the above, press Done at the top to save this profile.
- After creating your first profile, Apple automatically creates a default personal profile for you–unlike other profiles, you cannot delete your personal profile.

- After creating your first profile, Apple automatically creates a default personal profile for you–unlike other profiles, you cannot delete your personal profile.
- After Safari creates the profile, open it to add any extensions by check-marking any that you want from the Extensions area.

- Repeat steps 2-6 for any additional profiles you want to create for Safari–for example, you might want to create a school or education profile if you’re taking classes. Or if your child, spouse, or parent also uses your phone, you might create one for them too.
- Any profiles you created sync between Apple devices that use the same Apple ID and use at least iOS/iPadOS 17 or macOS Sonoma.
Once you set up your profiles, all of the changes you make in Safari using a profile, such as your start page, history, extensions, and bookmarks, are only stored in that profile and are not shared with any other profile.
If you decide you want to change a profile, return to Settings > Safari > Profiles and select the profile you wish to change. Then update the name, icon, color, and other settings. You can also delete the profile if you wish. 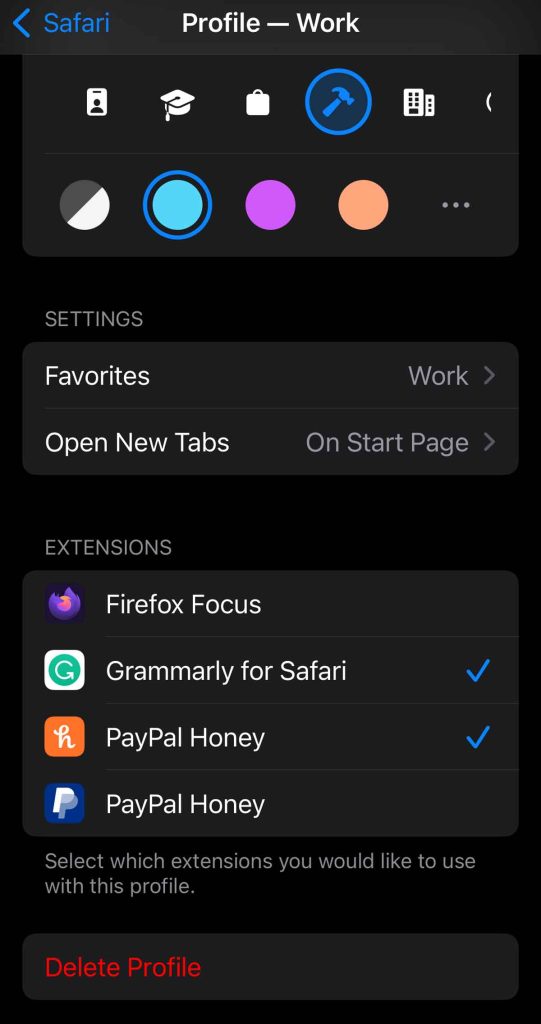
Once you create all the profiles you think you want, it’s time to see them in action.
How to use and switch between profiles in Safari on your iPhone and iPad
Switching between your profiles is super easy and helps you keep everything separate.
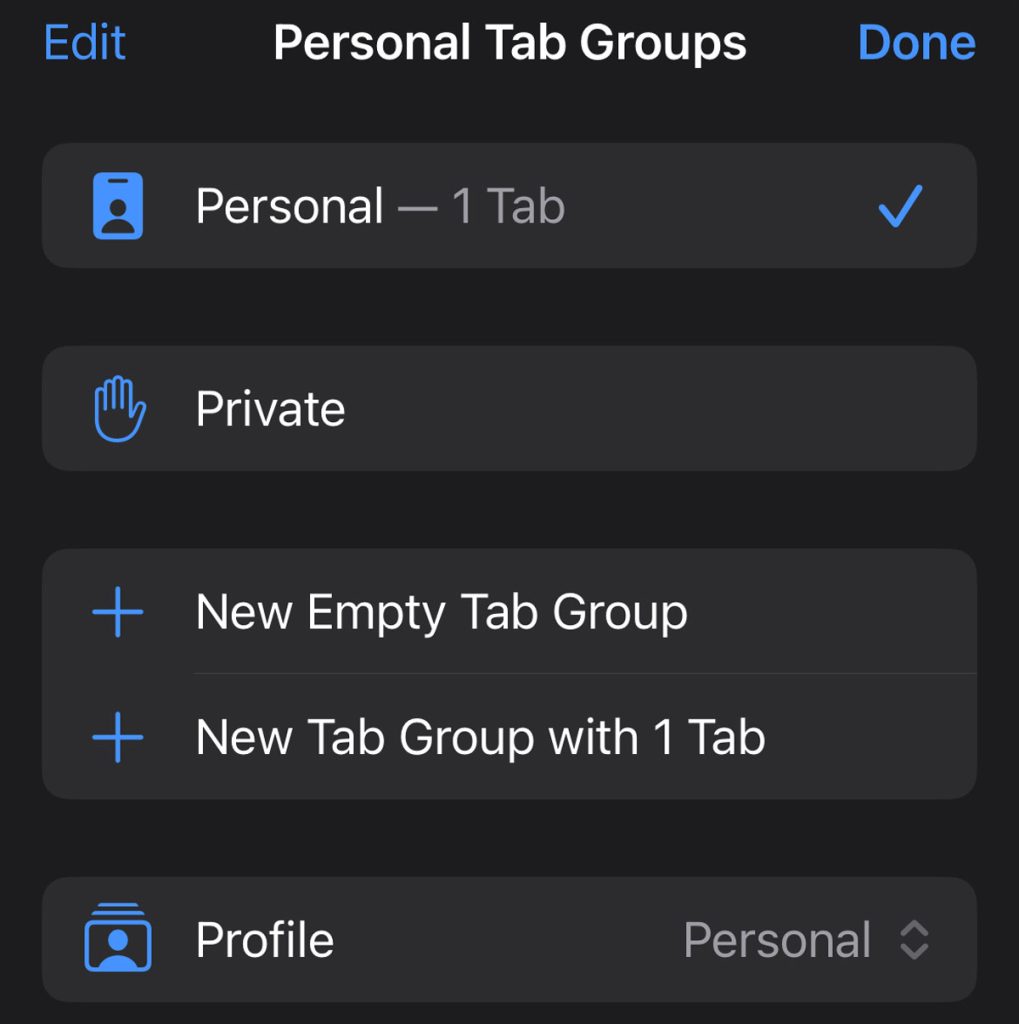
- Open Safari and tap the tabs group icon at the bottom right corner for iPhones or the top right for iPads (looks like two overlapping squares.)

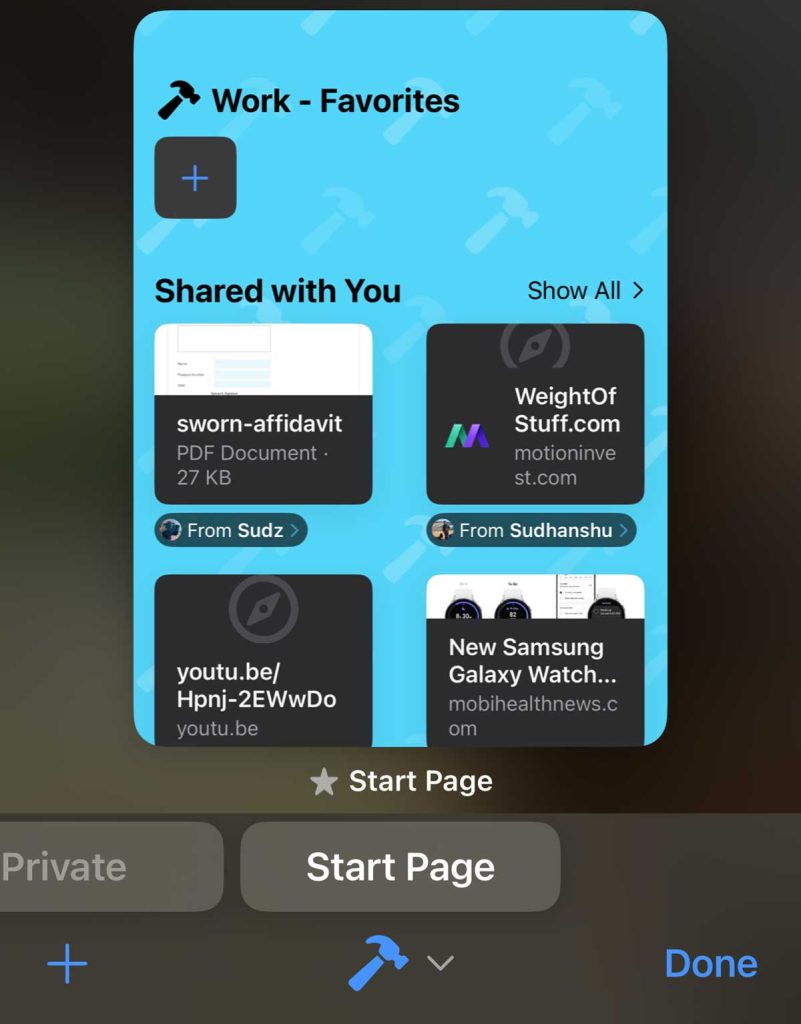
- Tap the middle icon that has the downward arrow next to it. For iPads, tap the profile name and icon.

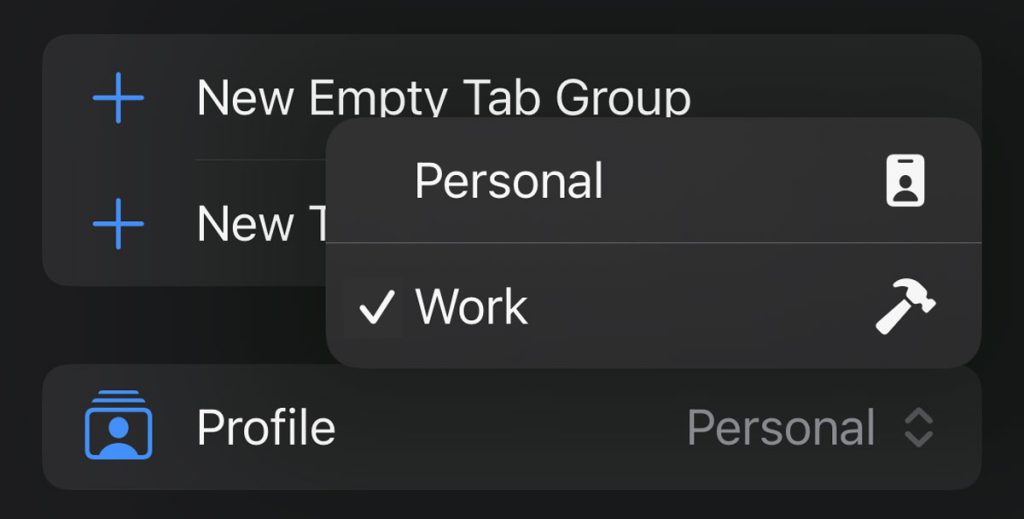
- Scroll down and tap Profile.

- Then select the profile you want to use.

- Press Done to go back to browsing using that profile!
- Your profile’s start page shows up, and the profile changes to your selected one for that profile.

- Your profile’s start page shows up, and the profile changes to your selected one for that profile.
Link your Safari profile to a Focus
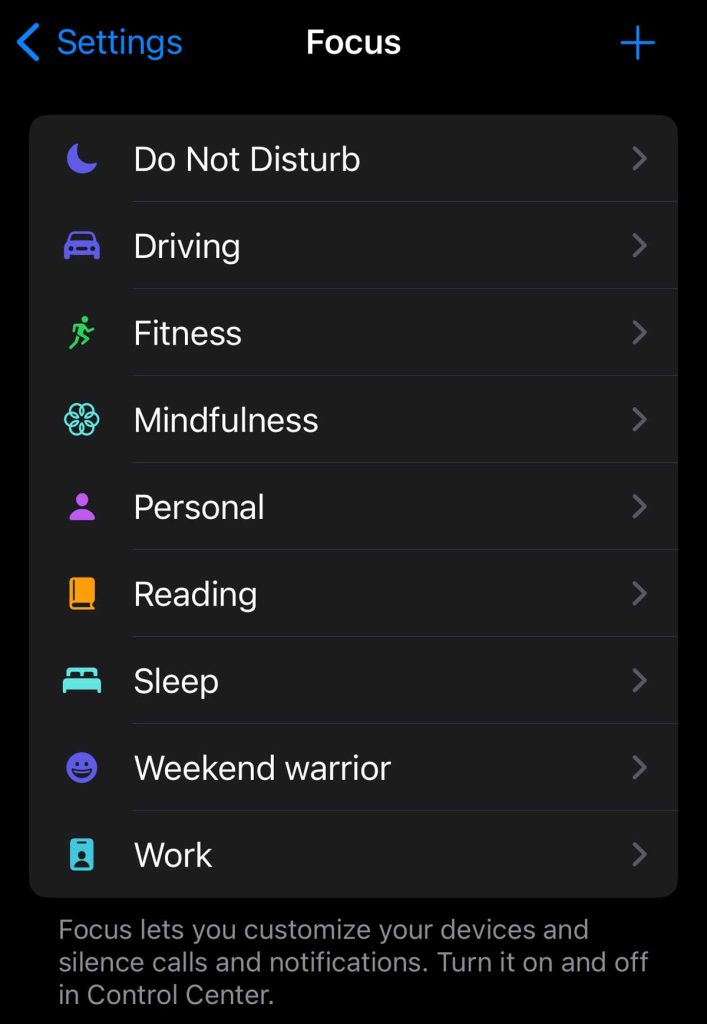
Another wonderful thing you can do with Safari profiles is link them to your different Focus modes, including Work, Personal, Sleep, and even custom Focuses.
When you choose to share focuses between devices, those devices reflect any changes you make to Safari profiles!
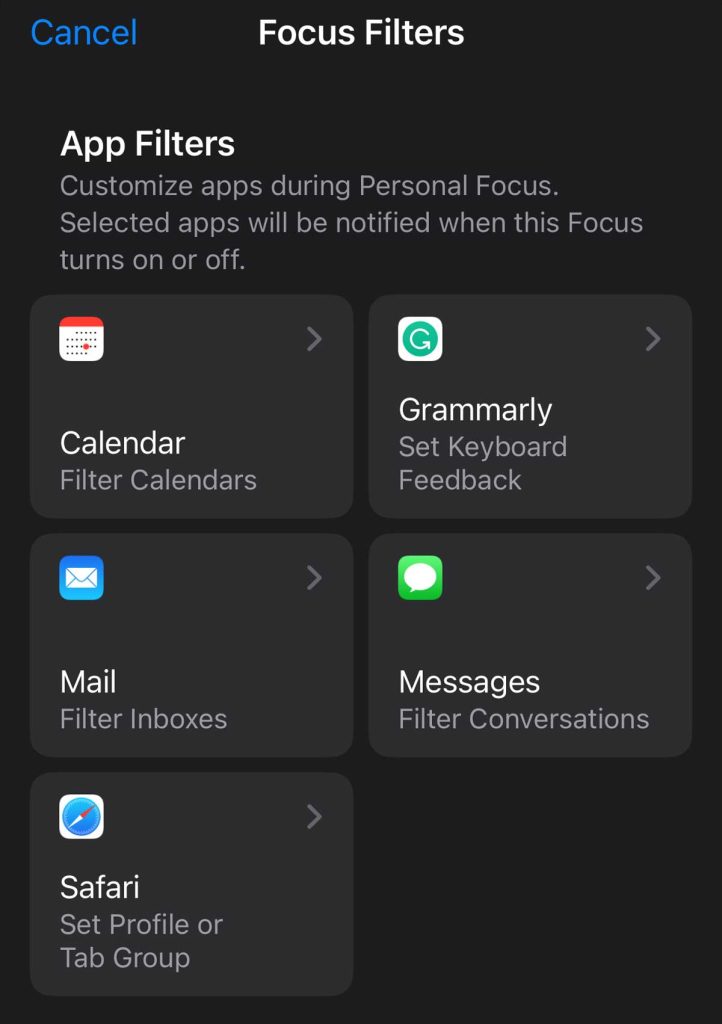
When you turn on a specific focus, you use focus filters to establish which profile you want Safari to use.
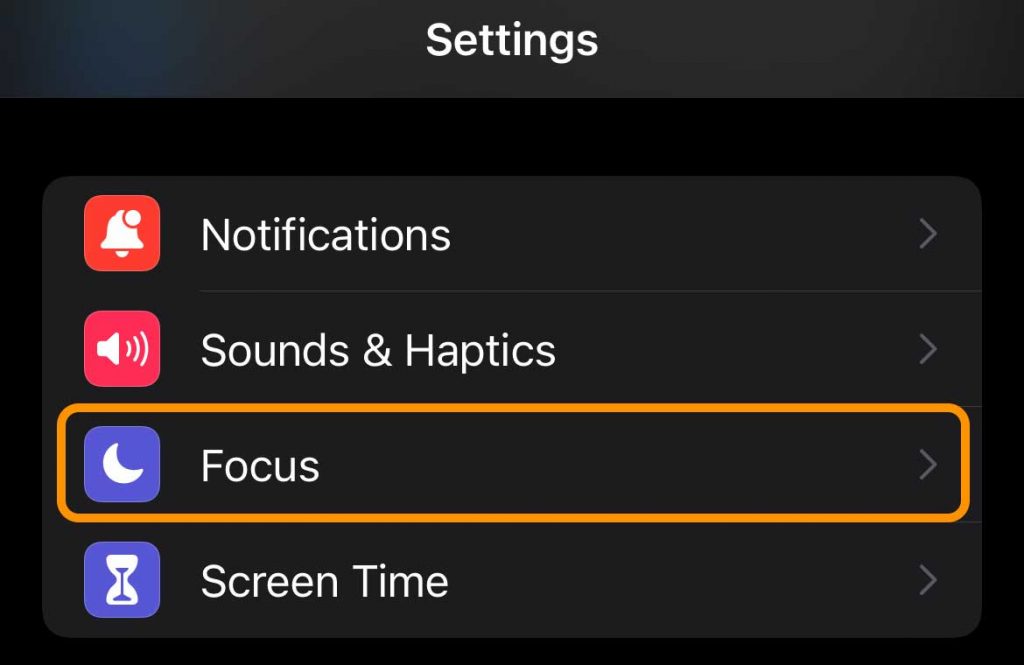
- Go to Settings > Focus.

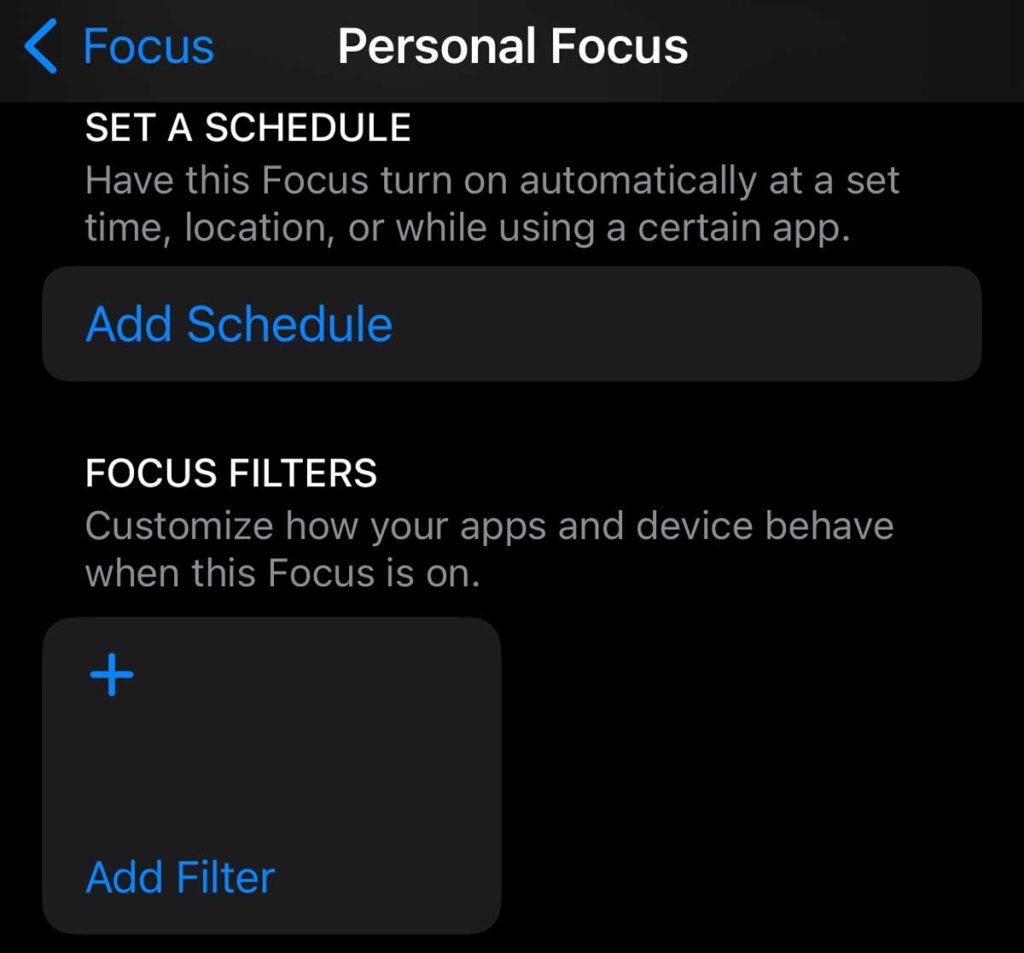
- Tap the Focus to which you want to set a Safari profile.

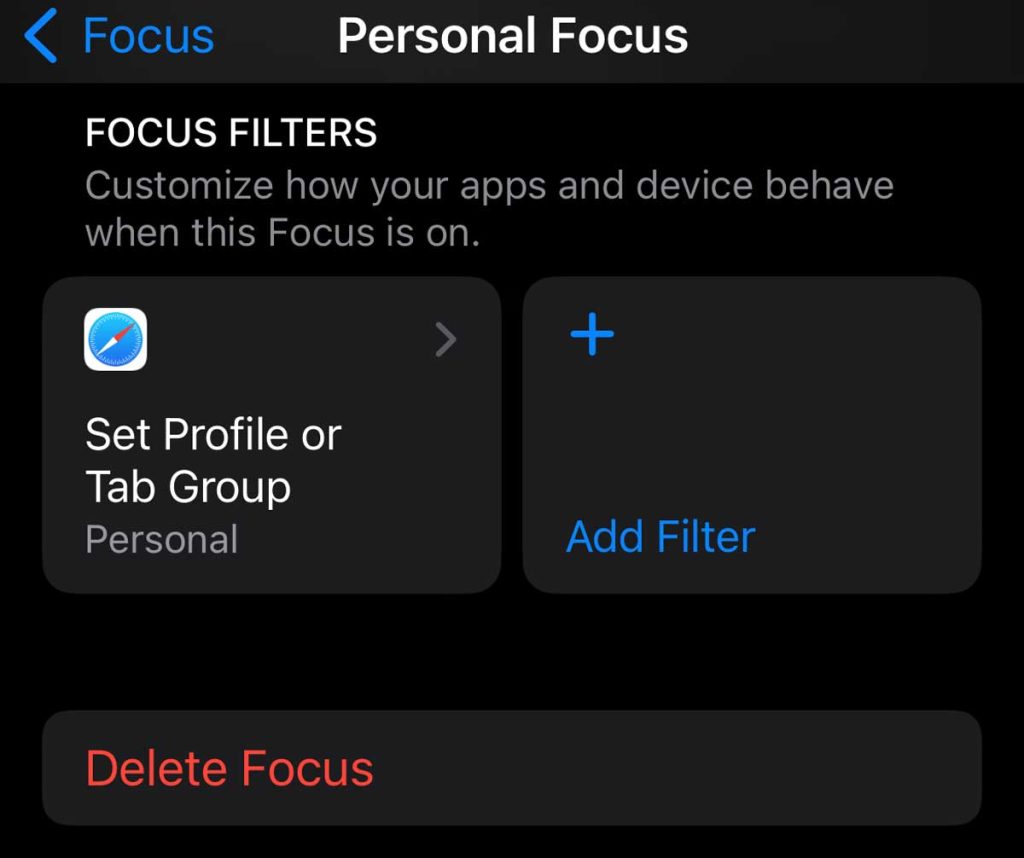
- Scroll down to Focus Filters, then tap Add Filter.

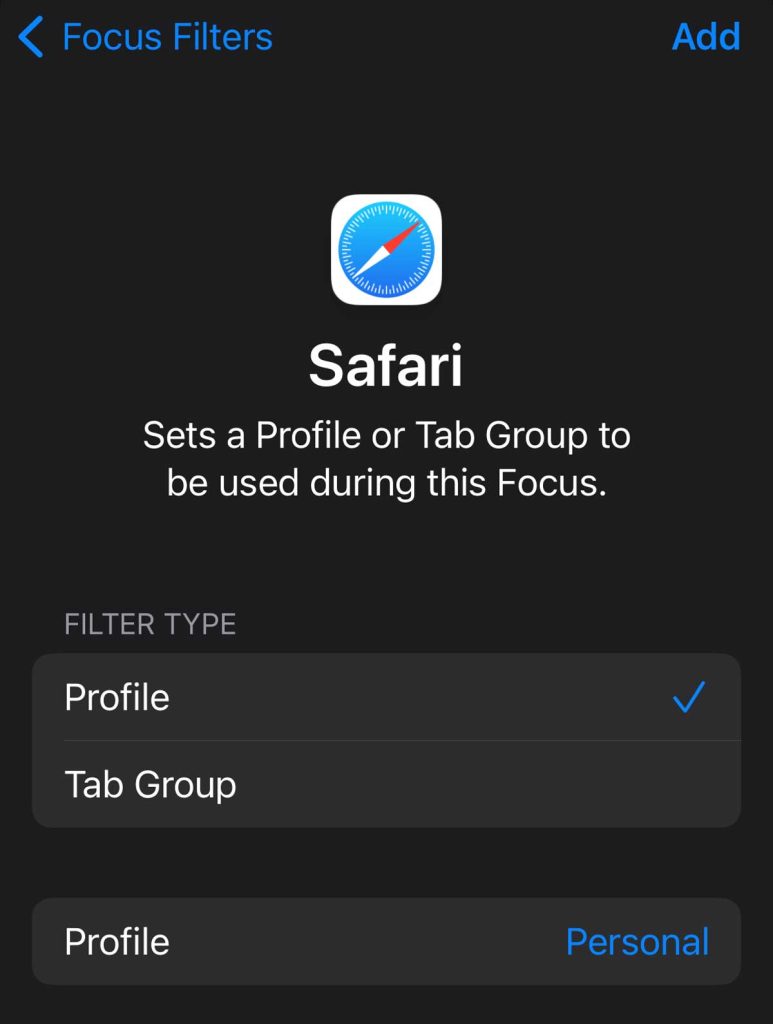
- Choose Safari from the list of App Filters.

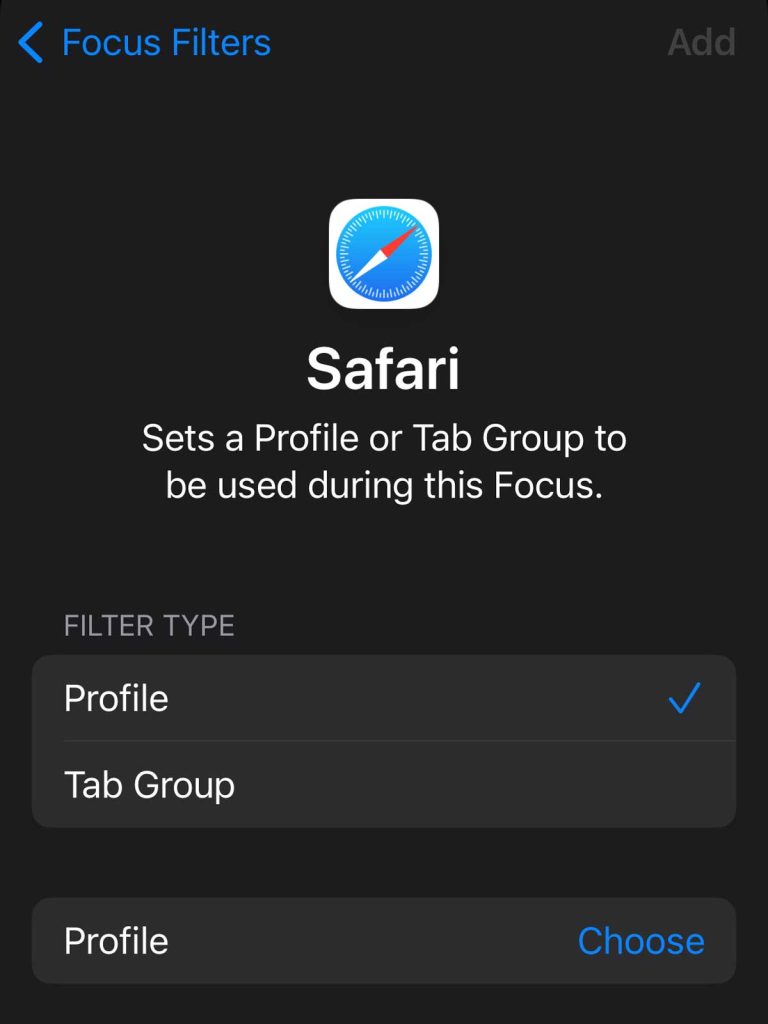
- Under Filter Type, select Profile.
- You cannot filter by Tab Group and Profile–it’s one or the other.

- You cannot filter by Tab Group and Profile–it’s one or the other.
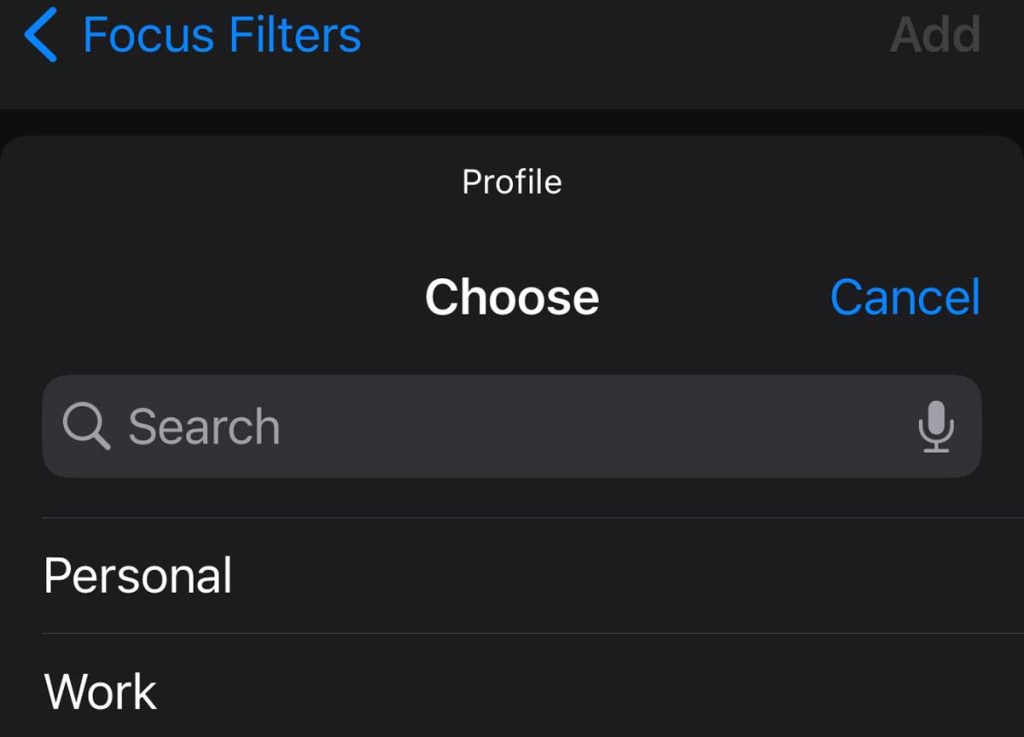
- Choose the profile you want to use with this focus.

- Tap Add at the top to save it.

- Confirm that the Focus Filter now shows your preferred Safari profile.

- Repeat steps 1-7 for any other focuses where you want to link a Safari profile.
How to delete multiple profiles in Safari on your iPhone or iPad
Deleting a profile is very simple. While you can remove most profiles, you cannot delete your personal profile (your default profile.)
- Open the Settings app and choose Safari.
- Scroll down to the Profile section and tap a profile you want to remove.

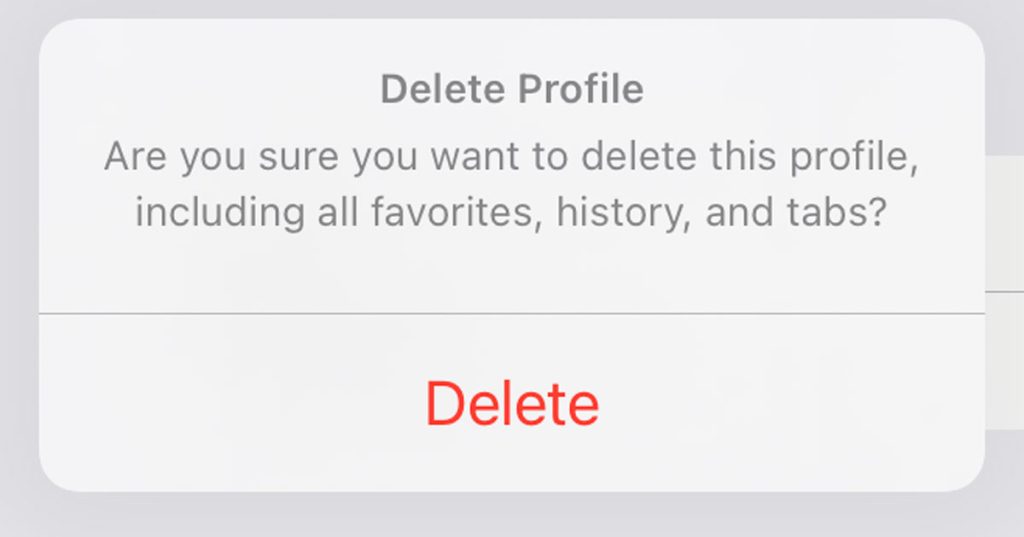
- Scroll down and choose Delete Profile and confirm you wish to delete it.

- Deleting profiles removes them from all your Apple devices using the same Apple ID and deletes its favorites, history, tabs, and all other data stored in that profile.

- Deleting profiles removes them from all your Apple devices using the same Apple ID and deletes its favorites, history, tabs, and all other data stored in that profile.
Final thoughts
It’s welcome news that Safari finally supports profiles!
With profiles, you create different “users” for things like work, school, and personal. Or create profiles for your child, family members, and others with whom you share your iPhone or iPad.
With separate profiles, you keep each user’s Safari information separate, including things like bookmarks, history, passwords, and other settings.
However, just remember that separate does not equal private. At this time, anyone who uses your iPhone or iPad can switch to a different profile and review all that profile’s information, including website history.

