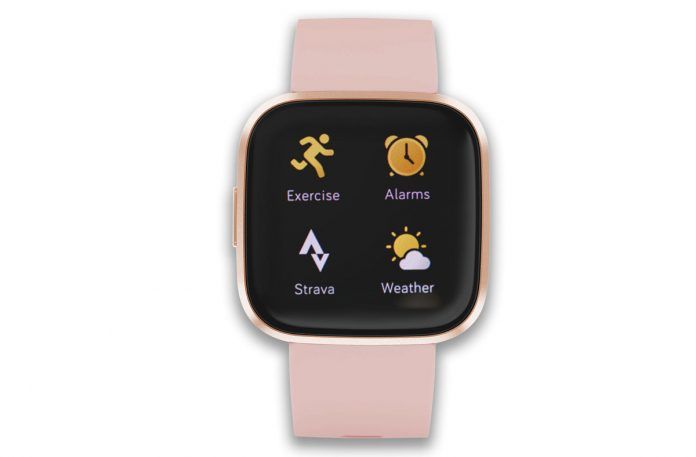
Learning how to use Strava with Fitbit can be somewhat intimidating for non-tech-savvy people. That’s why we are here to make things easier with this short guide. Strava is a top-rated platform for users who love running and biking, and the platform integrates well with leading wearables such as Garmin, Zwift, Wahoo, and Polar.
Just 5 minutes of reading can save you a lot of headaches. So, with all that said, let us get right to it!
Contents
Related Reading:
- Strava Segments not working? Let’s fix that!
- How to use Strava Routes: everything you need to know about the Strava subscription feature
- Complete Guide to Fitbit Sense Stress Management features
Step 1: Connect Strava with your Fitbit Watch
First things first, you need to connect Strava with your Fitbit watch. To do that:
- Go to your smartphone
- Open the Strava fitness app
- Login to your Strava account or create one if you don’t have any already (There is also the option of using social media accounts)
- After following the initial tips and landing on the feed, tap on “Connect a GPS watch or computer”
- And then tap on “Fitbit”
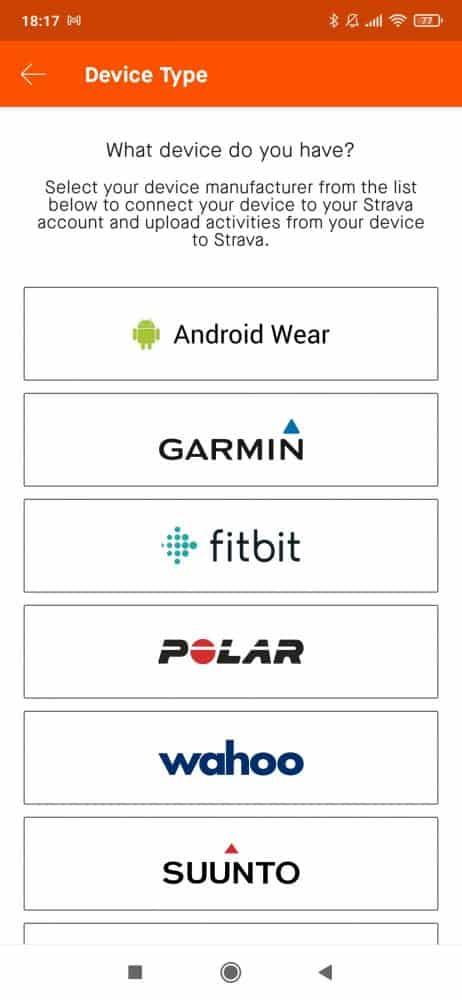
After that, log in to your Fitbit account and follow any on-screen instructions. That should be about it as far as the connection setup is concerned.
Alternatively, you can also do this through the web by going to Strava’s official setup page.
Step 2: Start Syncing Activities
After connecting Strava with your Fitbit watch/account, your activities, calories, and any other piece of information like that should automatically get synced with Strava.
If new data does not sync automatically after a session, go to the end of this article for troubleshooting issues.
It’s worth keeping in mind that activities with no GPS data, duplicate activities, and older activities completed before you added the account do not sync automatically.
To add older activities to your Strava account, you’ll first need those activities as TCX files. So, first things first, extract the old activities you want to add as TCX. To do that:
- Log into your Fitbit dashboard via a web app
- Head over to your Log
- Activities
- Select the activity you want to upload to Strava
- Click on the 3 dots at the upper right part of the screen
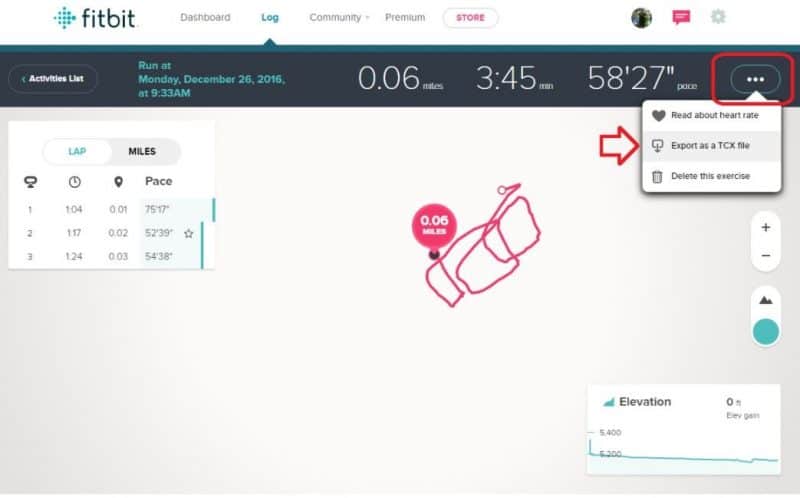
- Then select “Export as a TCX file”
Now that you have the activities as TCX files, you have to add them to Strava. To do that:
- Open your Strava dashboard via the web and login into your account
- Hit the “Plus” icon at the upper right part of the screen

- And select “Upload activity”
Then upload your extracted Fitbit activities to Strava. Keep in mind that if you are on PC, there is the option of uploading multiple files at once by holding down the “CTRL” button and clicking once on the files you want to upload. This allows you to choose multiple files in one go.
Step 3: Add Non-GPS Activities to Strava
That’s about all you need to know about syncing activities to Strava and adding older activities that didn’t sync before. But that’s only for as far as GPS-tracked workouts are concerned. How about those that you couldn’t track?
One easy way to add non-GPS activities to Strava is by using the built-in option that the Strava app offers on your phone. To do that:
- Open the Strava app on your phone
- Select the “Plus” icon at the bottom right part of the screen
- Tap on “Manual activity”
- Then insert all the parameters
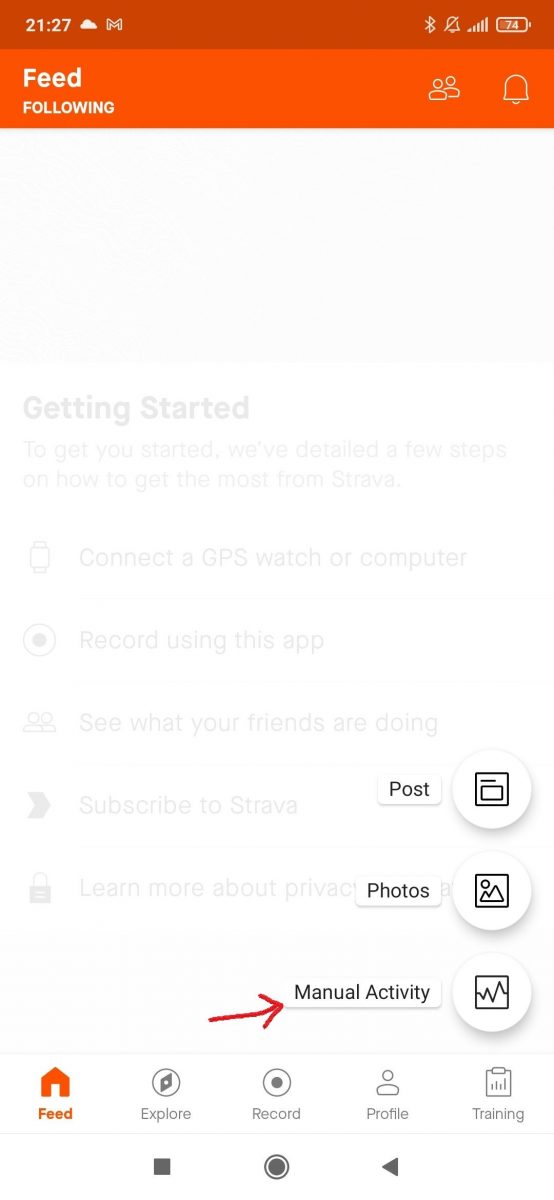
And it’s as easy as that.
Fitbit and Strava not syncing? Check out these essential tips
If you’ve connected your Fitbit watch with Strava, but the activities are still not syncing, we may yet have a fix for you. Here are some of the popular solutions:
- Try disconnecting and re-connecting Strava with Fitbit again. It’s not unusual for such simple solutions to work. Make sure to check that Strava is not down. An excellent place to check is Strava’s Twitter page. Sometimes when they are performing planned maintenance work, the sync process gets into hiccups.
- As we mentioned above, duplicate activities do not get synced. So, make sure that you are not looking at a duplicate activity since that’s not supposed to get synced anyway
- Make sure that your activity has GPS data in it. Activities without GPS data do not get synced. But you can still add them to Strava manually by following our guide above
- Make sure that you are connected to a network. Fitbit and Strava rely on the internet to sync activities with each other. And if you are connected to a network, make sure that it’s working normally and not currently down.
You can also try revoking access to Strava and setting it up again if something went wrong the first time. To do that:
- Log in to your Fitbit dashboard via web
- Click on the gear icon at the upper right corner of the screen
- Click on “Settings”
- “Applications”
- Go to “Fitbit + Strava” app
- Then “Revoke Access”
And repeat the first-time setup the way we point out at the beginning of this guide. That should hopefully fix it.
Sometimes deleting the app entirely from your phone and wearable and re-installing them can do the magic.

Using Strava with Fitbit: Wrapping Up
That’s the basics of how one can use Strava with Fitbit smartwatches and fitness bands. If you have any questions or ideas to add, you can let us know about them in the comments below!
We hope that you enjoyed this simple guide. Please follow us for our detailed guides as well as news on wearables and health.

