
Having a Medical ID on your Apple Watch and iPhone and on your family’s devices is a useful tool if ever needed for an emergency situation.
As a healthcare provider myself, I have seen many patients wear a formal medical alert bracelet, but there have been times when critical information has been retrieved from an Apple Watch or iPhone.
Even if an ER doctor just needs a support person to call on your or a loved one’s behalf, their emergency contact could be easily found on your watch or iPhone.
In this article, we’ll discuss how you can create an emergency medical ID on your Apple Watch and/or iPhone. We’ll also walk through a few other useful ways you could use your phone or watch in an emergency situation.
Contents
- 1 How to set up an emergency medical ID on your Apple Watch or iPhone
- 2 How to make an emergency phone call or review Medical ID info on an Apple Watch or iPhone
- 3 Emergency SOS via Satellite on iPhone 14+
- 4 Using a medical ID to get a lost watch or phone returned
- 5 Final thoughts on using your medical ID on your Apple Watch or iPhone
Suggested readings
- How to turn on crash detection for your Apple Watch
- How to check your skin and body temperature on your Apple Watch
- These 7 most popular Medical Apps are here to stay with us
- 14 of the best wearables and services for seniors and elderly folks
- The best apps for older adults to manage their medications and supplements
How to set up an emergency medical ID on your Apple Watch or iPhone
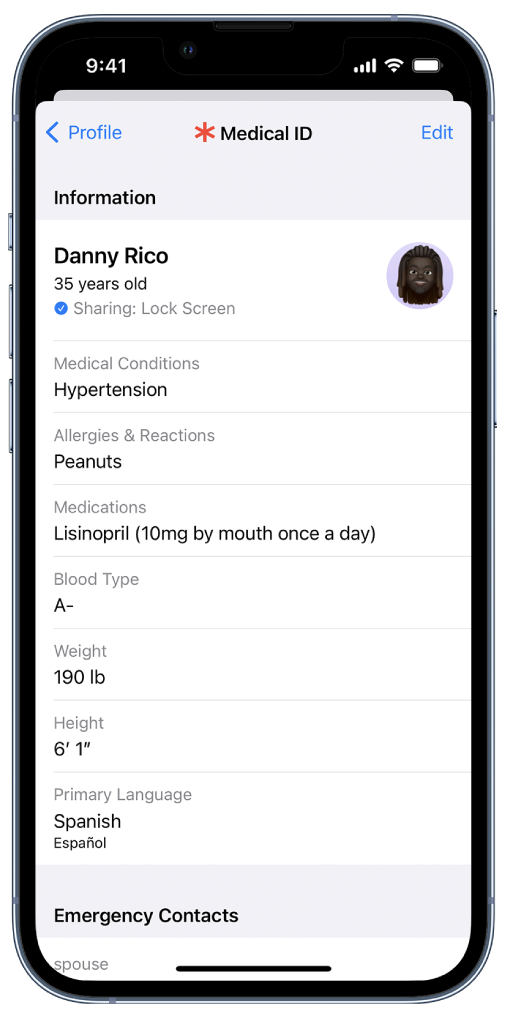
Your Medical ID provides important information about you in an emergency, including information like your medical conditions, allergies, and emergency contacts. That’s why we recommend setting it up on your iPhone and Apple Watch AND on all your family’s Apple devices.
First and foremost, we want to make it clear that a medical ID on your watch should not replace a formal medical alert bracelet. If you have a chronic condition that first responders need to know about, wear a medical alert wristband.
Having an emergency medical ID on your Apple Watch or iPhone should act as an enhancement and an additional tool that could accompany a medical alert device if you have one.
If you don’t have a medical alert bracelet, having a medical ID set up could simply help healthcare teams access information if you were to arrive in an emergency room, for example.
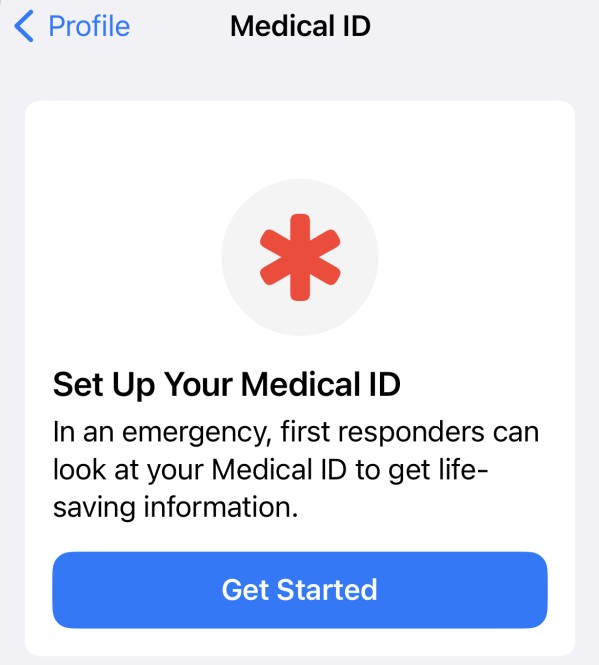
Setting up your Medical ID on iPhone
- Open the Health app on your iPhone.
- Select your profile pic in the top right corner > tap Medical ID > Get Started. If you already set up your Medical ID, tap Edit in the top right corner to make changes.
- Fill in your birthdate, organ donor information, medical conditions, allergies, blood type, height and weight, and medications. Plus, add any additional important information, such as primary language.

- If you’d like emergency medical personnel and emergency responders to access your Medical ID (which we highly recommend), ensure that you toggle on Show When Locked and Share During Emergency Call (feature available in the U.S. and Canada only.)

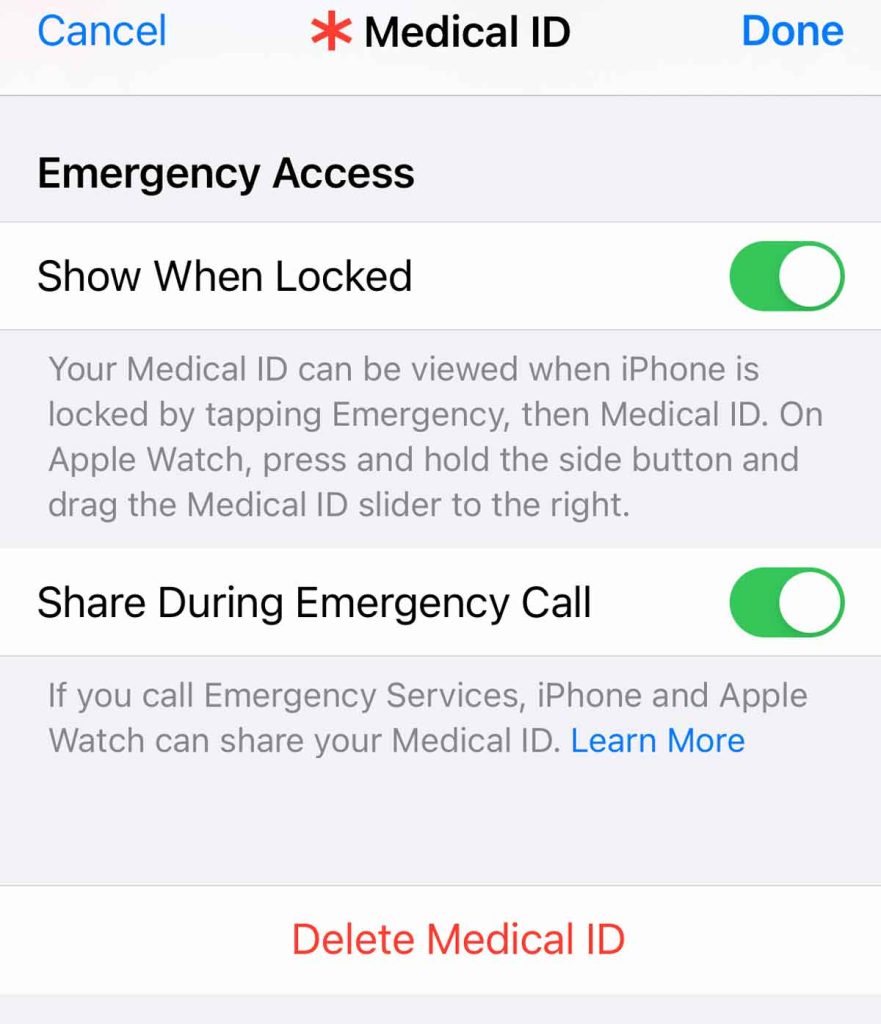
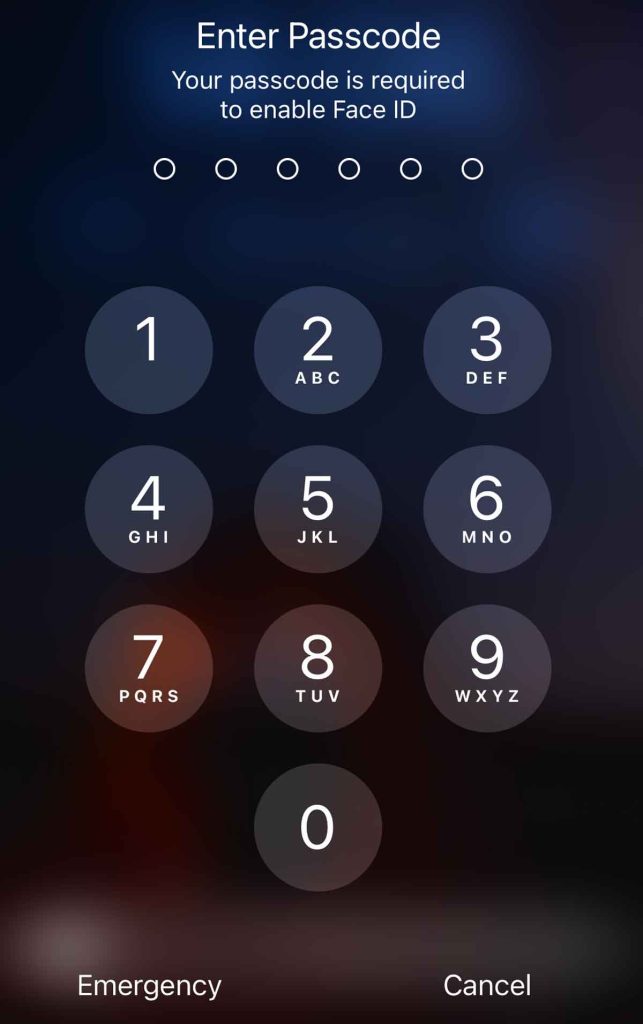
This allows a first responder to view your Medical ID from the Lock Screen by swiping up, pressing the side and volume button, or pressing the Home button (depending on your model) and tapping Emergency on the passcode screen, then Medical ID.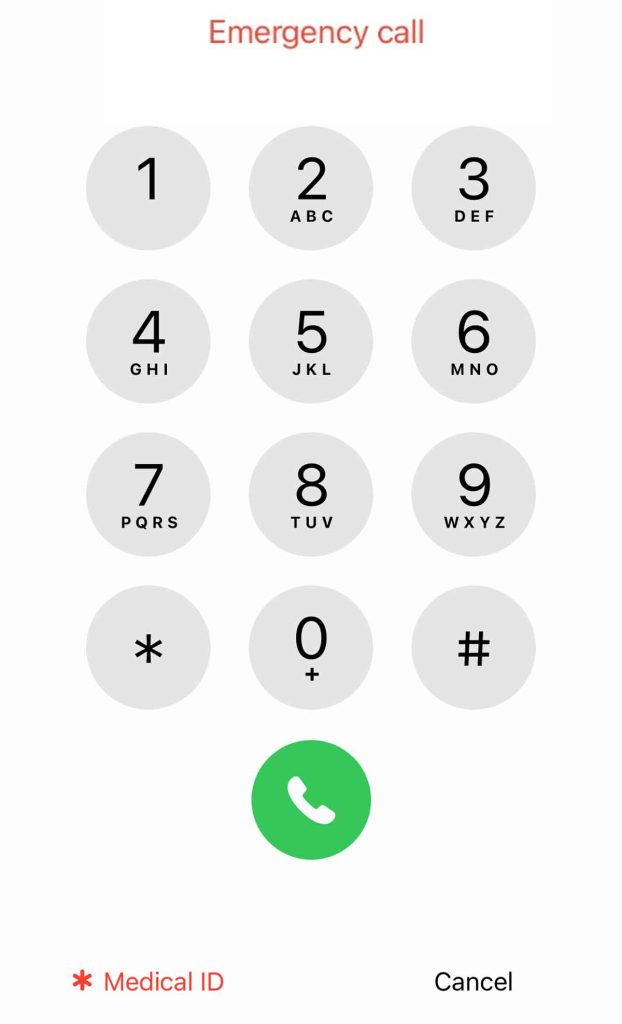
It’s a good idea when setting up your Medical ID to also set up your emergency contacts.
- Simply scroll down and select add emergency contact.

- From there you can select whomever you’d like from your contact list and note their relationship to you.
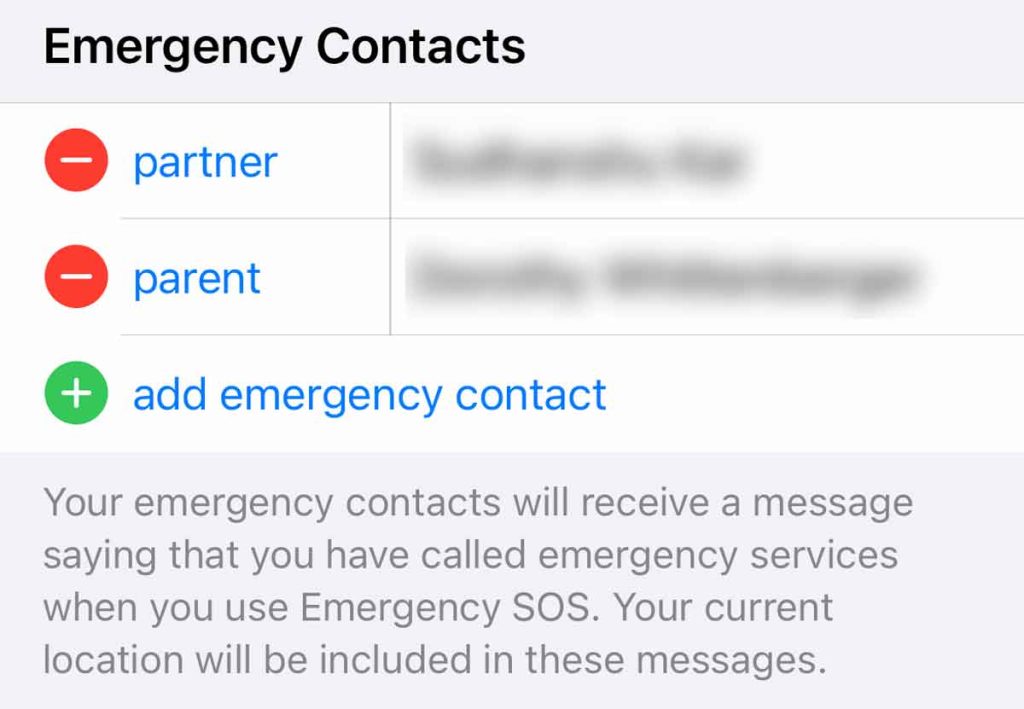
It’s good to know that your emergency contacts receive a message saying you called emergency services when you use the Emergency SOS feature. Your current location coordinates are also included in that message.
Sharing this information to an emergency contact can always be canceled if you prefer.
Viewing and editing your Medical ID on your Apple Watch
When you set up your Medical ID in the Health app on your iPhone, it also becomes available on your paired Apple Watch.
For standalone and managed Apple Watches using Apple family setup, the Medical ID is normally created when the watch is initially set up.
However, if this step was skipped, you can set it up using the family organizer iPhone’s Watch app via Watch app > All Watches > Select the family member’s watch > Health app > Medical ID.
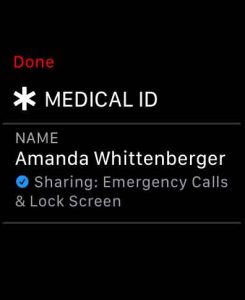
How to review Medical ID on Apple Watch
- Press and hold the side button until you see the sliders appear.
- Swipe right on Medical ID.

- From here you can scroll through and view your Medical ID.
- Tap Done at the top when you’re finished viewing.
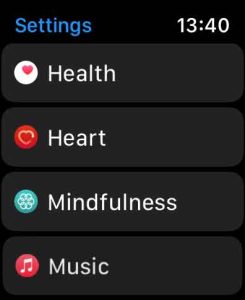
How to edit Medical ID on Apple Watch
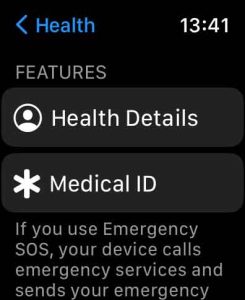
- Open the Settings app on the watch.
- Scroll down and tap Health.
- Under features, tap Medical ID.
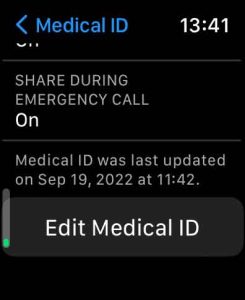
- Scroll all the way down and choose Edit Medical ID.
- Make any changes.
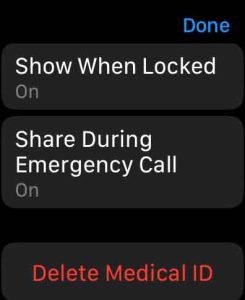
- We suggest you turn on Show When Locked and Share During Emergency Call (feature available in the U.S. and Canada only.) If these are off, tap them and toggle on.
- We suggest you turn on Show When Locked and Share During Emergency Call (feature available in the U.S. and Canada only.) If these are off, tap them and toggle on.
- Tap Done in the upper left corner to save your updates.
You can also make changes on the family organizer’s iPhone via Watch app > All Watches > Select the family member’s watch > Health app > Medical ID. 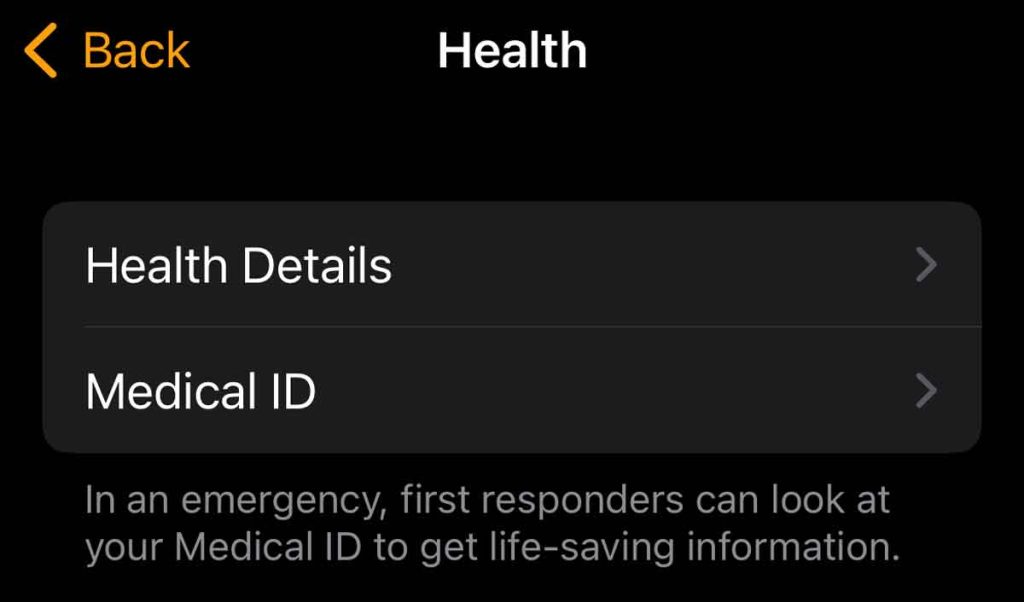
How to make an emergency phone call or review Medical ID info on an Apple Watch or iPhone
In case of emergency, you have several options to make a call and contact emergency services.
To do this on iPhone:
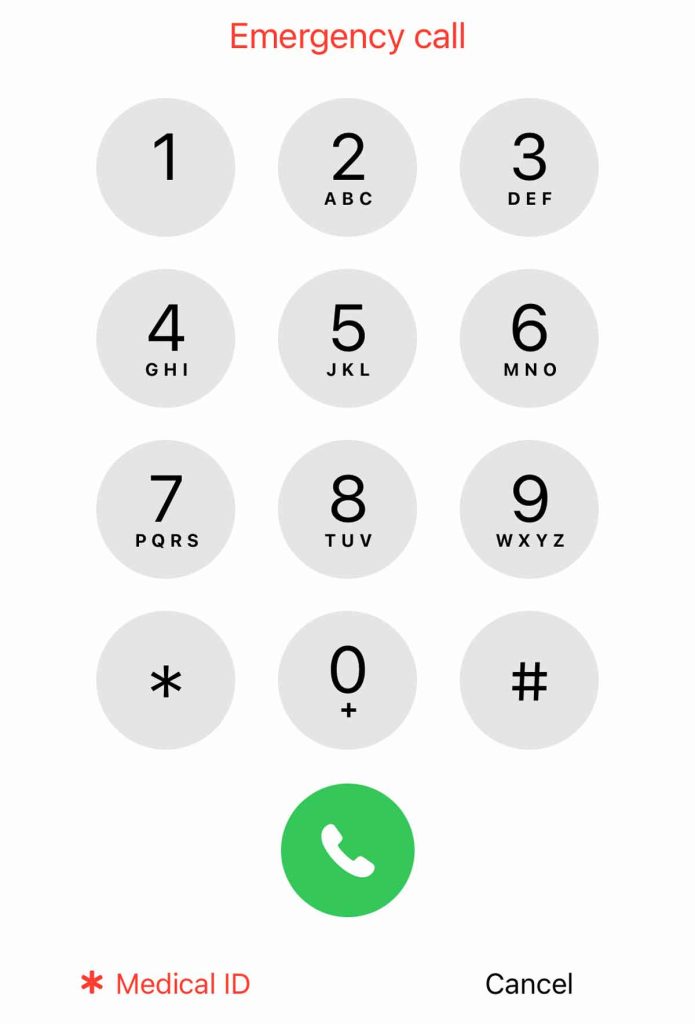
- You can dial the emergency number (911 in the US) while iPhone is locked
- Swipe to the Passcode screen and tap Emergency.

- Choose Medical ID at the bottom or make an emergency call by dialing the local emergency number and tapping the green phone icon to make a call.

2. Use Emergency SOS
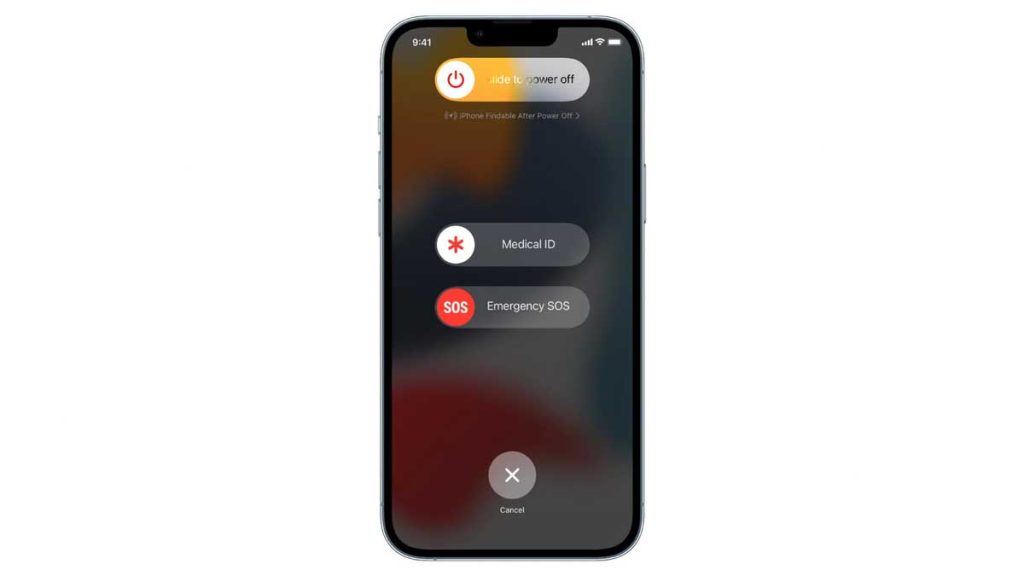
- On an iPhone with Face ID, press and hold the side button and either volume button until you see the red Emergency SOS slider.
- On other iPhone models, press the side button five times to see the Emergency SOS slider.

- On other iPhone models, press the side button five times to see the Emergency SOS slider.
- iPhone starts a countdown. If you don’t interfere, and once this ends, iPhone calls emergency services
After an emergency call ends, your iPhone alerts your emergency contacts with a text, unless you cancel this.
To do this on Apple Watch:
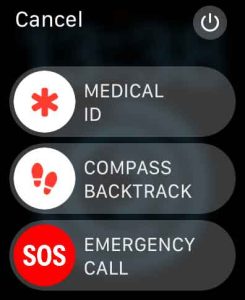
- Press and hold the side button until the emergency sliders appear

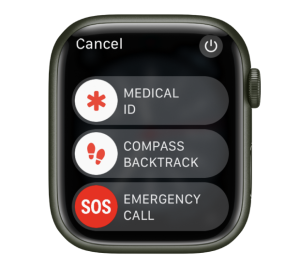
- You’ll have access to viewing Medical ID or making an SOS emergency call. K
- Tap Medical ID to access important health emergency information for those attending you.
- Contact emergency services by holding the side button until your Apple Watch initiates a countdown. When the countdown ends, the watch calls emergency services. If you added emergency contacts, once the call completes, it sends an alert to your friends and family.
When your watch detects a hard fall with fall detection turned on, your Apple Watch automatically connects you to emergency services and emergency contacts.
If your watch detects a severe car crash for Apple Watch Series 8, Apple Watch SE (2nd Generation), or Ultra, your watch alerts emergency services and contacts.
2. You can also ask Siri to connect you to emergency services with the simple command of “Hey Siri, call 911.”
Emergency SOS via Satellite on iPhone 14+

With iPhone’s 14 models and above, you can now use Emergency SOS via satellite! This feature is iPhone only and not currently available on Cellular Apple Watches.
This is used primarily if you find yourself being outside of cellular or WiFi use and contacting emergency services is unavailable because of lost service.
Your iPhone tries to connect you via satellite coverage. It’s important to note that using a satellite connection can vary greatly.
Sending a signal may take as little as 15 seconds if in clear conditions, or it could take several minutes if under trees or other foliage.
If other obstructions are present, it may not be able to send a signal at all.
Connecting to satellite
If you’re in a place without cellular or WiFi coverage, your phone prompts you to try connecting to emergency services via satellite text.
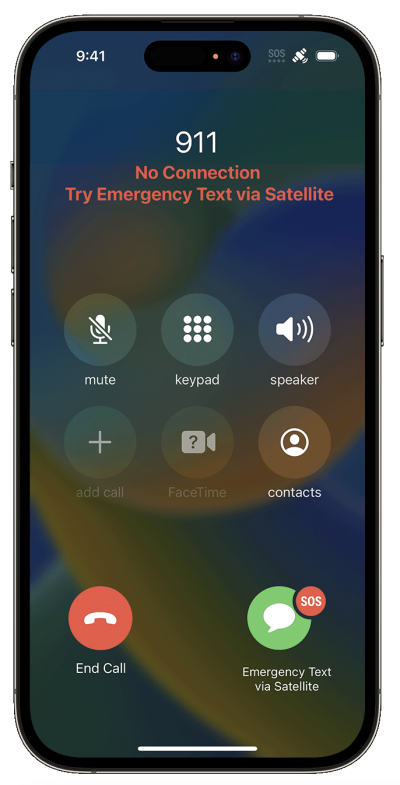
Even if it appears you can’t make a call, always try this first.
If your call doesn’t go through, select Emergency Text via Satellite, then Report Emergency when prompted.
You’ll be asked to answer a few questions regarding your situation. You can also choose to notify your emergency contacts.
Remember that sending messages via satellite could take up to several minutes.
To use this feature, you need an iPhone 14, iOS 16, be in a location without cellular or WiFi service, and be within the US, Puerto Rico, US Virgin Islands, or Canada.
Using a medical ID to get a lost watch or phone returned
Not only is it important to have your Medical ID set up for emergent medical purposes, but also around the possibility of having your phone or watch returned to you!
Who would have thought? But several scenarios online have been documented by users that the only way they were able to return a lost watch to its owner was by viewing their Medical ID and contacting a listed emergency contact!
Even if a phone or watch is locked, holding the side button (or side button and volume button) brings up the owner’s medical ID, which could have their own contact information or an emergency contact who you could also reach out to.
Final thoughts on using your medical ID on your Apple Watch or iPhone
Taking a few minutes to set up your medical ID could prove to be extremely helpful in several situations.
From texting emergency contacts to having a lost watch returned, to contacting emergency services via satellite, setting up your medical ID is foundational.
We hope you found this article helpful in walking you through how to set up your medical ID and learning several ways to use it if ever needed.


