The Workout app in watchOS 9 introduces a Custom Workouts feature that you can use to facilitate your interval training programs. This feature creates structured workouts that have exercise and rest intervals.
With custom workouts, you get to choose your workout’s work and recovery intervals and even set up alerts for pace, heart rate, cadence, and power.
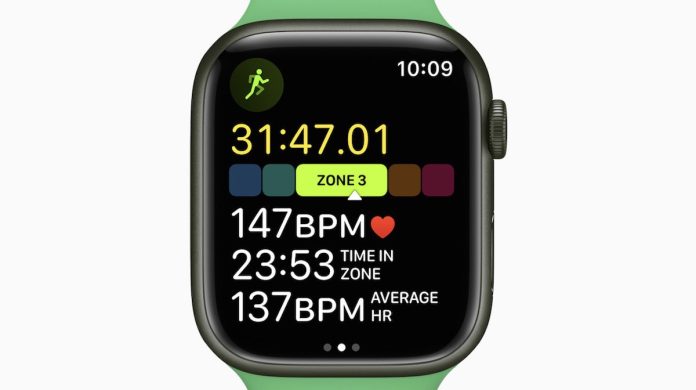
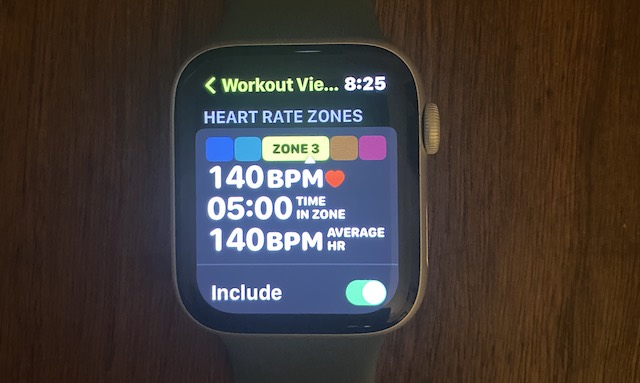
Furthermore, now that you can see the heart rate training zones, you can easily see if you are performing in Zone 4 or Zone 5. Knowing your zone helps you see when you perform at the higher intensities and training loads.
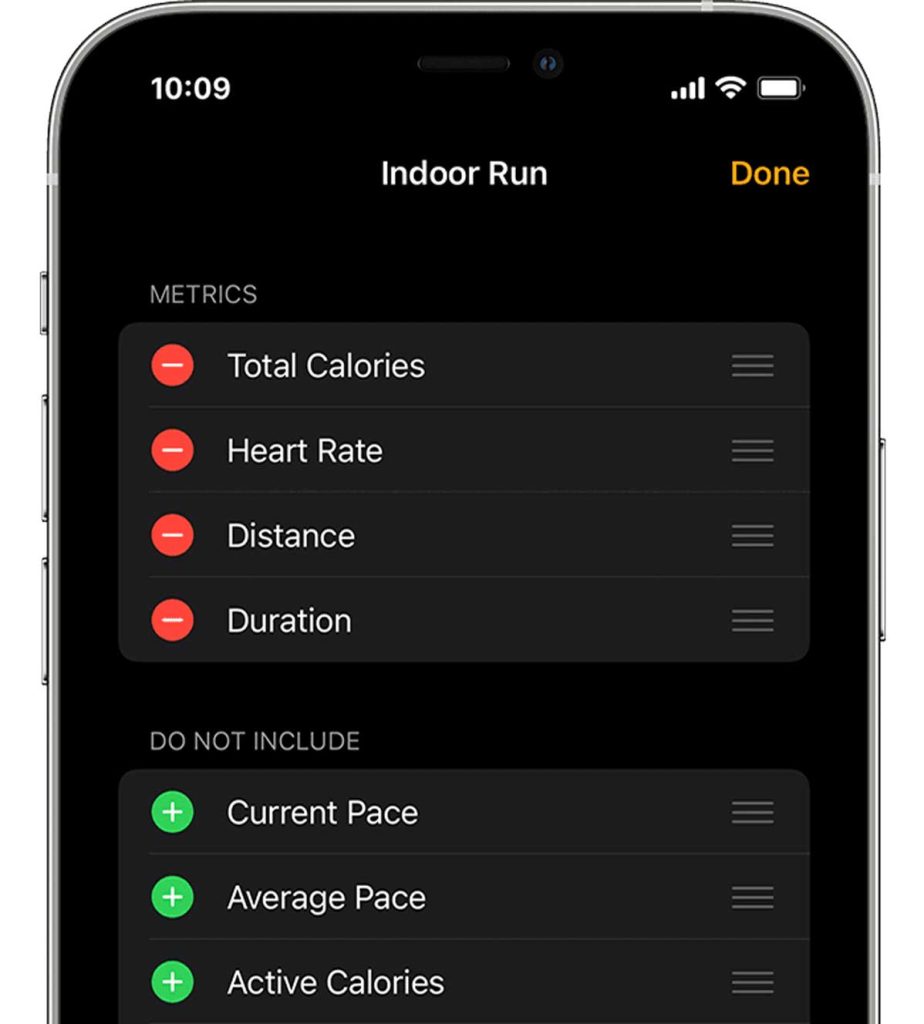
Additionally, watchOS 9+ brings new workout views where you can pick and choose the metrics for different training experiences that matter to you. Include or exclude metrics and then see all your chosen metrics by turning the Digital Crown for things like Activity rings, Heart Rate Zones, Running Power, Elevation, Splits, and segments.
Apple designed this custom workout feature to provide you with the best optics if you are a runner. This article explores how you can use your Apple Watch to design and measure interval training.
Contents
- 1 Workout views in earlier watchOS versions
- 2 What is Interval Training?
- 3 Interval Training for Beginners
- 4 How to use custom workouts in watchOS 9+ for Interval Training
- 5 Customizing High-intensity work zones and recovery zones
- 6 How to personalize metrics using Workout Views for your custom workout
- 7 How to use Custom Alerts in workouts to track your heart rate zone
- 8 Final thoughts
Related Reading:
- How to change the Apple Watch Workout app on-screen stats and metrics
- Complete Guide to Apple Watch Heart Rate Zones
- How to check running power and cadence on your Apple Watch
- How to check your Cardio Recovery scores on your Apple iPhone
- Lower your Blood Pressure using these Inspiratory Breath Training devices (IMST)
Workout views in earlier watchOS versions
If you have not or cannot update your Apple Watch to watchOS 9 or above, Apple only allows you to change your Workout Views using the Watch app. You cannot make these changes on the watch itself.
For older watchOS versions (watch 0S8 and below), change the workout view following these steps:
- Open the Watch app on your iPhone.
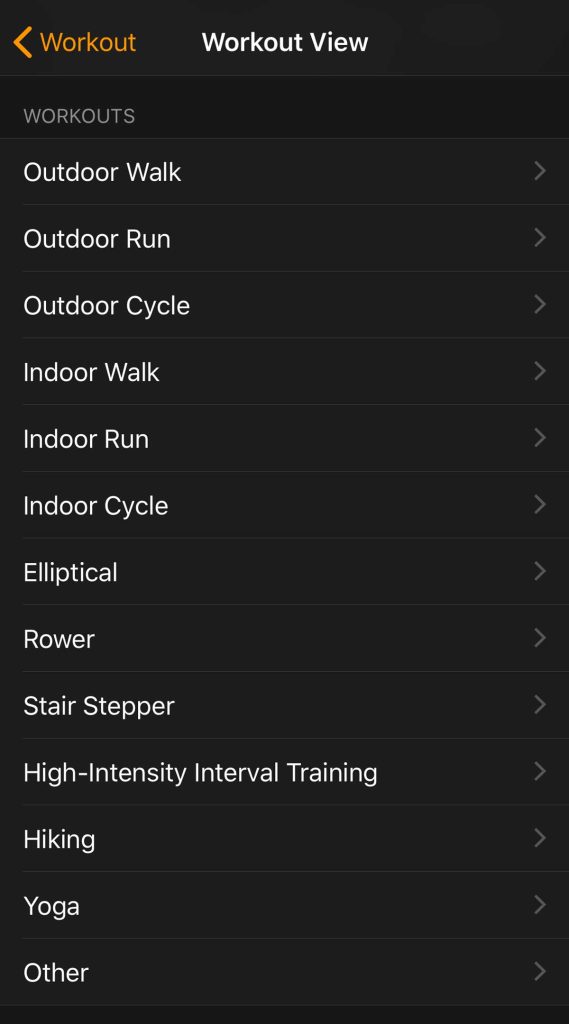
- Tap My Watch, then go to Workout > Workout View.
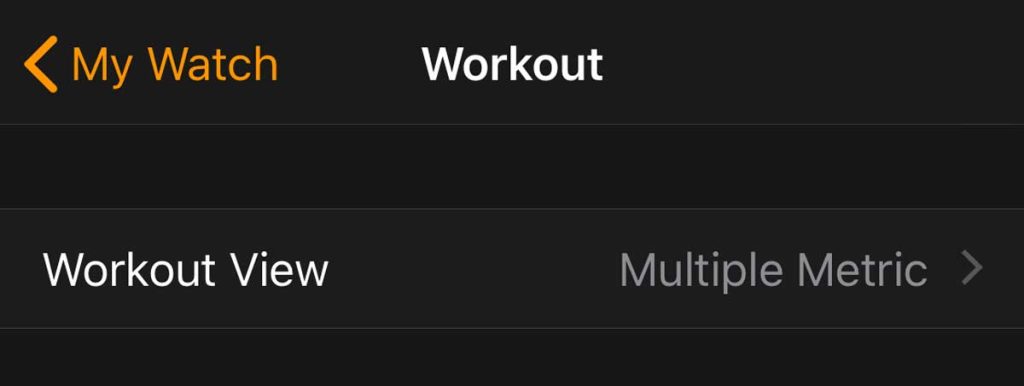
- You can show a single metric or multiple metrics.
- Choose which stats you want to show for each workout type. Tap the workout type, tap Edit, add or delete stats and drag to reorder. You can choose up to five metrics for each workout.
- To add a metric, tap the plus sign next to it.
- To remove a metric, tap the minus button next to it, then tap Remove.
- To reorder the metrics, press and hold the Change Order button (three horizontal lines) and drag and drop the metric into your desired order.

- Repeat for each workout type or at least the workout types you train regularly.

In watchOS 9+, Apple removed the ability to change Workout Views in the Watch app. You can only make updates on the watch.
What is Interval Training?
According to Mayo Clinic, Interval training is simply alternating short bursts (about 30 seconds) of intense activity with longer intervals (about 1 to 2 minutes) of less intense activity.
A HIIT(High-intensity interval training) workout alternates between short work intervals (70 to 90 percent max heart rate) and rest periods (60 to 65 percent max heart rate).
You can incorporate various HIIT types into your training regimen, including Cardio HIIT, full-body HIIT, HIIT with weights, and HIIT for runners.
Before Apple added this new feature in watchOS 9, serious runners had to depend on third-party apps to help them with interval training. Some popular apps include Keelo for Strength training HIIT workouts, Interval Timer, Tabata HIIT, and Interval Timer++.
Word of Caution: driving the heart rate too high and keeping it there too long can spike the production of stress hormones, tax the immune system, and increase the chance of injury.
Instead of building the cardiovascular system, overdoing these workouts can be detrimental to heart health and a tax on the endocrine system.
Interval Training for Beginners
If you are new to interval training or HIIT, you can start with a basic interval training regimen. Here is an example:
- Complete 3 – 5 minutes of warmup via light jogging.
- Run 30 seconds at 75% intensity followed by 30 seconds at 25% intensity.
- Repeat for 3 cycles on week one.
- Perform the workout twice weekly, adding a cycle every week for four weeks.
You can add more cycles to your training plan as you get comfortable.
How to use custom workouts in watchOS 9+ for Interval Training
You can access and design custom interval training sequences from your Apple Watch.
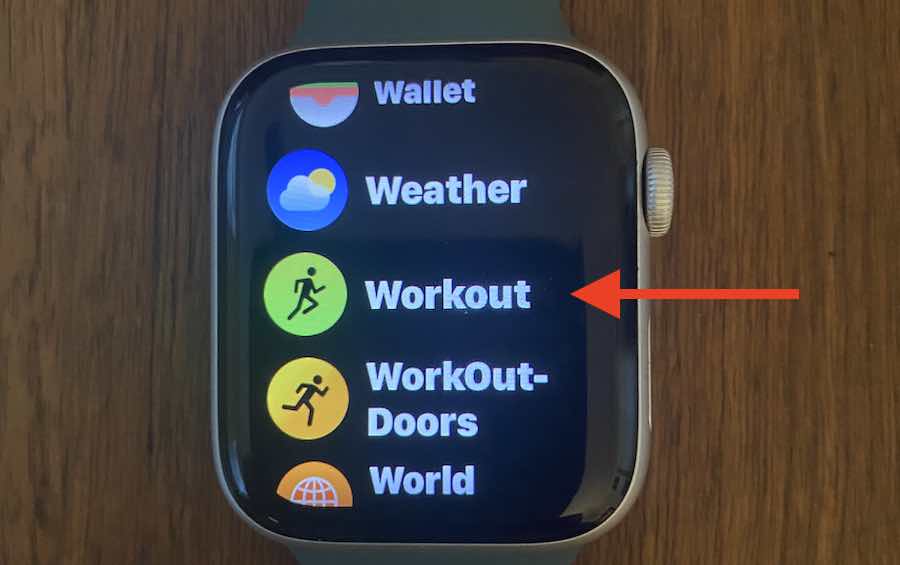
- Launch the Workout app on your Apple Watch.

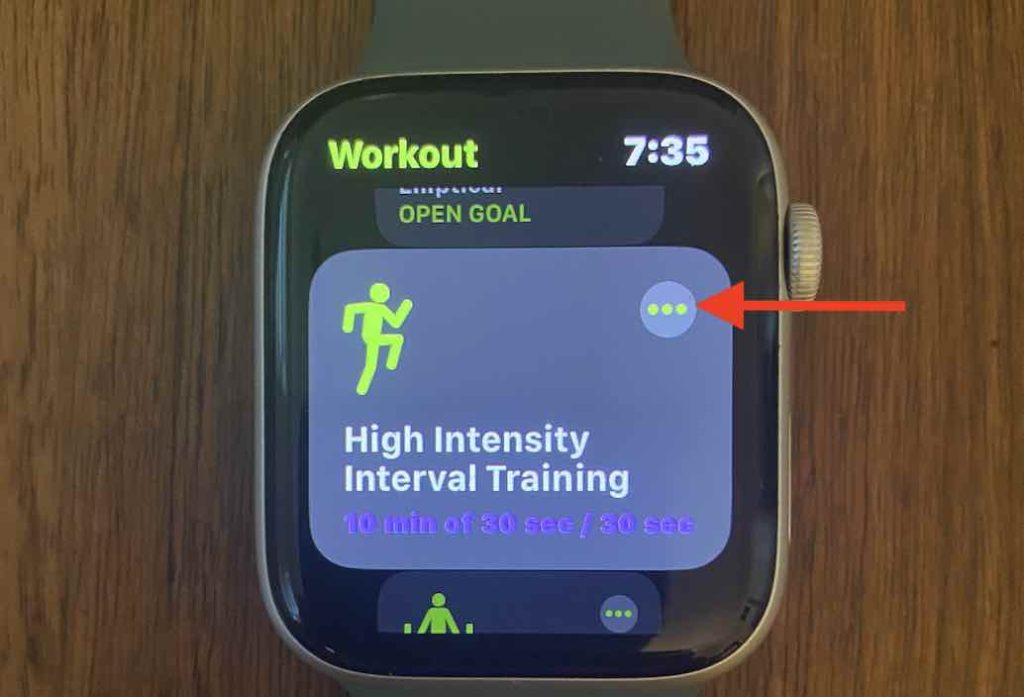
- Scroll down and locate the High-Intensity Interval Training program.
- Tap on the More button (three dots icon) at the right corner of your screen to customize your HIIT.

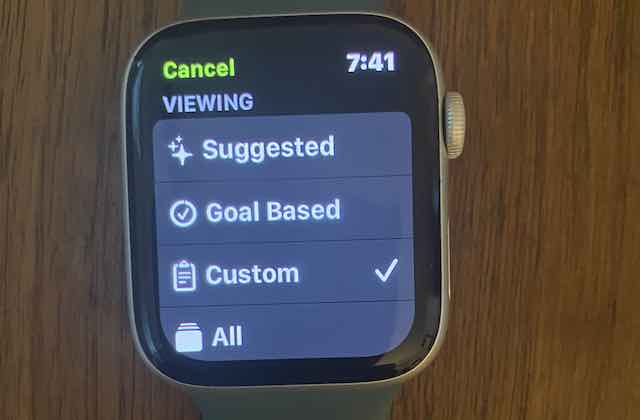
- Next, tap on the Suggested icon, and it provides you with the following choices:
-
-
- Suggested
- Goal-Based
- Custom
- All
-
-
- The Goal-Based training program provides you with two choices.
- You can stipulate the duration or specify the total number of active calories you want to burn.
- For our purpose, we chose Custom.

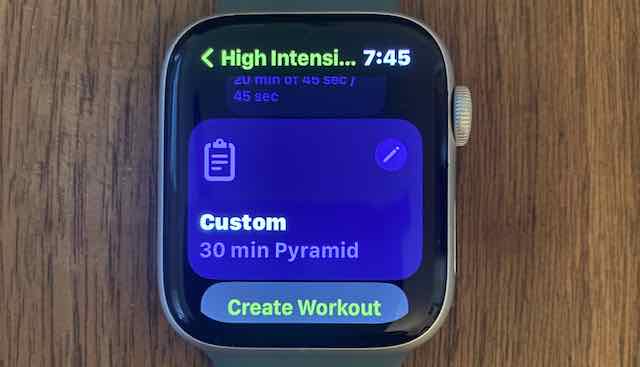
- The Custom workout provides you with six default options that you can choose from:

-
-
- 10 min of 30 sec / 30 sec – This means that you perform at 75% of maxHR for 30 seconds and then spend 30 seconds at recovery (moderate heart rate targeting 25% of your maximum heart rate). You repeat this for 10 minutes.
- 10 min of 40 sec / 20 sec – Here, you are increasing the training load by 10 seconds and reducing the resting period by 10 seconds.
- 20 min of 20 sec/10 sec.
- 20 min of 45 sec/ 45 sec.
- 30 min Pyramid workout.
- Create your Workout.
-
-
The choices that Apple provides above are pretty good for users who are just starting a HIIT program.
Additionally, you can customize any of these defaults to your preference.
For example, when you choose 10 min of 30 sec/ 30 sec from the option, tap on the Edit button to start customizing this.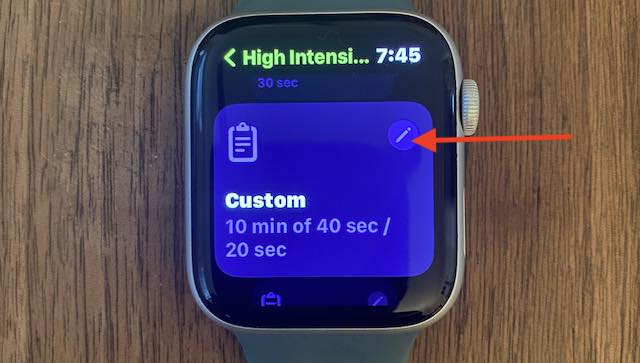
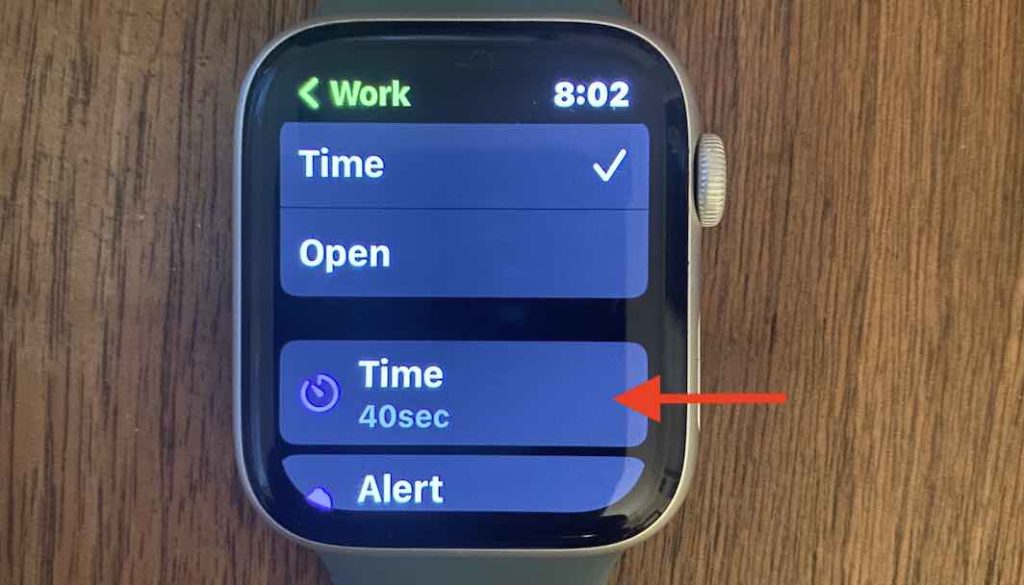
By default, the warmup time at the beginning of the program is set to 1 min. Tap on Warmup and scroll down and tap on Time.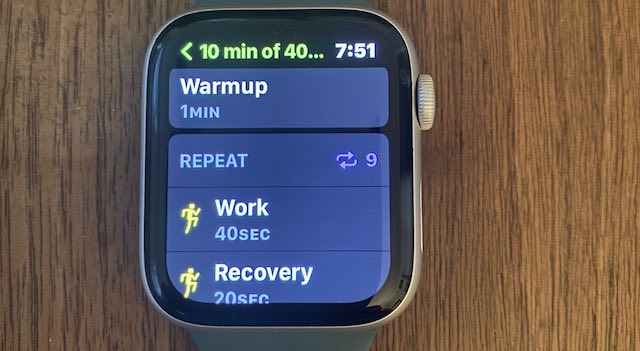
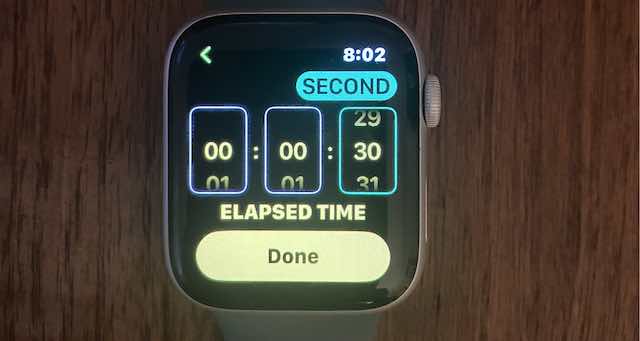
You can set up your custom warmup time using the Elapsed Time screen.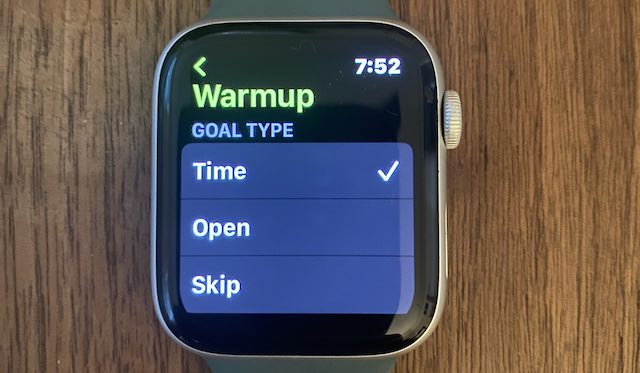
So, from our example of interval training basics from the prior section, we can customize the warmup time to 5 minutes.
You can also select Skip not to use warmup at the start of the workout.
Customizing High-intensity work zones and recovery zones
The next piece of customization includes setting time up for high-intensity and recovery zones.
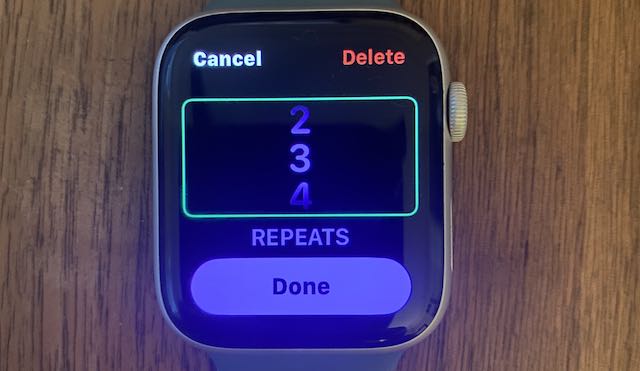
- Start by tapping on the 9x next to Repeat to change the number of cycles.

- Here you can change the number of cycles from 10 to your choice. We chose three cycles or three repeats in Apple parlance in our example.

- Once you have chosen the repeats, tap on Done.
- The next step is to customize the time for Work and Recovery.

- Tap on Work and for the time duration, change it to your preference. In our example, we kept it at 30 seconds.

- Next, tap on Recovery and set your own time for it.
- Tap on Cooldown and set a time window for it.
Now that you have designed your basic interval training, you can name the workout instead of using the custom tile 10 min of 30 sec/ 30 sec.
Tap on Custom Tile further down on the screen and rename the workout to your preference.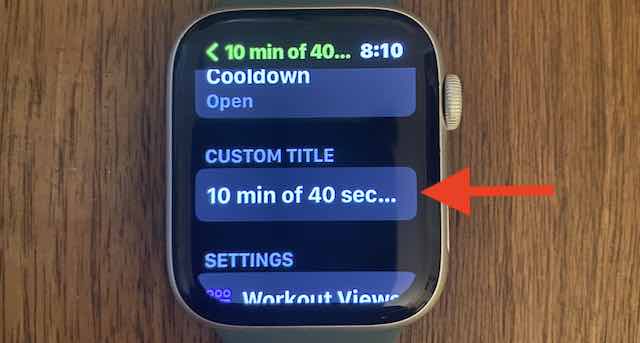
In our example, we renamed this to Niel’s HIIT Basic.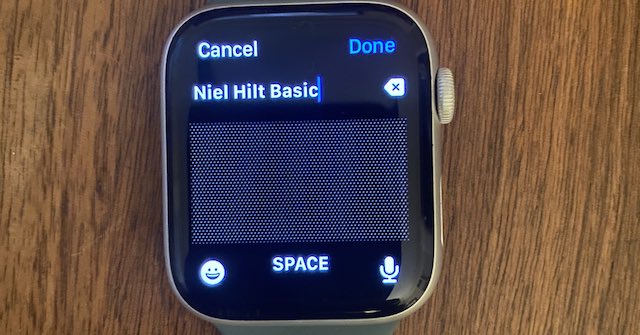
With these steps, you essentially create your own custom HIIT workout sequence!!!
How to personalize metrics using Workout Views for your custom workout
Now that you have designed a complete HIIT sequence and assigned the number of cycles let’s look at how you can personalize the metrics on your Apple Watch when you start this training.
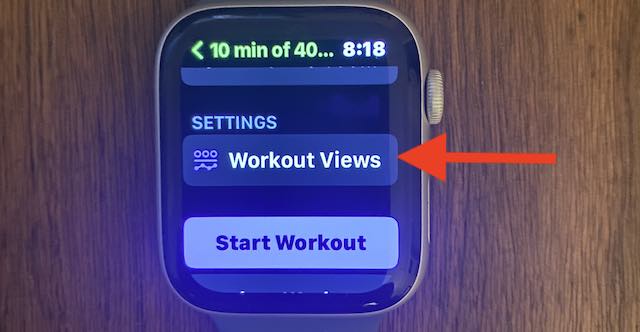
Open up the HIIT training that you just created and scroll down and locate Workout Views.
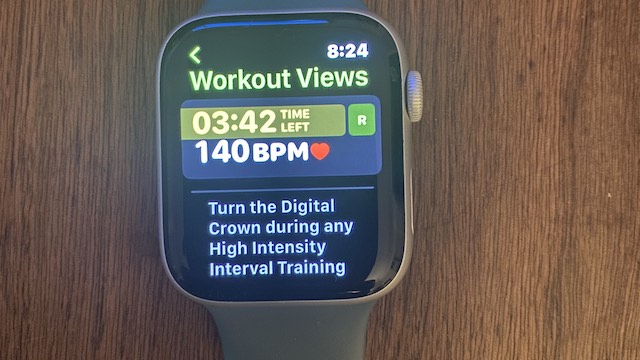
- Tap on Workout Views to get started.

- Next, tap on Edit Views at the bottom of the screen.

- Here you can see all the metrics that are included.
- While working out, you can turn the digital crown on your Apple Watch to scroll through these various metrics.

- Make sure to enable METRICS 2 here to keep an eye on your average Heart rate and Max HR.
- Tap on Include under Heart Rate Zones to bring the heart rate zone metrics into your screen.

- Scroll down to the end of this screen and tap on Reorder.
- Here you can drag and drop the metric views to arrange them to suit your preference.
- In our example, we moved the Heart Rate Zones to position one since we want to ensure that we are training in Zone 4 / Zone 5 during the ‘Work’ phase and Zone 2 / Zone 3 during the Recovery phase.
Using the step-by-step method in the prior section and this section, you have designed your custom HIIT workout and adjusted the metrics to track your heart rate zones during your custom workout.
How to use Custom Alerts in workouts to track your heart rate zone
watchOS 9+ on your Apple Watch also provides a feature to set up alerts that ping you during your training.
The Alerts feature available is tied to your heart rate.
For example, I want to ensure that when I’m in the Work phase of HIIT, I want to target Zone 5 for 30 seconds.
When my HR reaches Zone 5, I would like to receive an alert. That way, I don’t have to constantly look at my Apple Watch.
Here is how you can set up heart rate zone alerts.
- Open the custom HIIT workout that you designed.
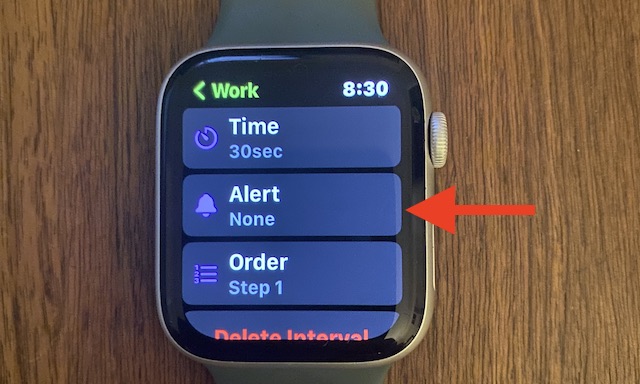
- Next, tap on Work and scroll down and tap on Alert.

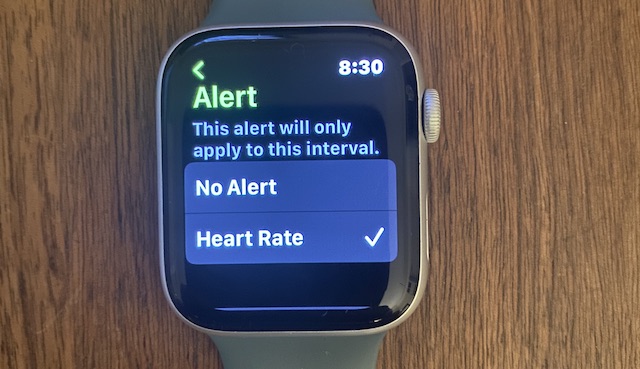
- Choose ‘Heart Rate’ as the alert type.

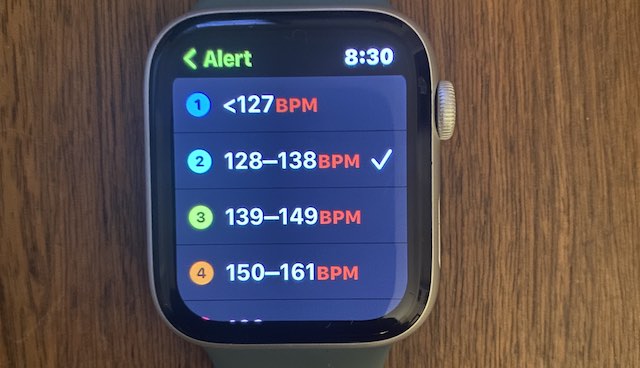
- Scroll down on the screen and choose the heart rate zone for which you want the alert to be triggered.

- By default, it displays you Zone 1 through Zone 5. For ‘Work,’ you can choose Zone 4 / Zone 5 and for ‘Recovery,’ choose Zone 2.
- You can also choose a custom heart rate zone by manually setting up the Lower and Upper limits.
For more on setting up and managing alerts in the Workout app, see this article: How to turn on or off Apple Watch Workout app alerts like splits, heart rate, or time
Final thoughts
Apple does a fantastic job in providing a rich set of customization options in watchOS 9 to guide you through your custom workout.
If you have not tried the HIIT workout, we recommend giving it a try with watchOS 9 since you can now access the heart rate zone data and alerts.
We hope that this step-by-step tutorial to create custom HIIT workouts, customize workout metrics and integrate heart rate zone-based Alerts was helpful to you.
Please let us know if you have any questions or would like to share a tip or two.

