
Checking your Fitbit’s current battery level should be easy. But, unfortunately, it’s not intuitive at all!
No one wants to find their Fitbit’s battery drained unexpectedly! So, it’s important we know how to quickly check the current percentage of battery life remaining directly on the Fitbit itself!
Contents
- 1 In a hurry?
- 2 How to check your Fitbit’s battery level while wearing it
- 3 Try using a clock face with a battery status indicator
- 4 Check your battery level in the Fitbit app
- 5 Connect your Fitbit to its charger
- 6 Get notifications and emails when your Fitbit’s battery is low
- 7 Is your Fitbit’s battery symbol red, flashing, or showing an exclamation point?
- 8 Need to charge your Fitbit frequently? Check out these tips to extend your Fitbit’s battery life
In a hurry? 
Here’s a quick rundown of our recommended ways to check your Fitbit’s battery
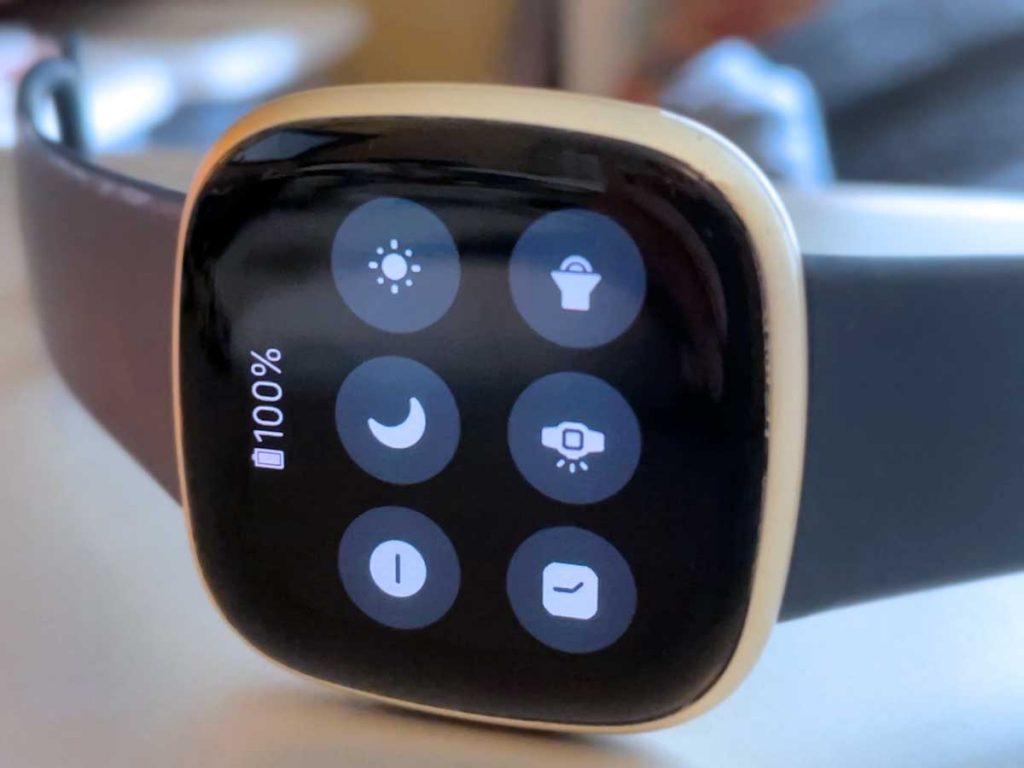
- Open and swipe to your Fitbit’s Quick Settings.
- Use a clock face that includes a battery indicator.
- Open the Fitbit app, tap the Devices icon in the top left, and look for your Device under Connected to Fitbit. Tap your device and review the battery information under your device’s info. This method only shows the general status of low, medium, and high–it does not show the percentage remaining.
- Place your Fitbit on its charger.
Related articles
- Fitbit not charging? What to do if your Fitbit won’t charge
- Fitbit doesn’t turn on the clock when you tap it? Screen wake not working? Let’s fix it!
How to check your Fitbit’s battery level while wearing it
For most newer model Fitbit smartwatches, including Versa Series, Sense Series, and Ionic, swipe to your Fitbit’s Quick Settings (usually a swipe down or swipe right) and look for the battery level icon or percentage at the top of the screen. 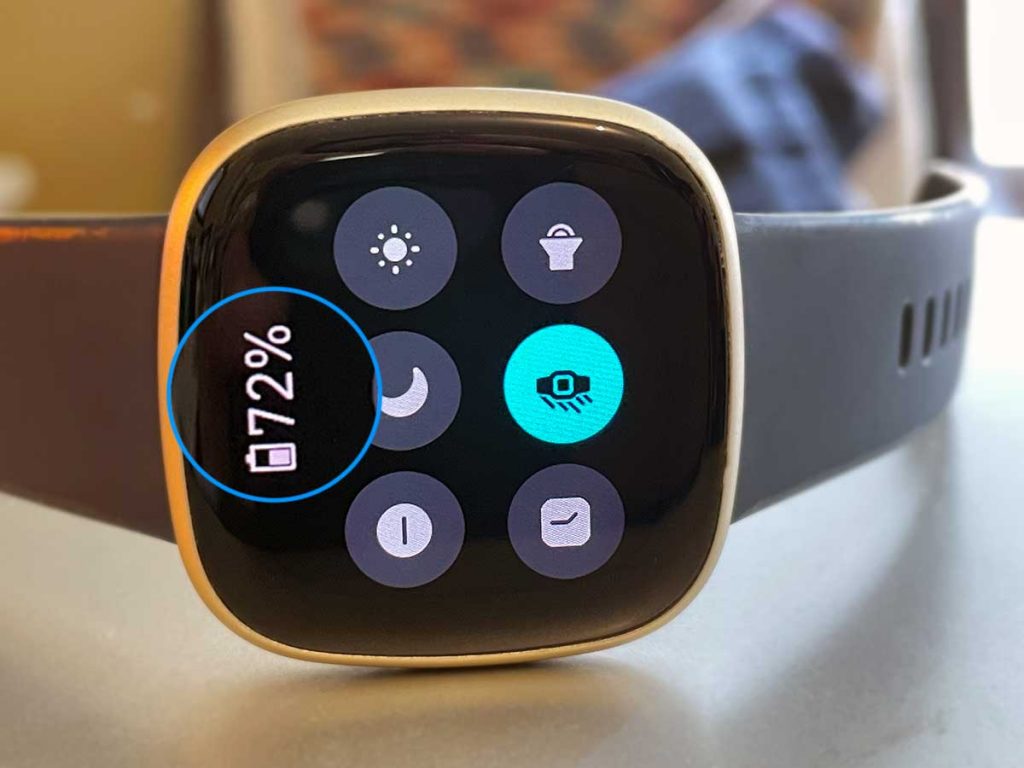
For most newer model Fitbit trackers, including the Luxe, Inspire Series, and Charge Series, swipe up on your clock face and find your device’s battery level at the top of that screen. 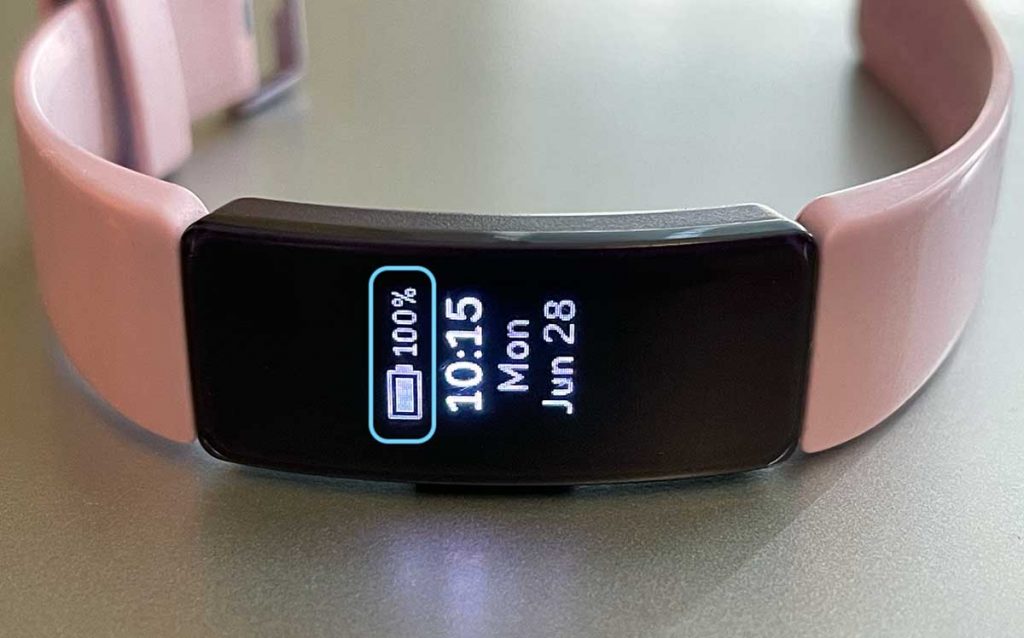
For older model Fitbits that run the legacy Fitbit app (not Google’s redesigned app), open the Fitbit app and turn on the battery screen option via Account > Menu Items > Battery. Once enabled, you will find a battery screen available on your device when you press and hold its side button.
Try using a clock face with a battery status indicator 
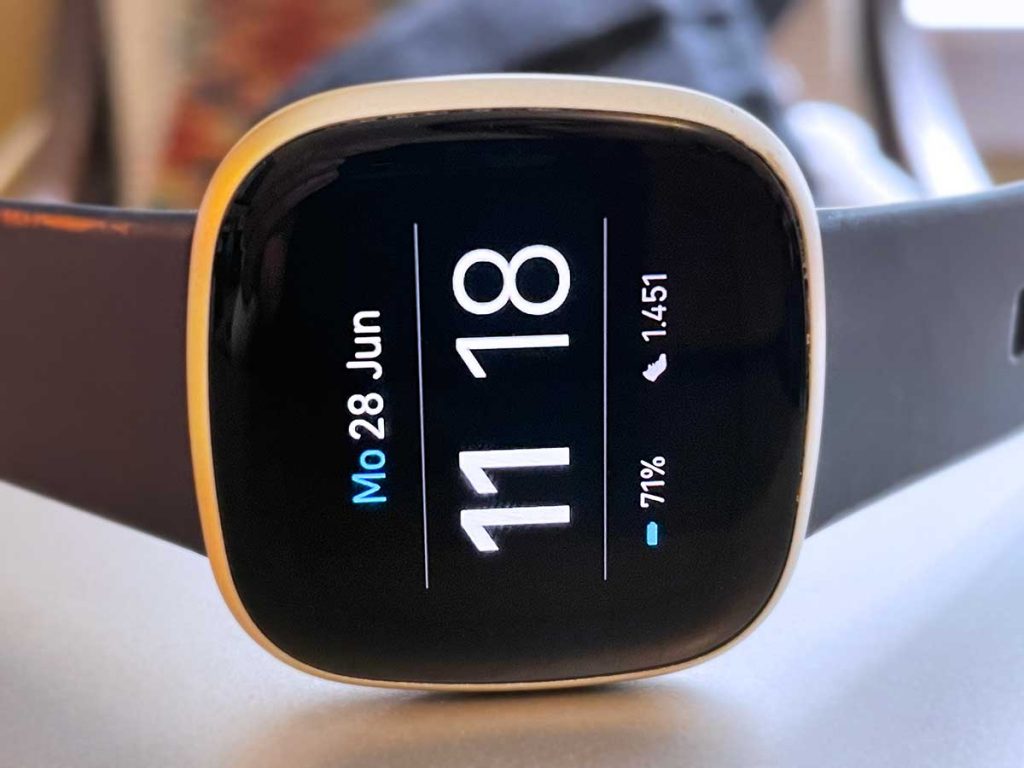
Having your battery level show up on your Fitbit’s clock face is the simplest way to monitor and keep track of how much battery your device has at any time.
Unfortunately, many of Fitbit’s clock faces don’t include a battery indicator! And at this time, it’s not an option to add a battery indicator or status icon to a clockface that doesn’t natively offer it.
So, if you want to see that battery information right away whenever you tap or lift your wrist to see your Fitbit’s screen, you’ll need to change its clockface.
To change your clock face to one with a battery indicator
- Open the Fitbit app and tap the Devices icon at the top left.

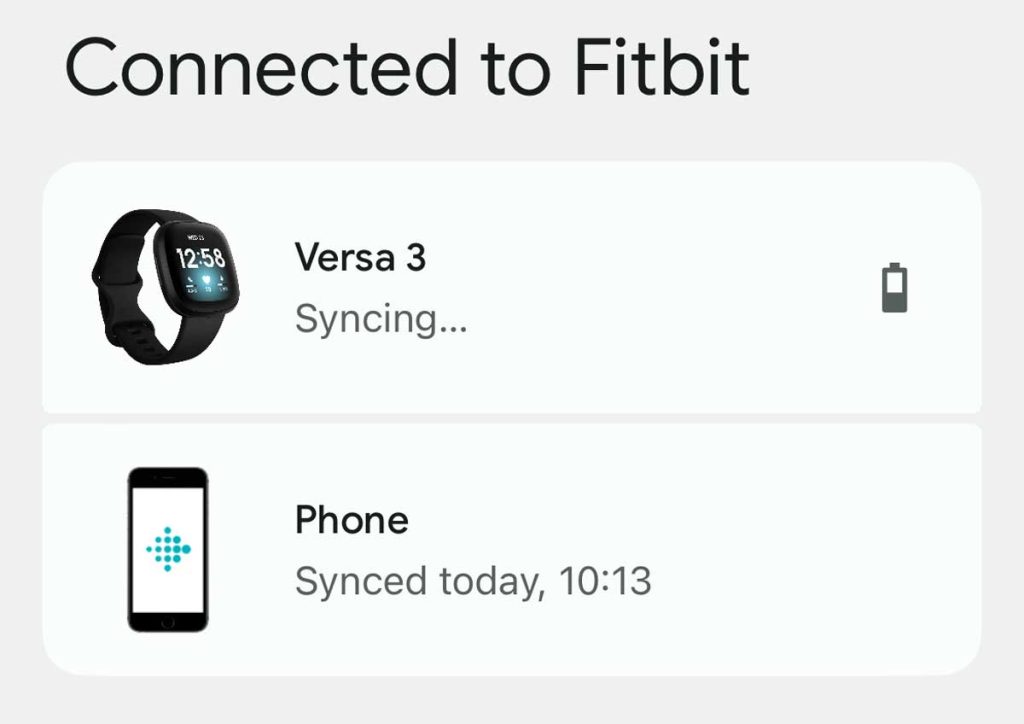
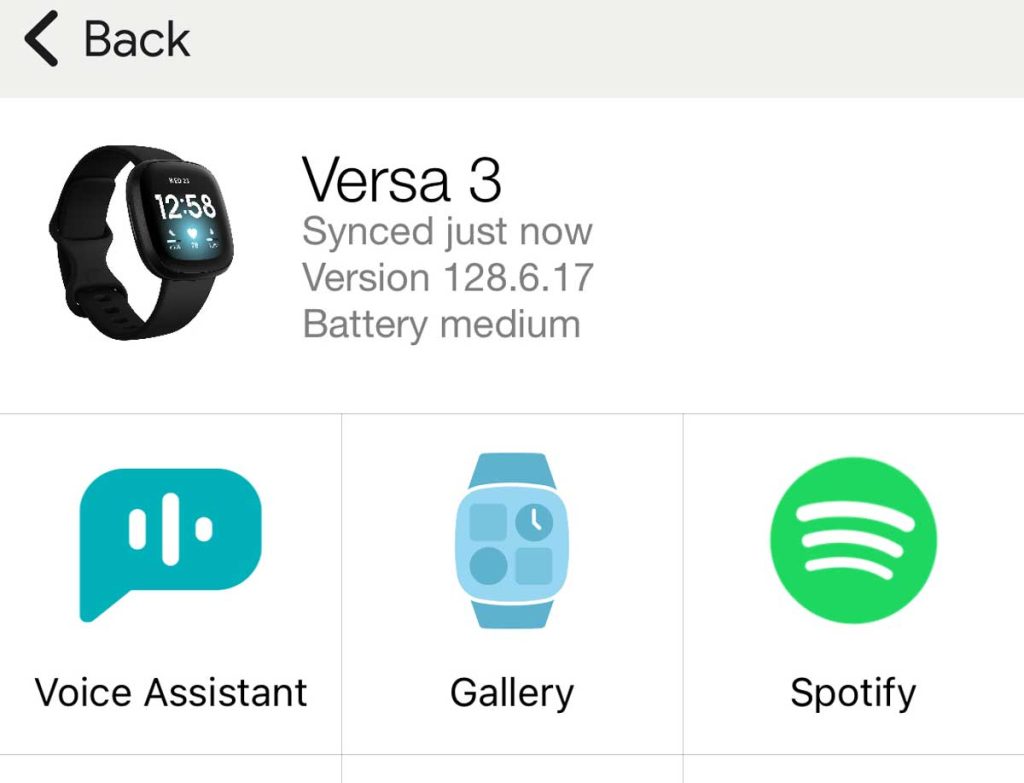
- Under Connected to Fitbit, choose your Fitbit device to see its details. You also see a battery icon next to your device that shows the general status of your Fitbit’s battery as high, medium, or low.

- Then, tap the Gallery tile. Under your Fitbit’s details, you also see the general status of its battery level (as high, medium, or low.)

- Select the Clocks tab.

- Perform a search using the term “Battery.” Then, scroll to see all your options.


This shows you all the clock faces available that support a battery indicator on-screen. Most of these clock faces are third-party, with some available for free while others require payment.
Choose a clock face that meets your needs and includes a battery status icon or percentage and any other on-screen stats you want to see (i.e., heart rate, step count, SpO2, and so forth.)
One final note: not all Fitbits offer a clock face with battery status.
In particular, most Fitbit trackers, like the Inspire or Charge Series, don’t offer any clock faces with a battery indicator.
However, when your tracker’s battery falls below 30%, a battery icon appears at the top of your screen. The icon often overlaps other stats and information on your Fitbit’s screen. ![]()
If you see this icon, it’s time to charge your device up!
Check your battery level in the Fitbit app
You can also check the general battery status whenever you use the Fitbit app.
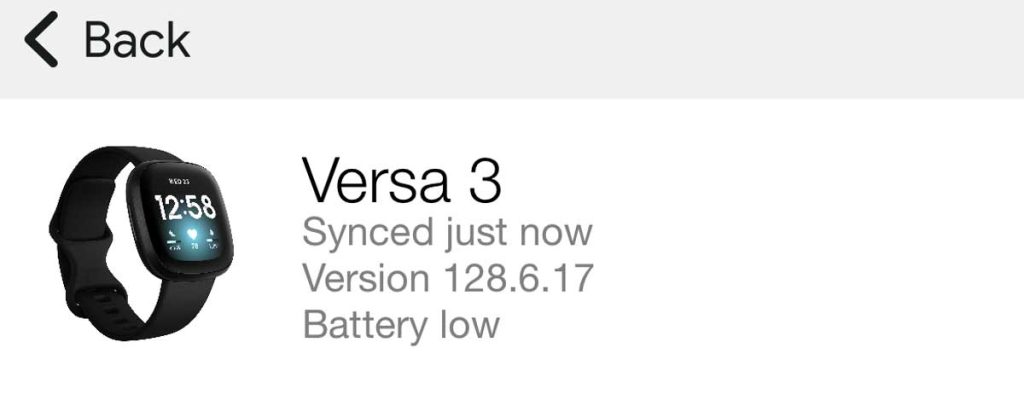
With the newest app version (redesigned by Google,) you no longer see the actual battery percentage of battery remaining but rather a status of low, medium, or high.
If you’re already using your paired phone for something else, checking your Fitbit’s battery general level is easy by opening the Fitbit app.
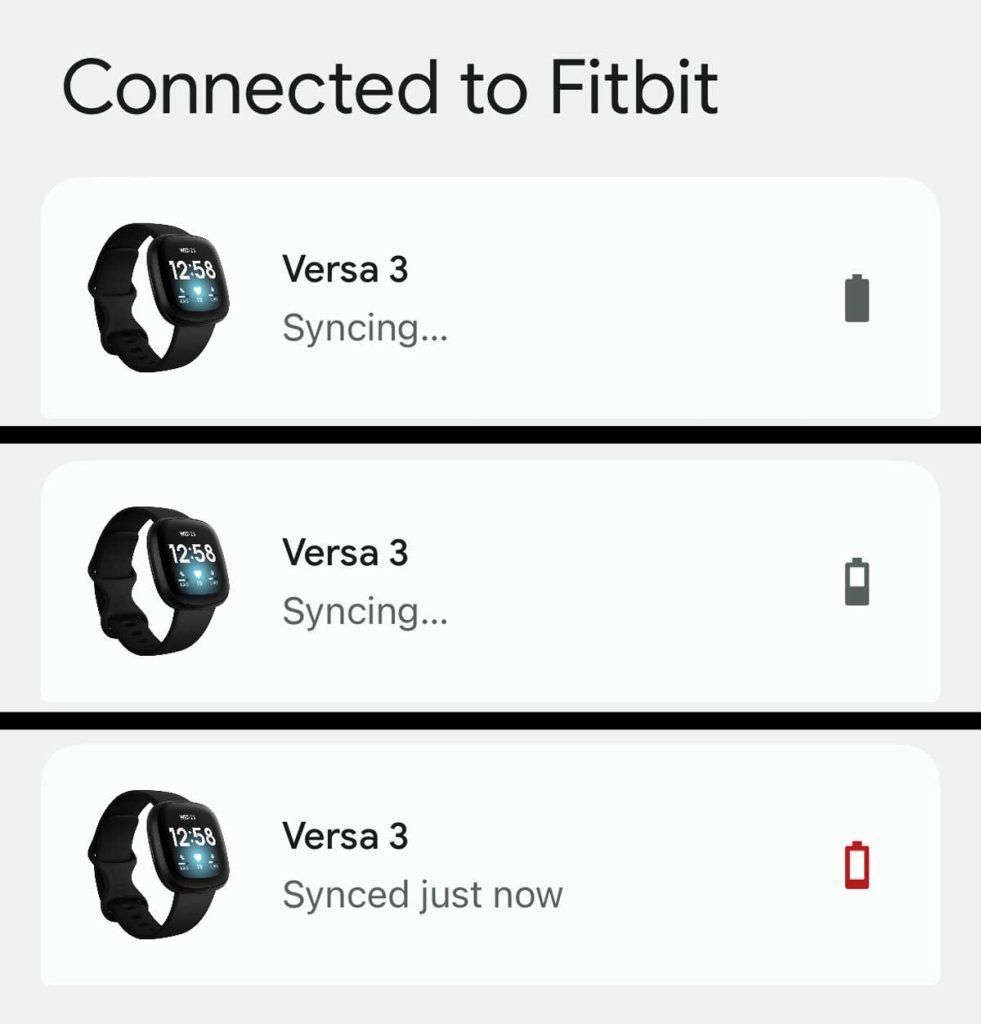
- Tap open the Fitbit app and choose the Devices icon in the top left.

- Look at the battery icon next to your Fitbit. How full the icon is indicates whether your battery has a high, medium, or low charge. A low charge is also shown in red.

- Tap your Fitbit to see more details.


If you use the legacy Fitbit app (not the Google redesigned app), swipe down from the top to see a banner with your device’s current battery charge level. 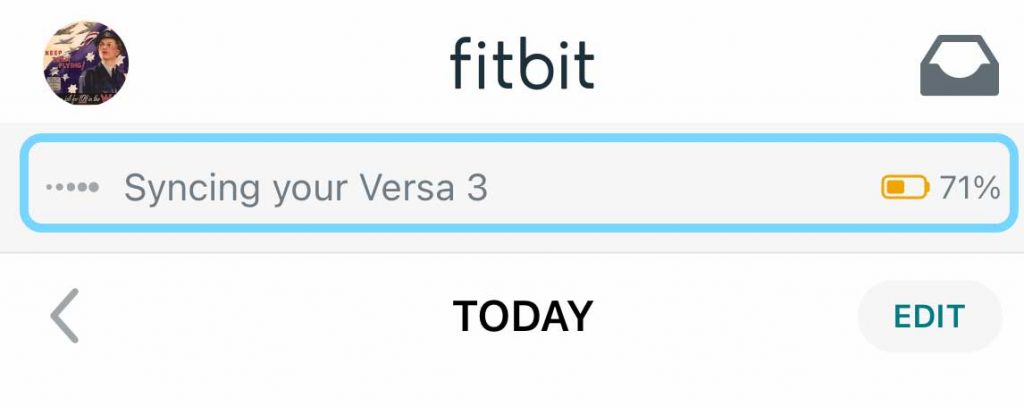
Connect your Fitbit to its charger
Another way to check your Fitbit’s battery level is by charging it. You should see the current battery level when you first connect it to the charger. 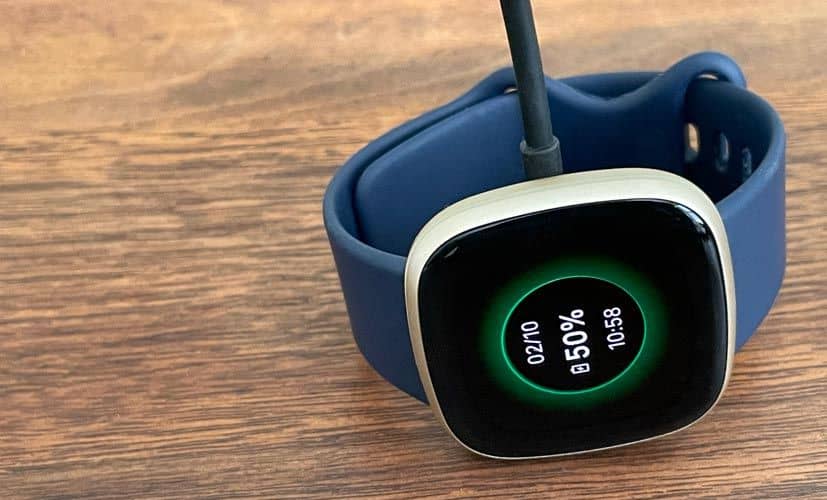
As your Fitbit charges, tap its screen twice or press the side button to turn it on. You’ll see the current battery level for several seconds. 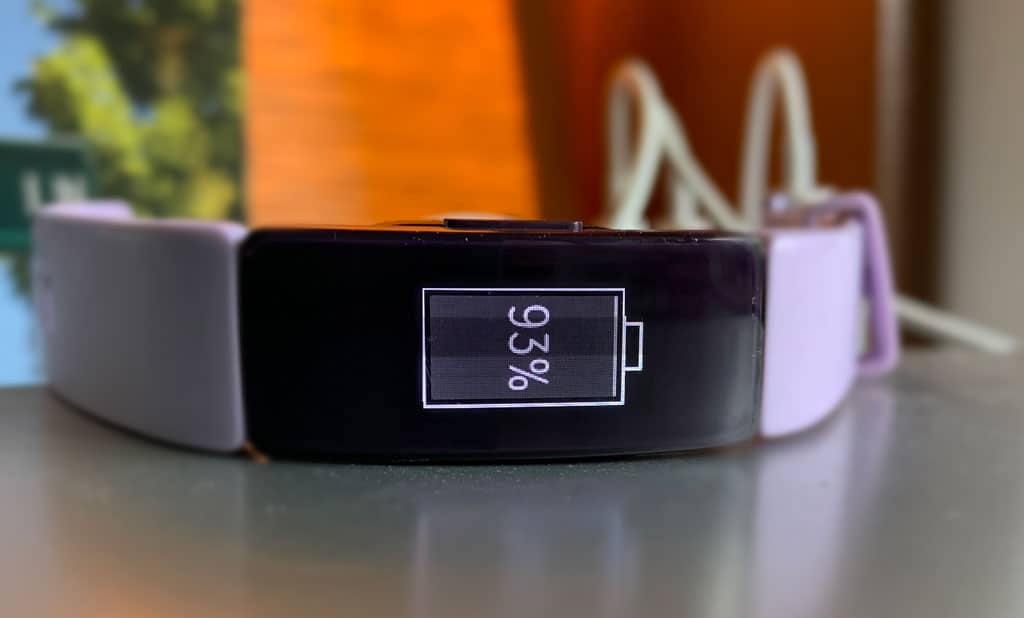
Get notifications and emails when your Fitbit’s battery is low 
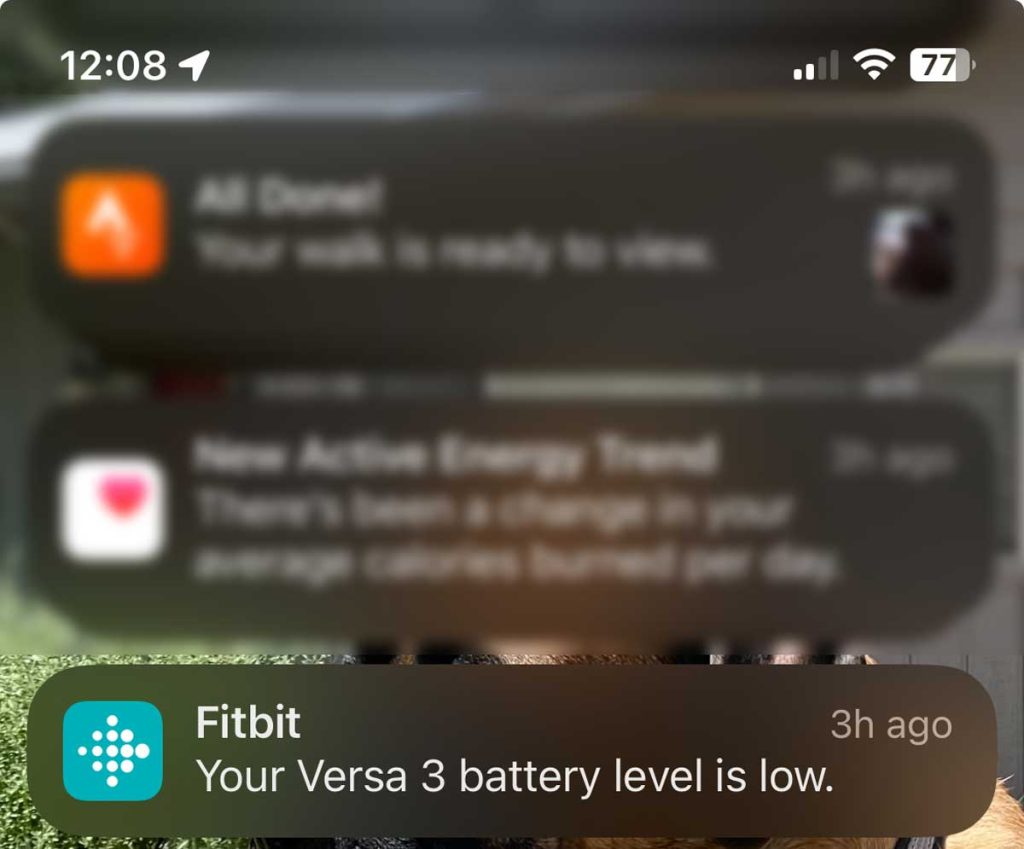
The Fitbit app can also send you a notification or email (or both) when it recognizes your low battery level.
You must allow the Fitbit app to run in the background to get these notifications so that the app can periodically sync with your device and get updated status information for things like your battery level and other activity/health stats.
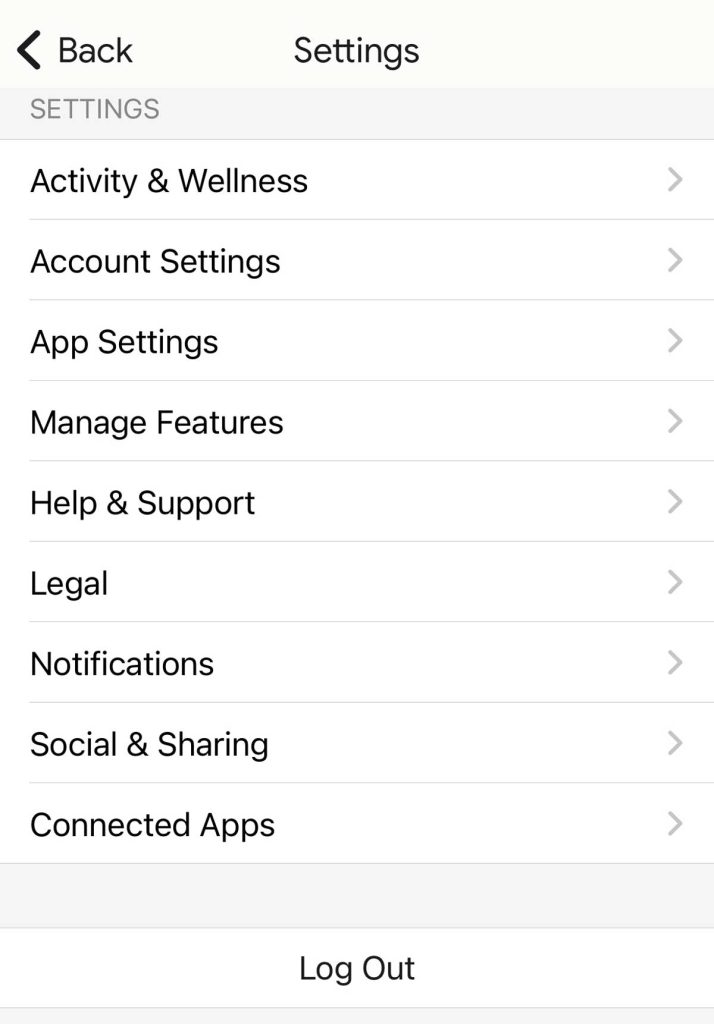
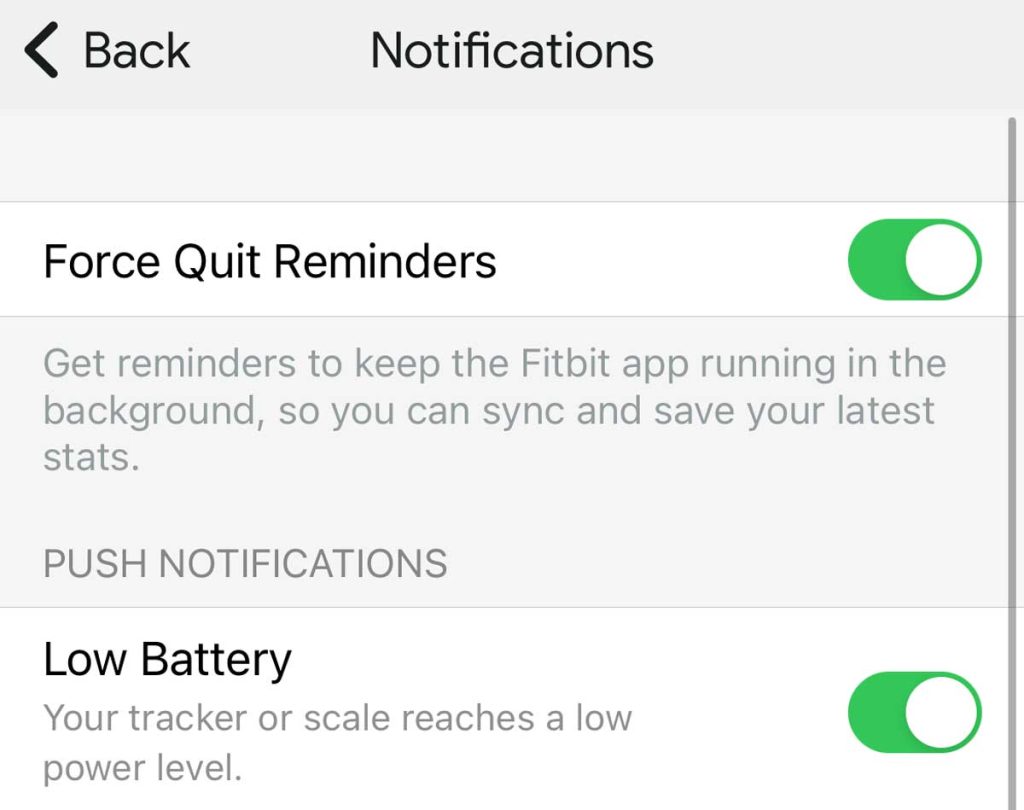
- Open the Fitbit app and choose the Settings Gear icon in the top right.
- Scroll down, and under Settings tap Notifications.

- Toggle on Force Quit Reminders to get reminders if the Fitbit app isn’t running in the background. Then, scroll down on the notification options and, under Push Notifications, toggle on Low Battery.

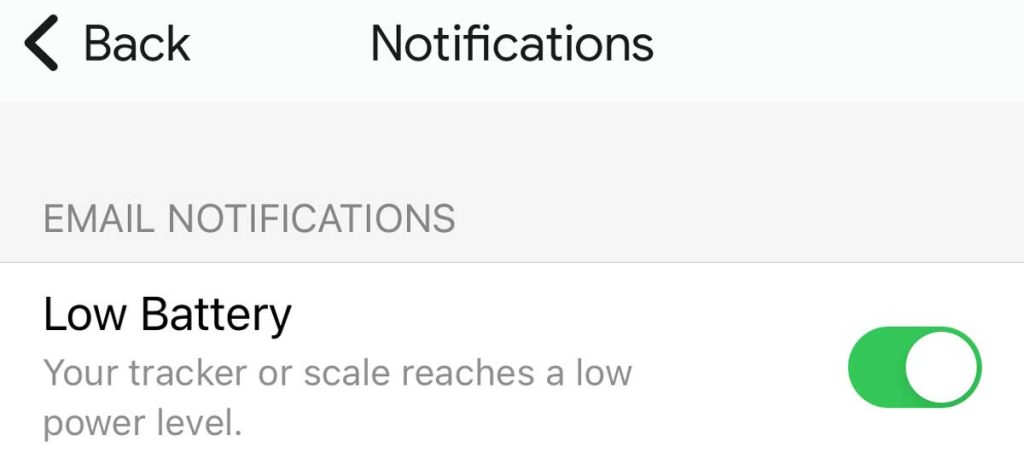
- To receive an email about the battery, scroll to Email Notifications and toggle on Low Battery.

Is your Fitbit’s battery symbol red, flashing, or showing an exclamation point? 
When you see your battery icon as red, that means it has less than 24 hours of remaining power.
When your Fitbit is critically low, the red battery icon flashes on and off or shows the exclamation symbol.
At that point, you must charge your Fitbit right away. Otherwise, the battery drains completely and zeros out, turning your Fitbit off. In that case, you may lose data.
If your battery has less than 25% of its total capacity remaining, it can no longer connect to WiFi to conserve the remaining battery power.
Additionally, when your Fitbit’s battery is low, it conserves power by:
- Disables notifications from showing on your Fitbit.
- Sets screen brightness to dim.
- Change the vibration strength to low/light.
- Turns GPS tracking off.
- Turns off the Always-on display.
- Disables quick replies.
- Disallows music controls.
Need to charge your Fitbit frequently? Check out these tips to extend your Fitbit’s battery life
You probably know that you should turn off or stop using some features to maximize your Fitbit’s battery life. But what exactly?
If you have ever wondered which features to turn off or reduce use, let’s review the top 6 battery-saving things you can do right now.
- Turn off Screen Wake.
- This feature lights up your Fitbit’s screen whenever you raise your wrist. So it’s probably turning on a lot of times when you don’t need it.
- When you disable the screen wake feature, you tap the screen to wake it.
- Disable screen wake via your Fitbit’s Quick Settings or the Fitbit app by toggling off Quick View. For a step-by-step on how to do this, see this article.
- Turn off Always-On Display if your watch supports it.
- Find this setting in your device’s Quick Settings or Settings app.
- Dim your Fitbit’s screen
- Bright screens use a lot of your battery’s energy. So try a lower brightness setting.
- Find this option in your device’s Quick Settings or Settings app.
- Learn about your screen brightness in this article.
- Get rid of all those reminders to move.
- Open the Fitbit app, choose the Today tab, and tap your account picture or icon.
- Select your Fitbit model from the list.
- Scroll down and turn off Reminders to Move.
- Change to a simple Made by Fitbit clockface.
- A clock face that shows a lot of stats or images consumes more energy than a simple one. So try a minimal clock face!
- Look for one listed under Made By Fitbit since these are optimized for your devices!
- Learn how to change your Fitbit’s clock face in this article.
- Turn off some or all of your forwarded notifications.
- You may love getting notifications for texts and calls, but do you need to get notified from every app? I doubt it!
- Open the Fitbit app and tap the Devices icon at the top left.
- Under Connected to Fitbit, tap your Fitbit.
- Scroll down and tap Notifications.
- Choose App Notifications.
- Review the list and toggle off all the apps you don’t need to see notifications for on your Fitbit. You’ll still get those notifications on your phone!
- Learn about enabling or disabling your Fitbit notifications in this article.


Please bring back tbe battery indicator on the app.