
While Fitbits work smoothly most of the time, sometimes things don’t go to plan, and you see a big red X on your Fitbit’s screen with the message that it’s not been able to clear its data.
Usually, you can get past this screen by syncing to the Fitbit app (or via Fitbit Connect.)
However, if your Fitbit is stuck on this red X and can’t clear its data or the message keeps reappearing, we detail some troubleshooting steps that fix this error and hopefully get your Fitbit watch working again.
So let’s get to it!
Contents
- 1 Quick checklist
- 2 Fitbit screen stuck on a red X and not clearing data? Check its pairing
- 3 Change your Fitbit’s clock face.
- 4 Re-pair your Fitbit to your phone’s Bluetooth
- 5 Replace your Fitbit in the Fitbit app
- 6 Remove your Fitbit from the Fitbit app and add it back
- 7 Reset your Fitbit
- 8 Contact Fitbit Support
Quick checklist 
Review this checklist before you start troubleshooting.
- Manually sync with the Fitbit app using the Sync Now feature.
- Fully charge your Fitbit.
- Update your phone, tablet, or computer to the latest Fitbit or Fitbit Connect app version.
- Verify that the Fitbit app runs or refreshes in the background.
- For Android users, clear the Fitbit app’s cache in Settings > Apps > Fitbit > Storage & cache > Clear cache.
- Close or force stop the Fitbit app and then open it again.
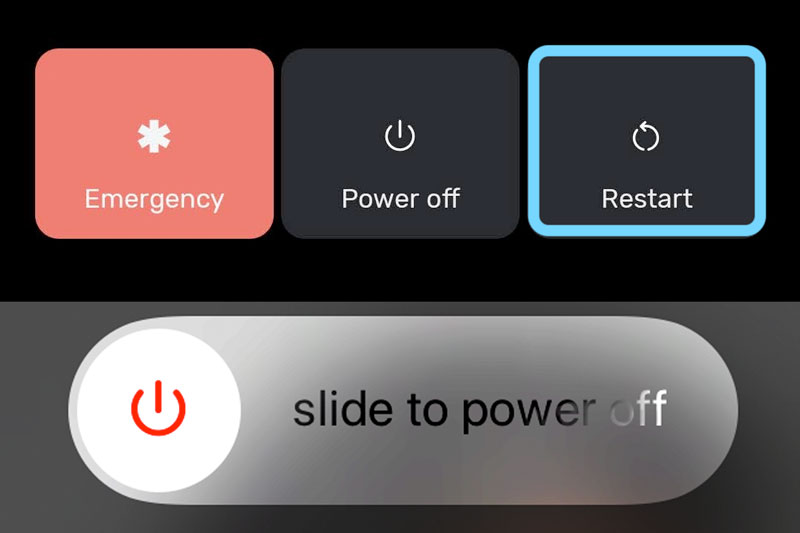
- Restart your phone (tablet or computer) AND your Fitbit.
- Turn off the Bluetooth from any other nearby devices that also have the Fitbit app installed.
- On the main phone, tablet, or computer you sync with, toggle Bluetooth off and on.
Related reading
- Does your Fitbit screen shut off too fast? Change this one thing
- Fitbit display screen black and not working or turning on? Let’s fix it!
- Fitbit Versa or Sense Series not syncing? How to fix a Fitbit that won’t sync
Fitbit screen stuck on a red X and not clearing data? Check its pairing
If you connect your Fitbit to more than one mobile device (like an iPhone and an iPad) or computer, that might be the problem.
It seems that Fitbits work best when they only connect to a single computer, phone, or tablet.
Decide which mobile device (or computer) is most important to you to house your Fitbit data and the app. For any other devices, either remove the Fitbit app entirely or remove your Fitbit from the app.
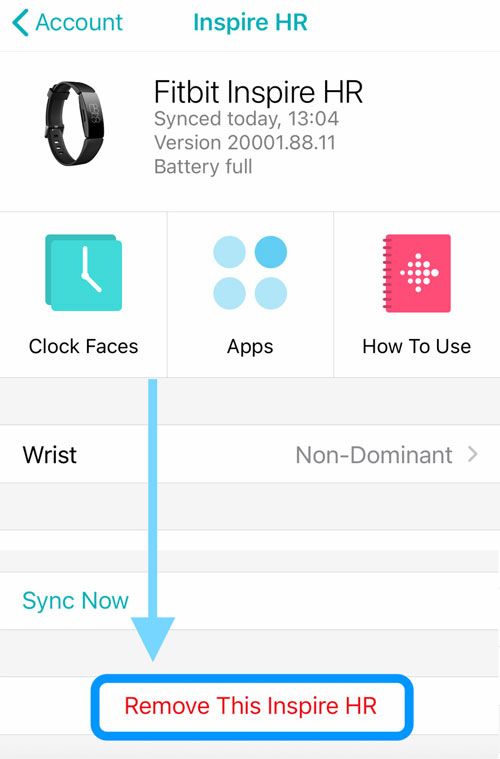
Remove a Fitbit from the Fitbit app
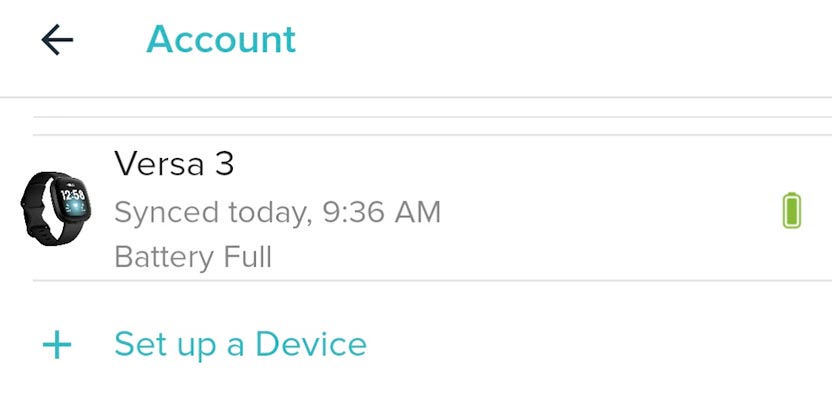
- Open the Fitbit app.
- Go to the Today tab and tap on your profile icon or picture at the top.

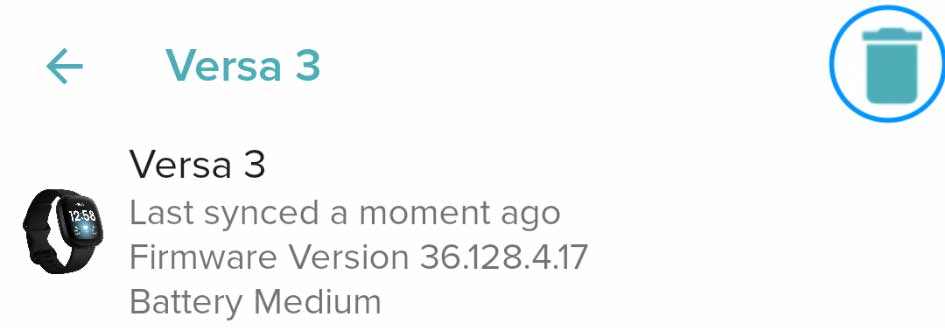
- Tap on the Fitbit device’s name.

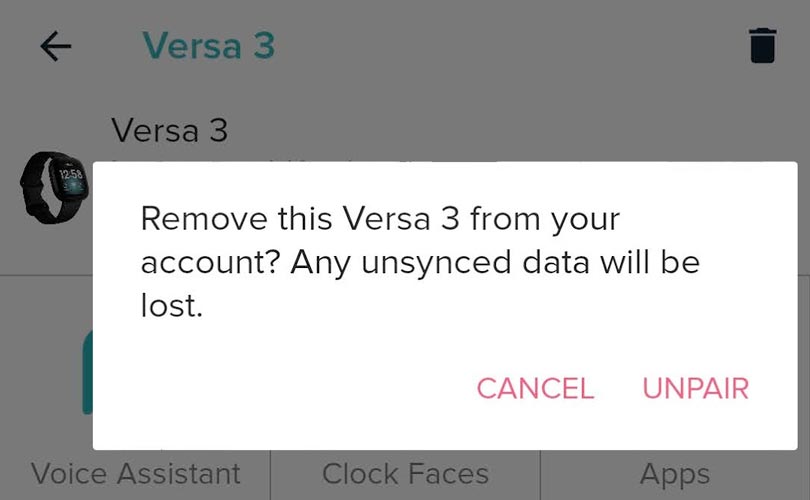
- For Apple devices, scroll down, choose the Remove This banner, and confirm. For Android, tap the trash can and confirm you want to remove and unpair the Fitbit.

- Open the device’s Bluetooth settings and verify it’s not listed as a connected device. If it is, tap it and choose to forget the Fitbit from the Bluetooth settings.


After removing the Fitbit from any additional computers, mobile phones, or tablets, try syncing your Fitbit with the single remaining device using the Fitbit app and see if it clears the red X from your Fitbit’s screen.
Change your Fitbit’s clock face.
Temporarily changing your Fitbit’s clockface often helps get your watch and the Fitbit app to refresh their connection.
How to change the clock face on your Fitbit
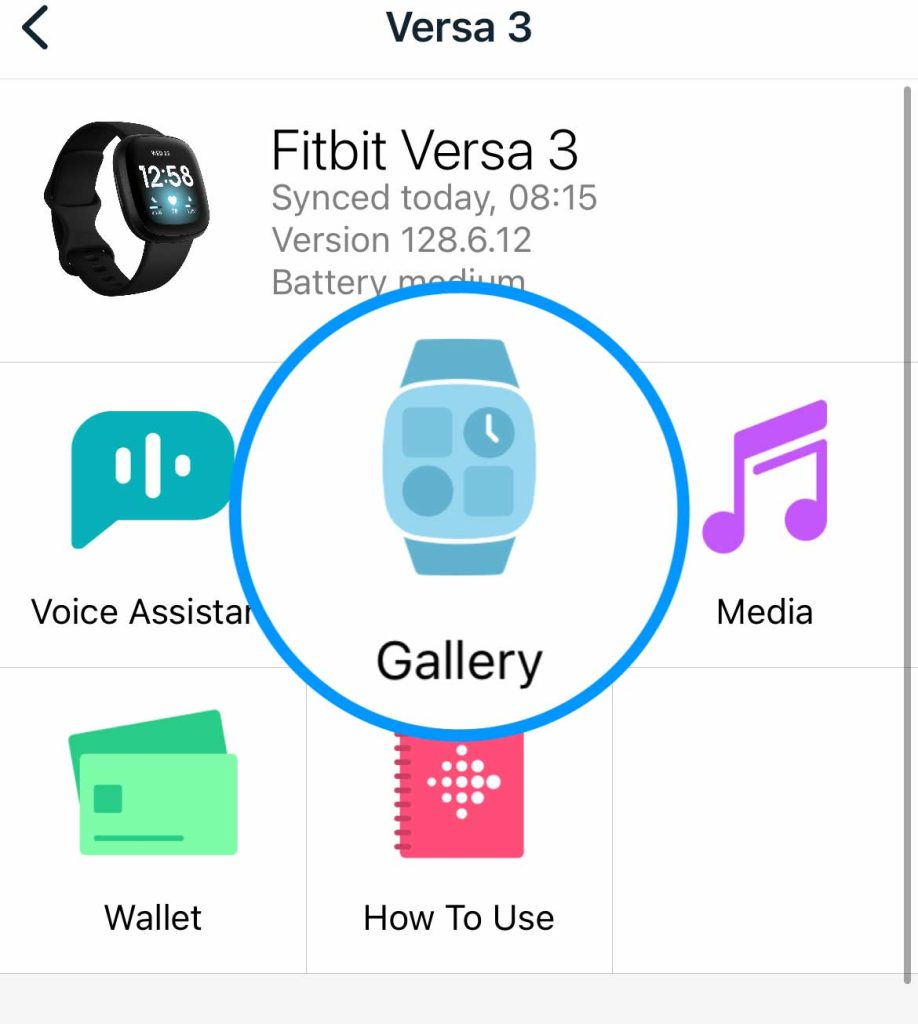
- Open the Fitbit app on your paired mobile device.
- Tap the Today tab > your account picture or icon at the top.
- Choose your Fitbit from the account list.
- Tap Gallery.

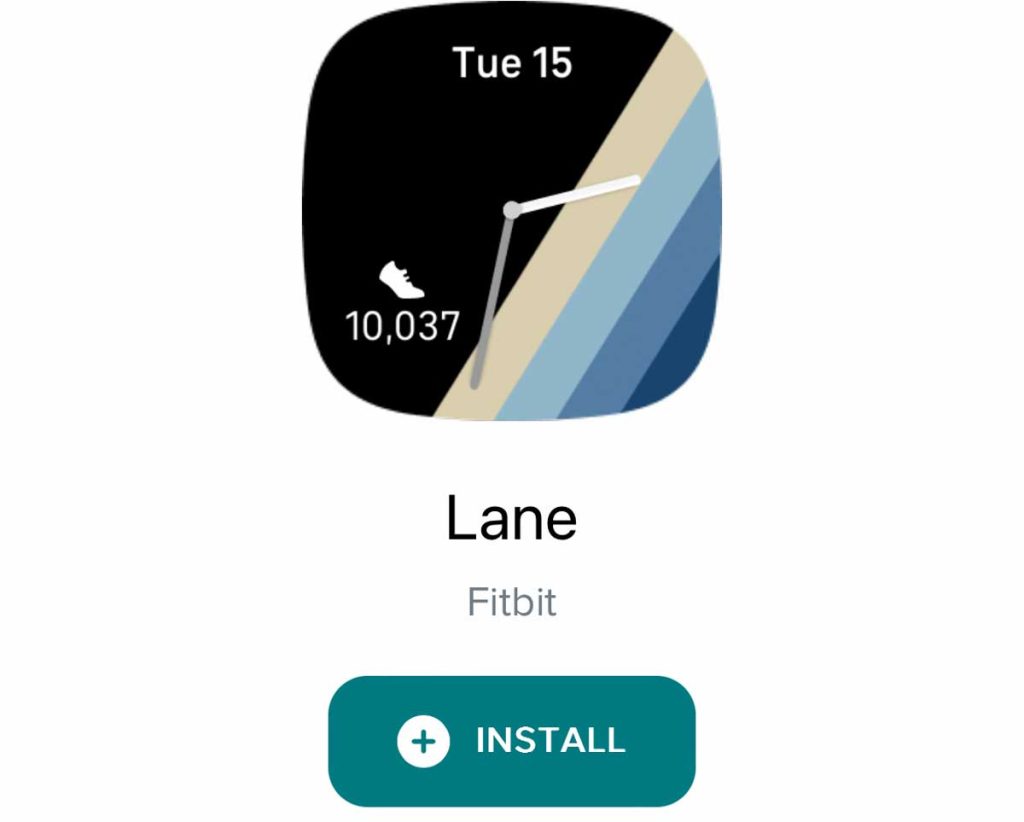
- Choose the Clocks tab. Select a new clockface from the By Fitbit options. Tap View All to see all the clock faces designed by Fitbit–these are always free.

- Tap and press install on the new clock face.

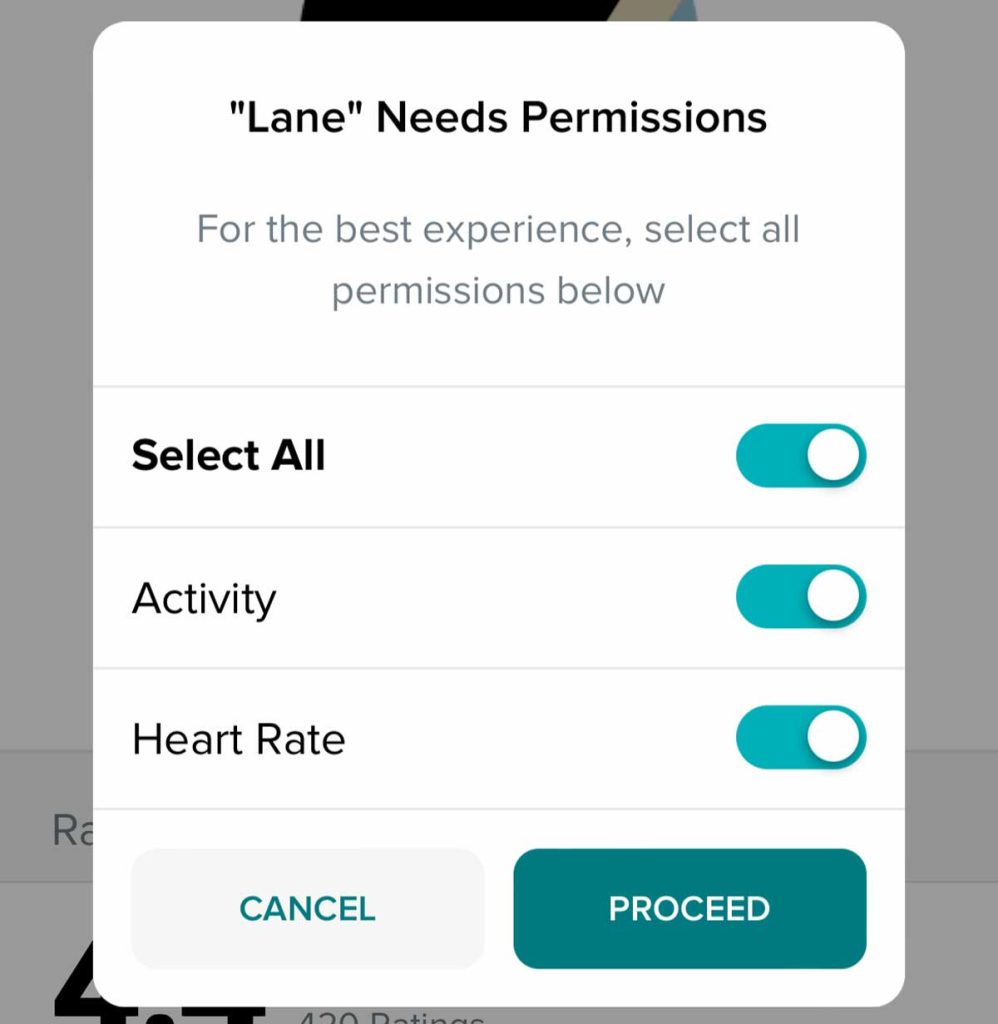
- Allow or disallow any requested permissions, if needed.

- Wait for the clockface to download to your Fitbit. Once complete, tap your Fitbit’s screen and see if you can now navigate it without the data not cleared error message.

If the new clockface solves the problem, you can repeat these steps and change the clock face back to your previous one, if desired.
For problems installing a clock face on your Fitbit, see this article Can’t change the clock face on your Fitbit? Let’s fix it.
Re-pair your Fitbit to your phone’s Bluetooth
- Open the Bluetooth settings on your phone, usually found in Settings > Bluetooth.
- Select your Fitbit from the list of connected Bluetooth devices.
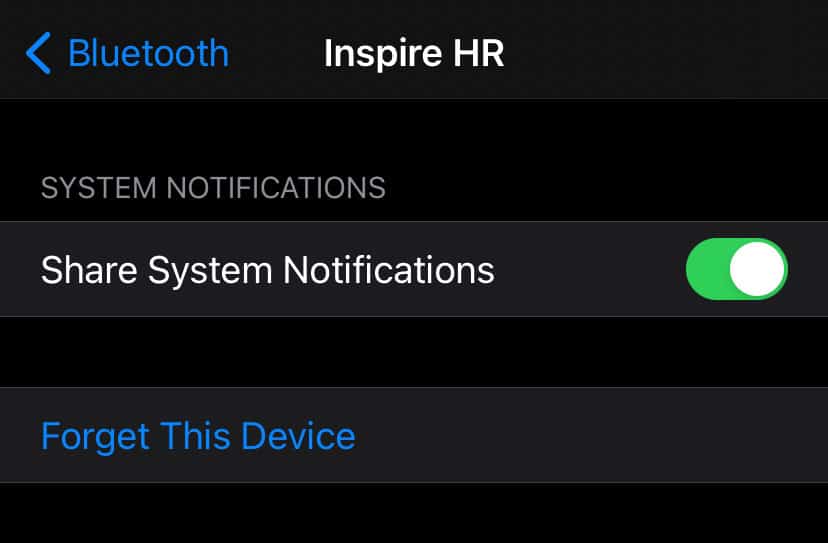
- Choose the option to Forget or Forget this device–forgetting unpairs your Fitbit from your phone’s Bluetooth.

- If you see a notification asking you to allow your phone to display notifications from your Fitbit, tap Allow.
- Open the Fitbit app.
- Do not connect to Bluetooth through your phone’s BT settings. You have to go through the Fitbit app for the pairing process to work correctly.
- Tap your profile picture or icon and choose your Fitbit device.
- Wait for a notification to start the Bluetooth pairing process and follow the screen’s directions to set this up again.

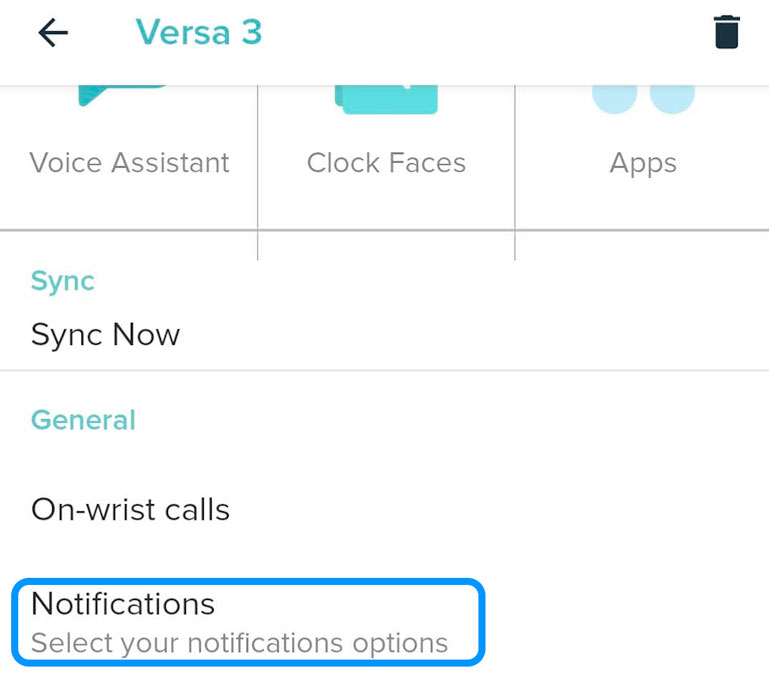
- If you don’t see a notification, tap the Notifications settings inside the Fitbit app to jump-start the pairing process.


After successfully re-pairing with Bluetooth, wait for your device to automatically sync with the Fitbit app or tap Sync Now.
Clear your Bluetooth cache (Android only)
Android phones and tablets also include an additional Bluetooth feature to clear just the Bluetooth cache.
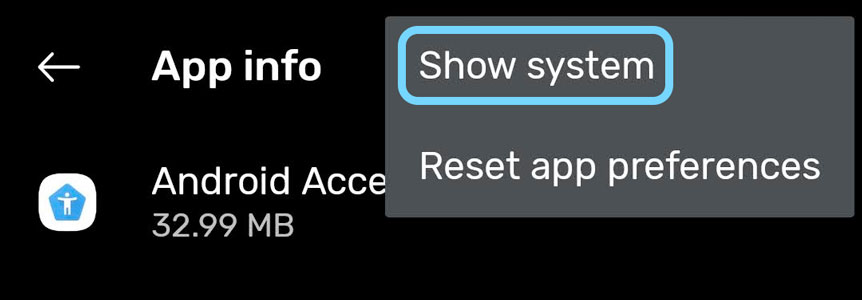
- Go to Settings > Apps & Notifications (or Apps.)
- Show all your apps.
- Tap the Menu or More button (the icon looks like three dots or three lines.)
- Chose Show system (or Show system apps.)

- Scroll the list and tap Bluetooth.
- Choose Storage & cache (or Storage.)
- Tap Clear cache.

Replace your Fitbit in the Fitbit app
We frequently see this data not cleared error when folks recently factory reset their Fitbits (also called clear user data) but forgot to remove it from the Fitbit app first.
This tip often works even when you did not recently clear your Fitbit’s user data (factory reset.)
If you factory reset your Fitbit without first removing it from your Fitbit account, follow these steps
- Open your phone’s Bluetooth settings and remove the Fitbit from the list of devices by tapping it and forgetting it.

- Open the Fitbit app and tap your account picture or icon at the top.
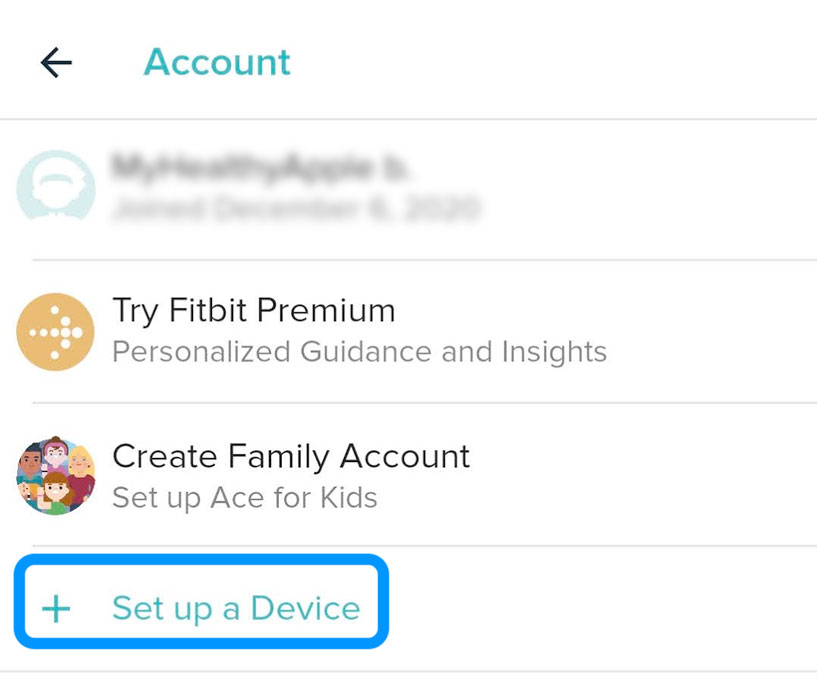
- Select Set Up a Device from the list of account options. If you see your current device listed, that’s okay but do not tap it.

- Choose your current Fitbit model from the list of options. If you don’t see your model, scroll down.

- Choose the option to Replace your Fitbit.

- Place your Fitbit on its charger and follow the on-screen instructions.
- Wait for the app to find your Fitbit and enter the paring code to re-pair your Fitbit to the app.
- Grant the Fitbit any permissions requested.


Remove your Fitbit from the Fitbit app and add it back
If your Fitbit continues to display the message data not cleared sync & try again and you already tried the Bluetooth tips above, completely removing your Fitbit from the app might do the trick.
- Open the Fitbit app on your paired phone (tablet or computer.)
- Choose the Today tab and tap on your profile icon or picture at the top.
- Select your Fitbit device from your account list.
- Scroll down, tap Remove, then confirm.

- For Android devices, tap the trash can and confirm you want to unpair.

- For Android devices, tap the trash can and confirm you want to unpair.
- Open your Bluetooth settings on your phone. If you see your Fitbit listed, tap it and choose to Forget it.
- If you still connect your Fitbit to multiple devices with the Fitbit app, like a phone and a tablet, repeat steps 1-5 for each additional phone, tablet, or computer.
- Restart your phone.

- Connect your Fitbit to its charger and start charging it.
- Open the Fitbit app again and go to Today > profile picture or icon.
- Tap the option to Set up a Device.

- On the set-up screen, choose your Fitbit model, then tap Set Up.

- Wait for the Fitbit app to find your Fitbit, enter the pairing code from your Fitbit’s screen, and follow the on-screen instruction to complete pairing and setting up features.
- On the set-up screen, choose your Fitbit model, then tap Set Up.
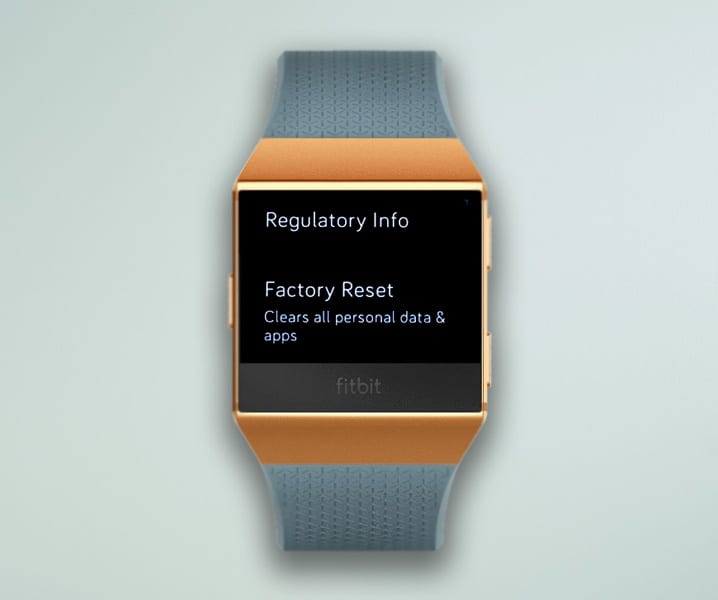
Reset your Fitbit
If your Fitbit is still showing that its data is not cleared, a factory reset is the last step to try.
When you reset your Fitbit back to factory standards, you lose any data, like step count and other activity/health information, that was not previously synced to your Fitbit account.
Additionally, any third-party apps, clock faces, and other customizations are also removed from the Fitbit.
Before you factory reset, remove your Fitbit from the Fitbit app by following the directions above.
If you can navigate (swipe) to a different screen on your Fitbit, use these steps to factory reset your Fitbit.
- Open the Settings app.
- Choose About.
- Tap Factory Reset or Clear User Data.

For the newest Fitbit watches, try this manual reset process only if you cannot access the software method and your Fitbit is still stuck on the red X screen.
- Press and hold the side button until the screen turns off, usually 8-10 seconds.

- As the screen turns off and you feel a short vibration, release the side button and immediately press and hold that button again.
- Wait for the Fitbit logo to appear.

- Once it disappears, immediately release the side button and press and hold it again until you feel another vibration.
- After you feel the vibration, release the button. This second vibration indicates you’ve started the factory reset.
See this article. Need to restart or reset your Fitbit? Learn the steps for detailed step-by-step directions on resetting your Fitbit model.
Contact Fitbit Support 

If, after all these troubleshooting steps, your Fitbit continues to be stuck on that screen or if it routinely pops up, reach out to Fitbit Customer Support for further assistance.
Before contacting Fitbit, ensure you have your serial number, proof of purchase, and check its current warranty status.
Fitbit generally offers a one-year warranty for most of its wearables in the US and two years for Europe. If your Fitbit is under warranty and their support team cannot fix it, they send you a replacement at no charge.
Even if your Fitbit is more than 1 or 2 years old, Fitbit Support usually offers a replacement discount.


Thank you! Deleting it from the app and re-pairing it worked for me.
Fitbit Sense
This worked for me after trying every other “solution” on Fitbit help boards. Tried to reset from the Fitbit about ten times and that didn’t work. Re-downloaded the app on my phone, made it forget the device and then reinstalled and that did work!! Thank you!!
Hi,
After 2 days solid if trying to fix my red X on my Fitbit, your solution worked. I waded through the Fitbit community and nothing worked. I tried the online help but kept getting bumped out whilst following instructions. I thought it was the end of my Fitbit and I would need another. Great, concise, clear instructions. Thank you so very much, very much indeed!
Kind regards,
ClazN