Lost your Fitbit and bought another as a replacement? Decided to replace an old Fitbit and update your Fitbit to the latest model or a Google Pixel Watch?
Received a replacement Fitbit covered under Fitbit’s warranty program? Or did your Fitbit break down, and you purchased a new Fitbit to take its place? All of these are reasons why folks replace their Fitbits.
If you are wondering how to get that new device to work just like the old one, the good news is that it’s relatively easy to replace your Fitbit and retain all your activity data from the old Fitbit!
The most important step is to connect your replacement (or new) Fitbit device to your existing Google account.
It’s actually your Google account that stores your activity data, not the individual device.
Contents
In a hurry? 
If time is short and you don’t need a thorough step-by-step, follow these quick instructions to get your replacement or new Fitbit device up and running!
At this time, you can only switch or add devices to a Google account, so you may need to migrate your Fitbit account to a Google account first.
- For a new or replacement Fitbit branded device, open the Fitbit app and tap the Devices icon at the top left. Choose Add more devices. Select your replacement Fitbit model and follow the on-screen instructions.
- For a new Pixel Watch, install and open the Google Pixel Watch app (Android only) and follow the on-screen instructions to connect your watch to your Google Account. After setting up the watch, open the Fitbit app, tap Add more devices and add the Pixel Watch.
Unfortunately, you cannot set up more than one Fitbit device to your account if the devices supports the Fitbit Gallery (Pixel Watch, Charge series, Fitbit Inspire series, Fitbit Luxe, Fitbit Sense series, or Fitbit Versa series.)
Related reading
- Find your Fitbit’s serial number
- Check your weekly report using the Fitbit app
- How do I get my Fitbit repaired or replaced under warranty?
- Contact Fitbit customer support about problems and warranty info
- Need to restart or reset your Fitbit device? Learn the steps
As an Amazon Associate, we earn from qualifying purchases using links in this post.
Why replace a Fitbit device and not just add another Fitbit (or Pixel Watch) to my account? 
If your new Fitbit is a warranty replacement for a troublesome or broken device or you’re replacing a lost device with the same model, you should do a one-to-one replacement.
However, if you upgraded or changed your Fitbit device model, you might consider simply adding that new device to your list of account devices.
Having more than one device gives you some flexibility, especially if you want to use a different model for varying activities–like one worn for the office and a different model used for swimming or at the gym.
Connecting more than one Fitbit to your account aggregates and syncs the data across devices. So your Fitbit dashboard shows you the sum of all your data!
Sadly, it’s just not that easy to have multiple Fitbits on your account anymore.
Connect any replacement to the same Fitbit account
If you replace your existing Fitbit, make sure you connect it to your current Google account–do not create a new account.
Also, you cannot add a new or replacement device to a Fitbit account–you must migrate your account to Google first. 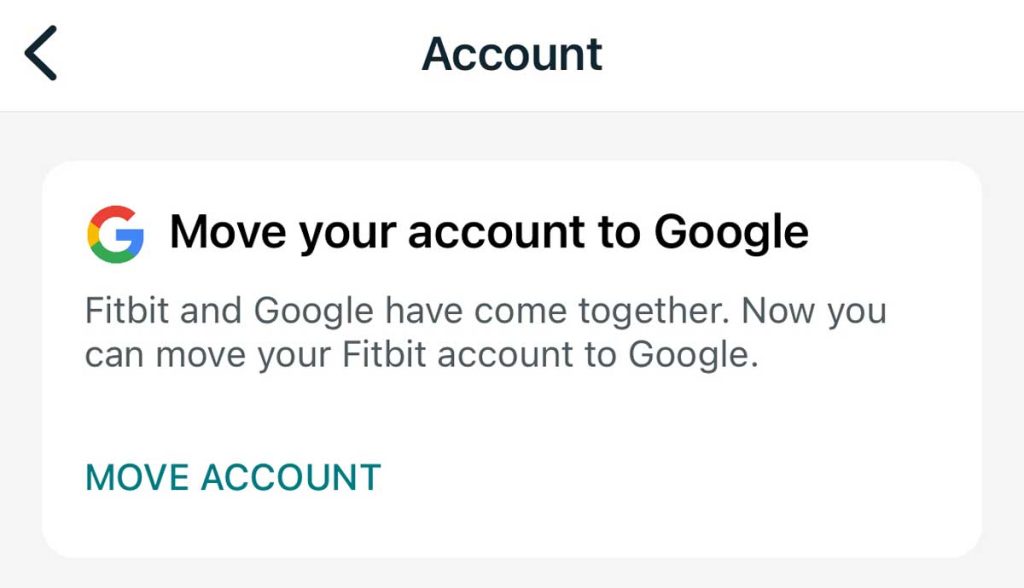
That means logging in as an Existing User with the same Google account credentials (or migrated Fitbit to Google account) you used on that older Fitbit.
Having multiple Fitbits connected to your account sounds like a good idea. Sadly, it’s often not possible.
Unfortunately, while Fitbit supports multi-trackers on a single account, it does not offer this feature for all of its devices.
In particular, most of the newest models (like the Sense, Versa, Charge, Luxe, Pixel, or Inspire models, and also the Google Pixel Watch) do not allow for multiple device support.
These listed devices allow you to connect only one of these devices at a time to your account: The Fitbit Charge 3 and above, Fitbit Luxe, Fitbit Inspire series, Fitbit Sense series, Fitbit Versa series, and Google Pixel Watch.
So if you’re replacing or upgrading from one of those listed devices, you cannot keep your old device on your account!
Steps to set up your replacement Fitbit
Most people do not want to create a new account when they replace a device. Instead, you want your new Fitbit or Pixel Watch to integrate with your Google Fitbit account and its history seamlessly.
So when you set up your replacement Fitbit or Google Pixel Watch, make sure you select that you are an existing user and log in with your current Google account credentials.
Step 1: Sync the old Fitbit to your Fitbit account, if you can
First, if you still have your old Fitbit and it works, make sure you sync it to your Fitbit account using the Fitbit app for Apple and Android.
Once you complete the sync, do not remove the old Fitbit from your account until you set up the new Fitbit!
How to sync using the Fitbit app
Each time you open the Fitbit app or Fitbit Connect, your device syncs automatically if it’s nearby.
- Charge your Fitbit (ideally to 100%) before you start.
- Ensure your paired phone, tablet, or computer are within a few feet of your Fitbit.
- To sync your Fitbit, open the Fitbit app.
- Tap the Today tab and swipe down to manually force a sync. Wait for the sync to finish.

- Once the sync completes, tap the Devices icon in the top left corner.
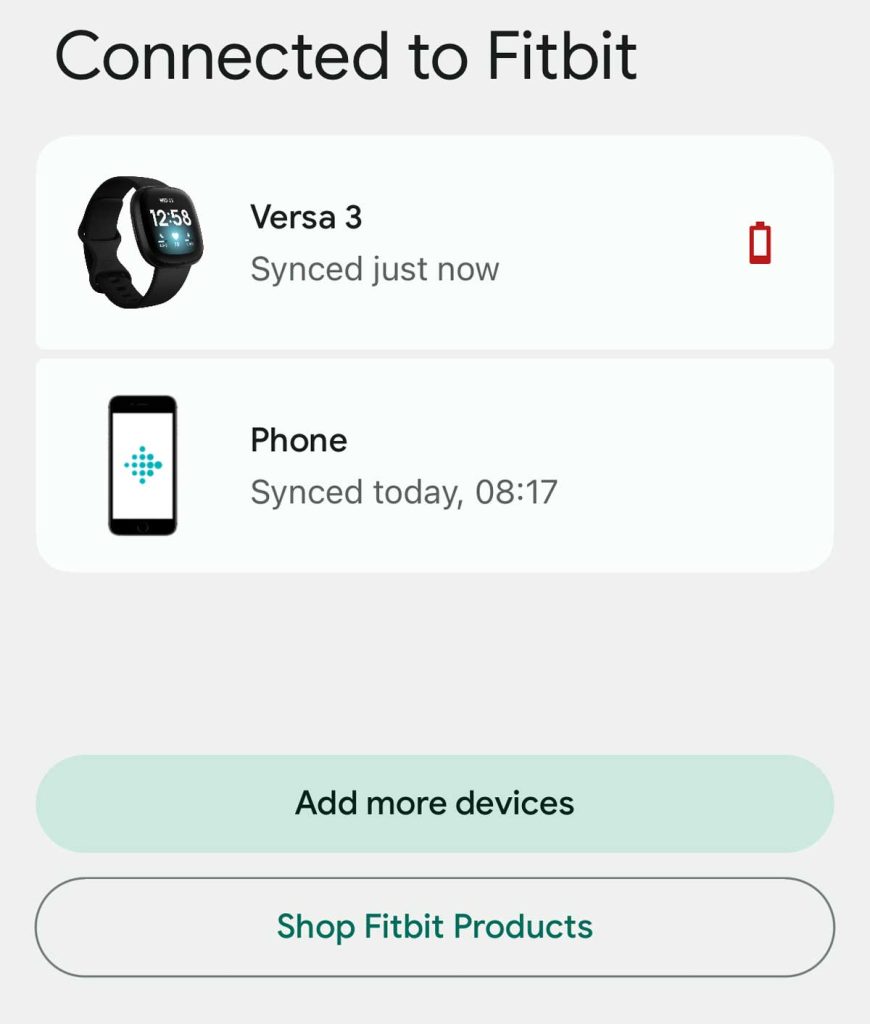
- Make sure that your current Fitbit shows that it’s synced just now. Go further down and choose Add more devices.

Step 2: Setup your new or replacement Fitbit to your account
When you connect your new Fitbit to your existing account, you usually need to set it up as a replacement for the old Fitbit.
You do not lose your data and history when replacing or switching your Fitbit device model as long as you connect both devices to the same account.
Fitbit stores your account’s data and history (including all connected Fitbit devices) on its servers linked to your Google account’s email address. So your data persists, even if your device does not!
Remember to sync your old Fitbit before setting up the new Fitbit, even when replacing the old device with the same model (i.e., Fitbit warranty replacement.)
Replace your device using the Fitbit App
- Open the Fitbit app on your phone, tablet, or computer.
- Choose the Devices icon at the top left.

- Scroll past the section Connected to Fitbit and tap Add more devices.

- Choose your new Fitbit or Pixel Watch model.
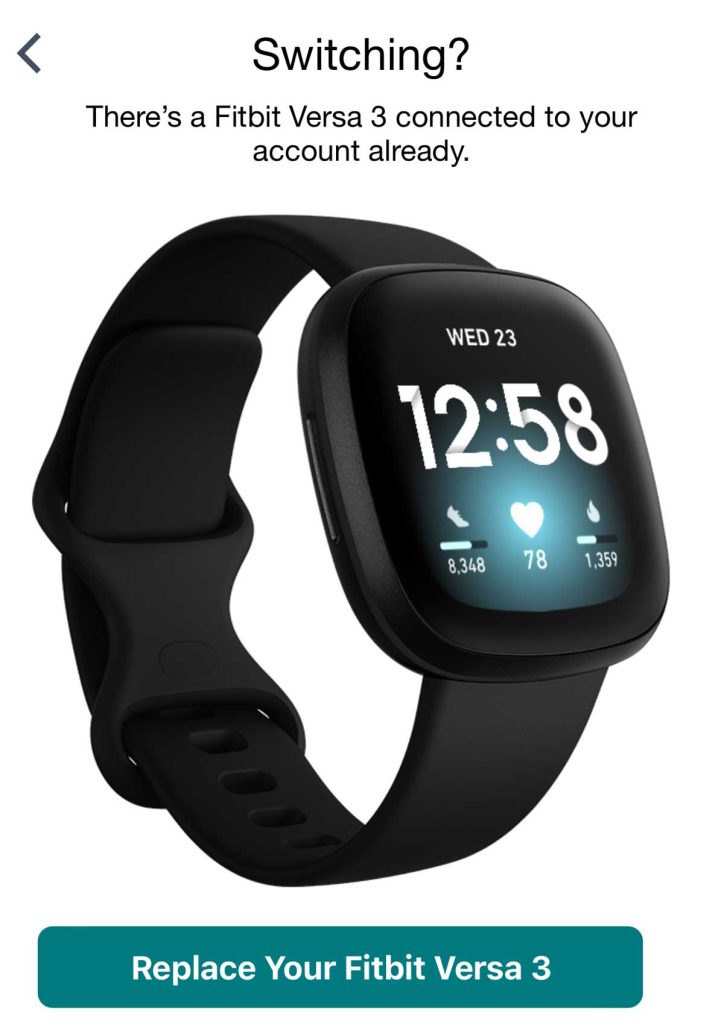
- If you replace your old Fitbit with a new one of the same model (like a warranty replacement), the set-up process asks you to confirm that you are replacing the older Fitbit. Tap the Replace Your Fitbit button.

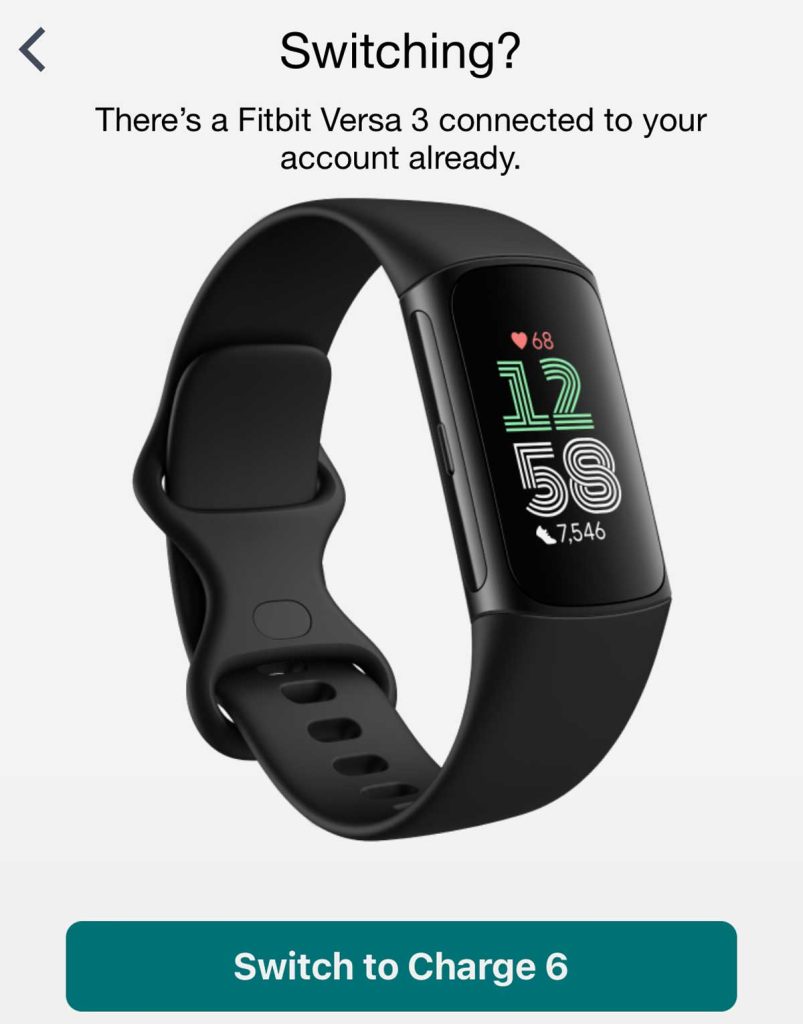
- If you replace your old Fitbit with a different model, the set-up process asks if you want to switch to the new model. Tap the Switch to button.

- If you replace your old Fitbit with a new one of the same model (like a warranty replacement), the set-up process asks you to confirm that you are replacing the older Fitbit. Tap the Replace Your Fitbit button.
- Follow the on-screen instructions to complete your set-up.
How to remove your old Fitbit device from your account
Once you confirm your replacement and the Fitbit device works as expected, you may need or want to delete the old Fitbit from your account.
When you remove your old Fitbit, any data you didn’t previously sync is deleted from your account. So, if you forgot or neglected to sync your old Fitbit, now is the time to do it and save that data!
First, remove and erase all the Fitbit device’s data 
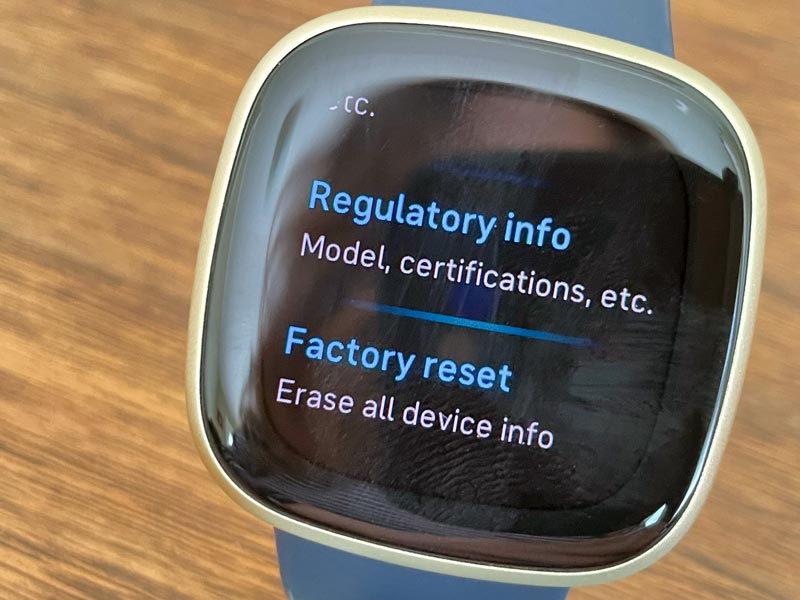
- For Sense, Versa Series, Luxe, or Charge 3+, open the Settings app > About or Device Info > Factory Reset or Clear User Data.
- For Inspire, Luxe, and Ace 2/3, open the Settings app > Clear User Data.
- For the Pixel Watch, use the Google Pixel Watch app (System > Reset and unpair watch) or the Settings app on the watch > System > Disconnect and reset.
Erasing your Fitbit or Pixel Watch removes apps, stored data, personal information, credit and debit cards, and all other saved settings. It’s like returning it to its factory defaults.
Use the Fitbit app to remove a Fitbit device from your account.
- Open the Fitbit app on your paired Apple or Android device.
- Tap the Devices icon.

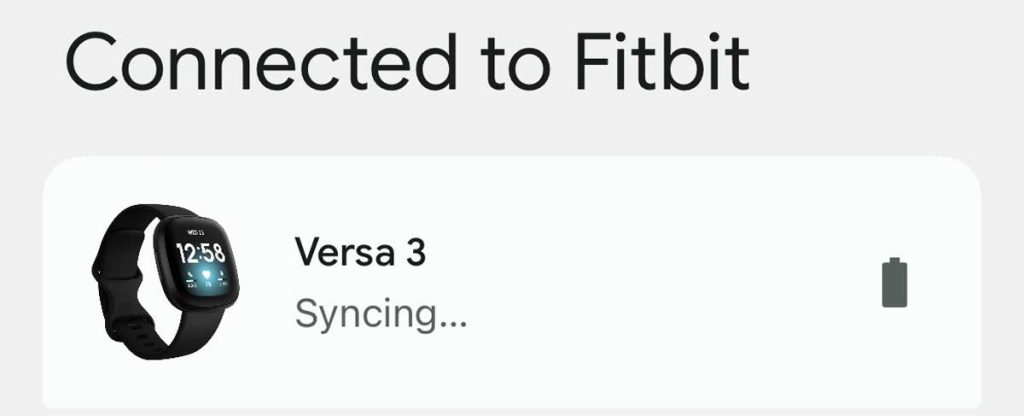
- Under Connected to Fitbit, tap the name of the device you want to remove. You can only removed Fitbit models this way. For Pixel Watch, open the Watch app.

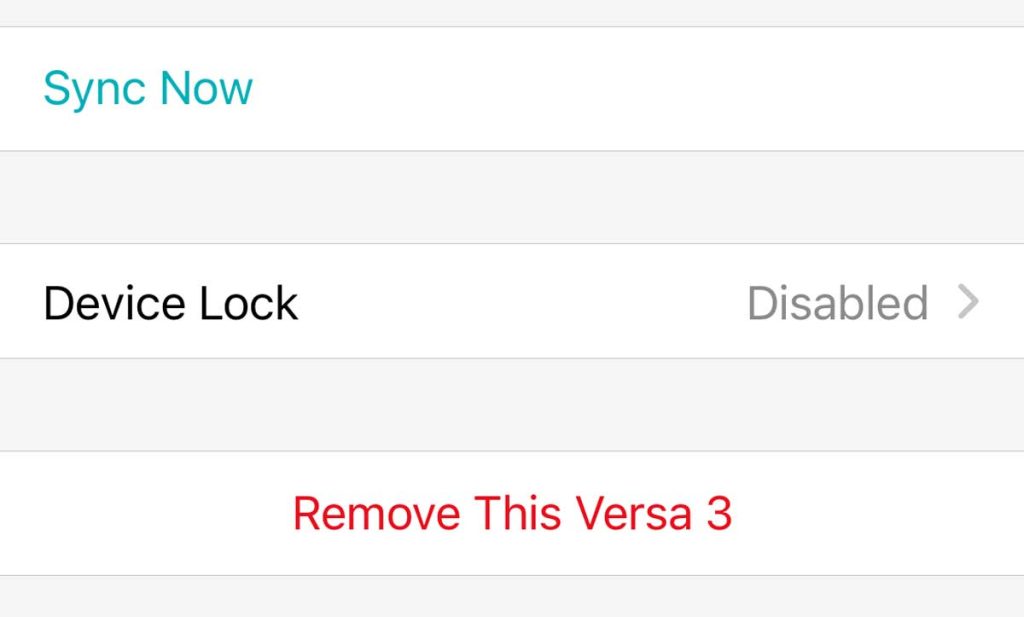
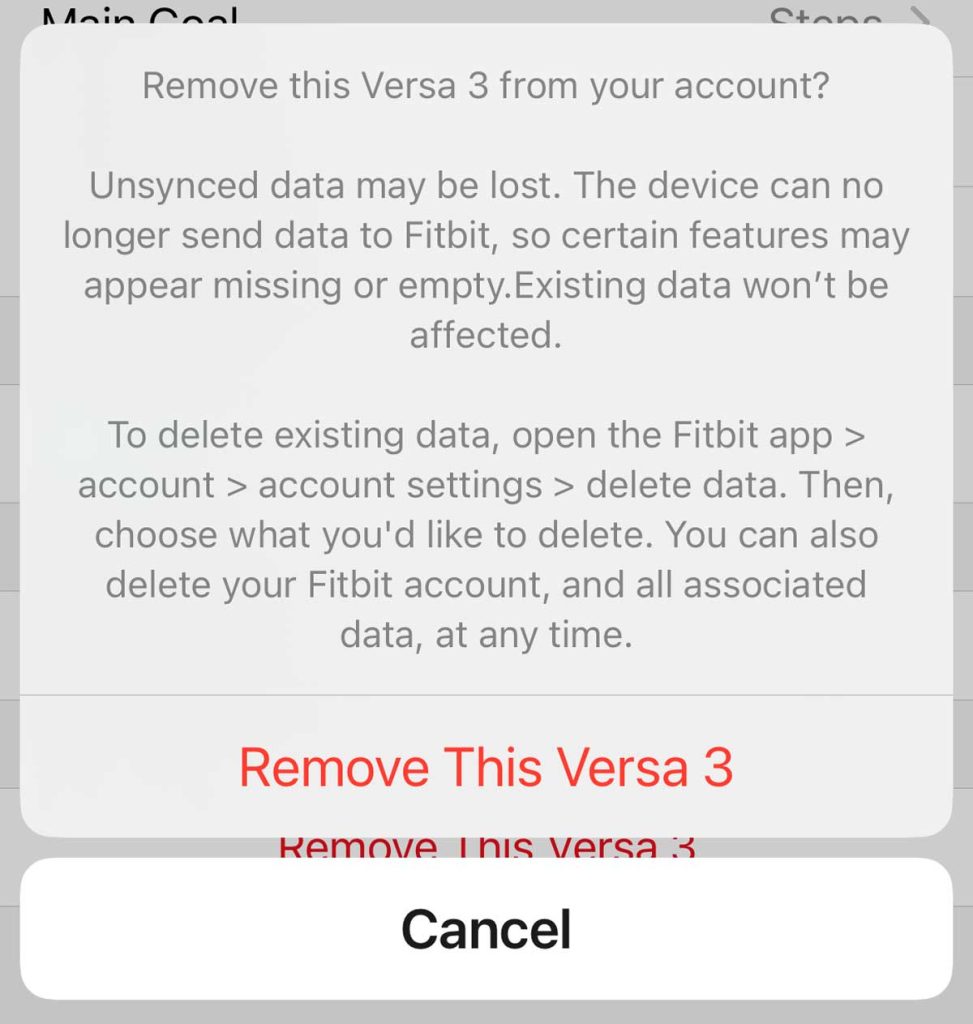
- For Apple devices, scroll to the bottom and tap the option to Remove this device.

- For Android devices, tap the trash icon.
- Confirm you want to remove that Fitbit from your account.

Use the Fitbit website to remove a Fitbit device from your account.
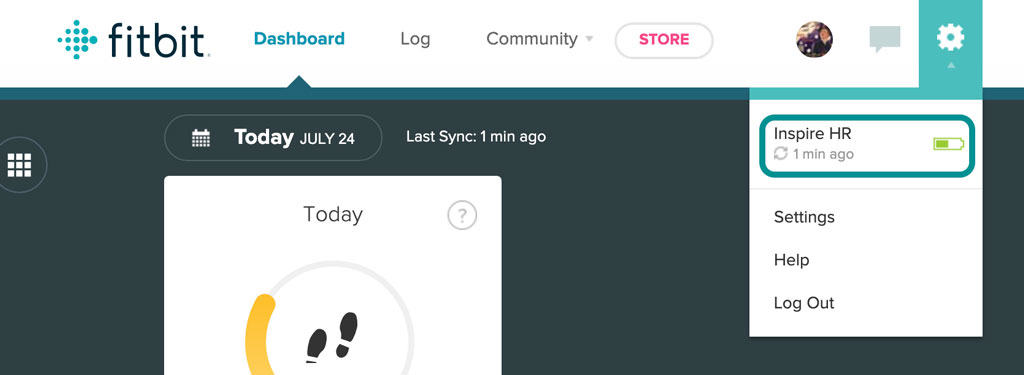
- Go to your Fitbit account’s dashboard using a favorite internet browser.
- Access your account.
- Tap the Settings icon (it looks like a gear.)
- Select the device you want to remove.

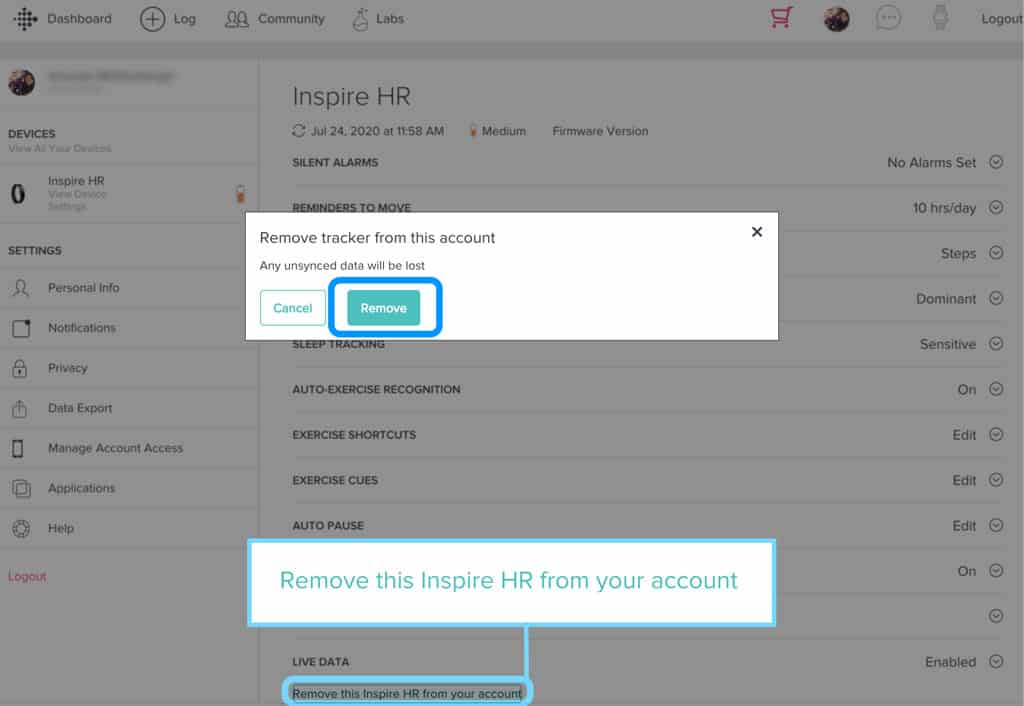
- At the bottom of your device’s information page, choose the option to disconnect or remove this device from your account.

- Confirm you want to remove that Fitbit.
- Follow the on-screen instructions to remove the device from your account.







I wanted to add a charge 5. I had a charge 2 and a charge 4. I deleted the charge 2. When I went to add the charge 5, the only option I was given was “replace charge 4.” What jerks! … and I can’t believe that at the end of the process, they wanted me to sign up for a premium version of their jerkwater app. Geez.
I stopped my premium on my old Aspire some time ago. I just got a Charge 5 and would like to try it again. Can I get the free trial of Premium that comes with a new Charge?
Hi LuAnn,
Technically the free trial is only for new customers who haven’t opted for Fitbit Premium before. However, since it’s been a while, you might qualify. We suggest you reach out to Fitbit support chat and they should be able to look up your account.
My flex will charge but when I take it off the charge it doesn’t wk no lights. Is there something I can do
Hi Ronna,
We’re sorry to hear that your Fitbit Flex is having problems with holding a charge. Have you tried restarting it?
Remove the Flex from its band.
Plug your charging cable into the USB port and insert your Flex in.
Take a paperclip or a SIM card tool and insert it into the small pinhole on the back of the charger.
Press on that pinhole for 3-4 seconds until your Flex restarts, then remove the object from the pinholes.
After it restarts, remove it from the charger and put it back in the band and open the Fitbit app and see if it works.
Why can’t I mirror one Sense Fitbit with my new one. My old Sense has a cracked screen, but still works fine. I wanted to use it for work outs and the new pretty one for going out. HELP ME
Hi Maureen,
Unfortunately, Fitbit only allows you to pair one Fitbit Sense with the Fitbit app and your Fitbit account. You can pair a Fitbit Sense and some of the older Fitbit models to your account and the app–but not any of the newer models.
At this time, if your Fitbit supports the Fitbit Gallery (find this in your device settings in the app), you can’t connect multiple devices to your account. This includes these models: Charge 3+,, Fitbit Ionic, Fitbit Inspire series, Fitbit Luxe, Fitbit Sense, and Fitbit Versa series. All of these models limit you to connect one of these devices to your account at a time.
What you can do is have multiple Fitbit accounts, with different IDs–however, that means your data from each device won’t be combined and remains separate.
There is a feature request discussion for adding multiple devices to a single account–consider adding your voice to the request.
I accidentally deleted my first Fitbit app and I’ve bought a new Inspire 2, it won’t let me sync it to my iPhone or start registering steps or show time etc, saying I already have an account so won’t let me start a new one
Can you help?
Hi Sue,
You can actually use the same Fitbit account, the one you previously used. Fitbit only allows one account per email address, so it’s easier to use that old one. Plus, you’ll also get all your old device’s history so you can compare your Inspire 2 performance with that older one.
If you forgot its password, you can reset that.
Open the Fitbit app and then choose Log In > Forgot your password?
Enter your email address and tap Send Reset Email.
Open your email account and open that password reset email, then choose a new password for your account.
After resetting the password, open the Fitbit app and type in your email and new password. Then, tap the Today tab and choose your account picture or icon at the top.
If you see your old Fitbit in the list, tap it and scroll all the way down and choose Remove.
Then go back to that account list and choose Set Up a Device, then follow the steps on-screen.
Alternatively, you can also use another email address and set-up a new Fitbit account with that email. Just remember that you’ll then have two different Fitbit accounts, which cannot be merged.
I hope this helps!
Cheers,
Amanda